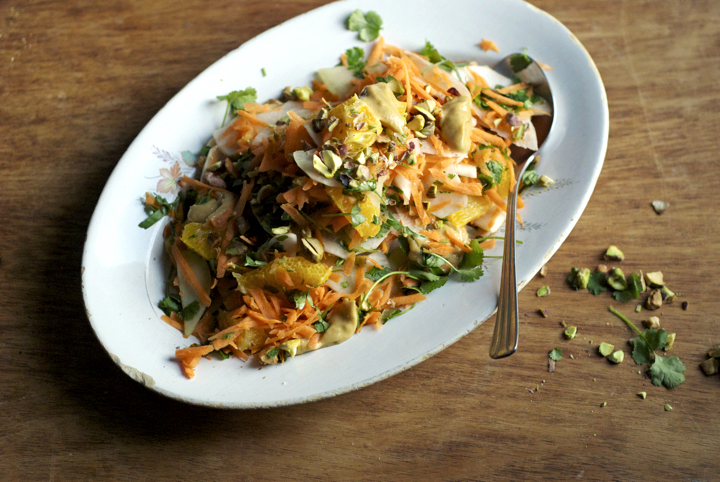
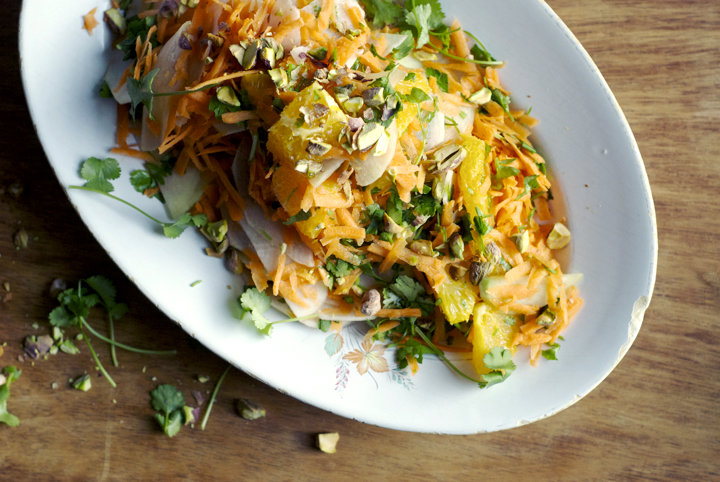
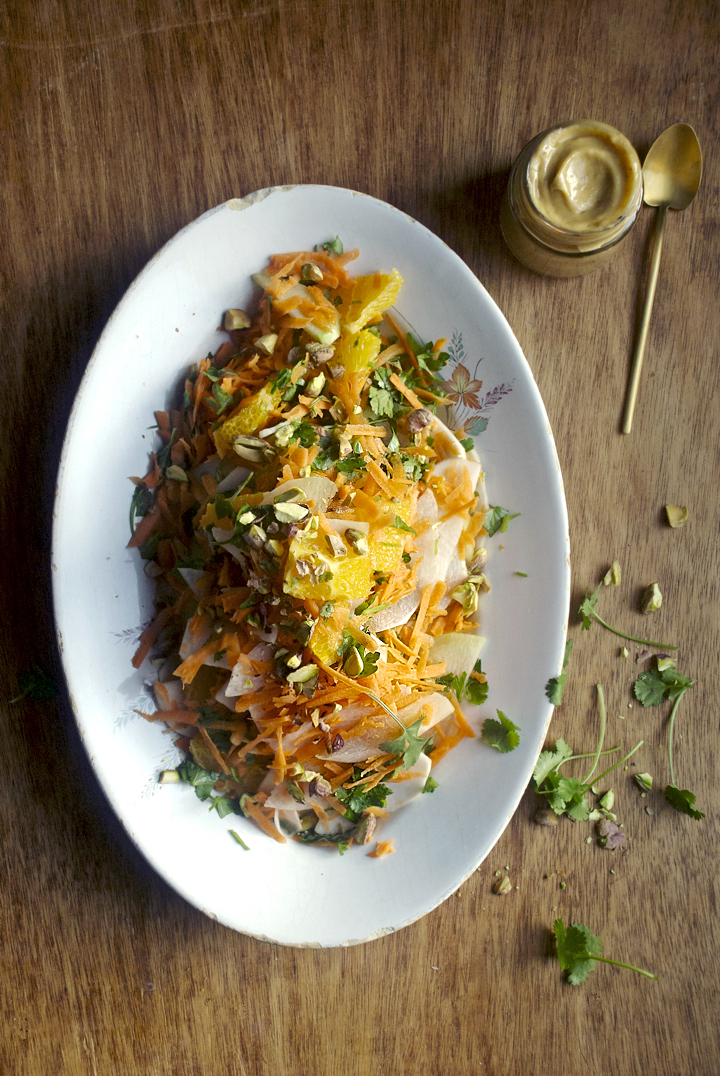
Farmers’ Market Salad with Apricot-Cumin Dressing
It’s that time of the year when the weather is getting warmer and I start craving raw and cold salads again. This week, at the farmers’ market, I brought home lots of kohlrabi and turnips with the main intention to eat them raw (which is how I like them better anyway).
I know that a lot of people aren’t particularly excited about turnips, and even though I used to share the same opinion, I’ve been rediscovering this vegetable and absolutely loving its versatility. I’ve been enjoying thinly sliced turnips with just a dash of salt and black pepper as a light snack these days – there’s something about its light and yet slightly bitter flavour that I really love.
Anyway, this salad is pretty much like a coleslaw, with lots of crispiness and different textures. I felt I needed to balance that with a smooth dressing, and that’s how I ended up making an apricot-based one. I was really pleased with how it turned out – it’s sweet and tangy at the same time, with just a hint of cumin to make it more complex and intense.
Farmers’ Market Salad with Apricot-Cumin Dressing
Serves 4
For the salad:
220 g /5 medium sized carrots, grated
140 g /1 large kohlrabi, thinly sliced
120 g /1 large turnip, thinly sliced
200 g /1 large orange, sliced into half-moons
15 g / half a bunch of parsley, finely chopped
15 g / half a bunch of coriander, finely chopped
60 g /1/2 cup pistachios, coarsely chopped, toasted and lightly salted
For the apricot-cumin dressing:
65 g /6 dried unsulphured apricots, roughly chopped
6 Tablespoons olive oil
6 Tablespoons lemon juice
3 Tablespoons water
1 ¼ teaspoons cumin seeds, toasted and ground in a mortar and pestle
¼ teaspoon sea salt
black pepper to taste
Combine all the ingredients for the salad in a large bowl.
Put the apricots in a small bowl. Pour 1 cup of boiling water over them, cover the bowl, and let stand for at least 10 minutes, or until the apricots are very soft.
In a blender, combine the drained apricots with all the other ingredients for the dressing. Blend until you get a very smooth mixture.
Pour the dressing over the salad (you might not need all of it, use just enough to coat the vegetables), mix with a wooden spoon or with your hands and serve immediately.
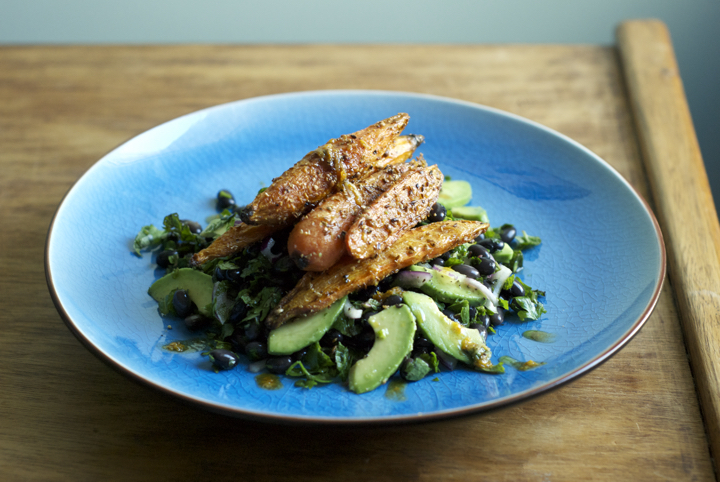
Roasted Carrot & Black Bean Salad with Orange Cinnamon Dressing
I don’t share the enthusiasm most people have for Christmas. My close family is very small and I’m with them all year around, so gathering for an occasion I personally couldn’t care less about (I respect all religions, but I’m not a religious person) just seems a bit pointless. Having said this, it doesn’t come as a surprise that I don’t bother cooking a big, impressive meal for Christmas Eve. In fact, I cook the same kind of food I do everyday, like this little carrot and black bean salad.
This dish is easy to pull off and it’s packed full of good things for you. It’s also perfect for this time of the year when, after the carb and sugar filled holidays, people seek to lighten up their eating. You can also adapt the ingredients, like substituting the black beans for chickpeas or even the carrots for sweet potatoes. The dressing is very fragrant and gives an exotic edge to the salad too. After cooking my way through Plenty More these last couple of weeks, I borrowed some ideas from Ottolenghi, and one of those is adding spices to salad dressings, like cinnamon and/or fennel seeds.
I wish you guys a wonderful new year, and I’ll come back by the end of the week with one of my favourite soup recipes –keeping the mood light and clean. ;)
Roasted Carrot & Black Bean Salad with Orange Cinnamon Dressing
serves 2
For the salad:
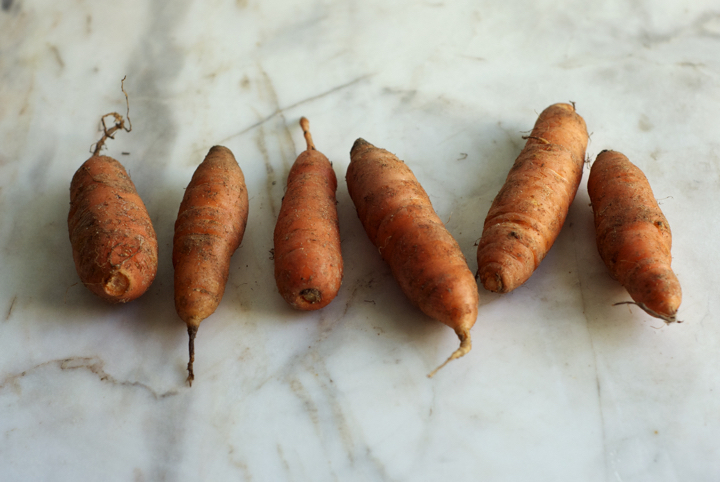
645 g / 10 medium sized carrots, peeled and left whole
1 teaspoon cumin seeds, crushed
1 ½ teaspoon coriander seeds, crushed
1 tablespoon olive oil
270 g / 1 ½ cups cooked black beans (canned is fine)
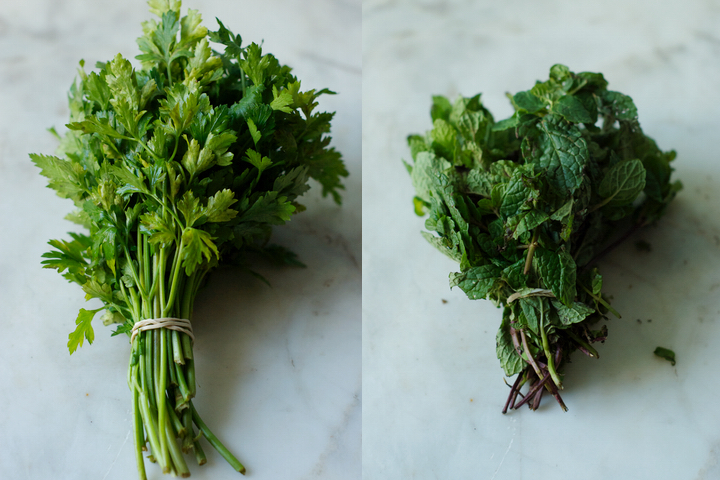
20 grams chopped parsley
20 grams chopped mint
20 grams chopped coriander
30 grams / ½ small red onion, finely diced
1 medium avocado, thinly sliced
salt and pepper to taste
For the orange cinnamon dressing:
zest of one large orange
3 tablespoons olive oil
2 tablespoons lemon juice
1 small garlic clove, minced
¼ teaspoon cinnamon
salt and pepper to taste
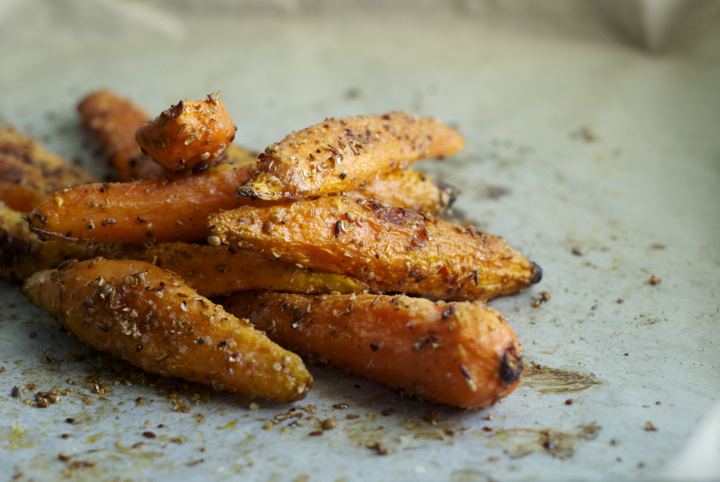
Preheat the oven to 180º. Line a baking tray with non-stick baking paper. Combine the carrots with 1 tablespoon of olive oil and the cumin and coriander seeds. Add a generous pinch of salt and pepper, toss, and roast in the oven for 45 minutes or until the carrots have cooked through and are lightly brown.
Mix the remaining ingredients for the salad in a large bowl, and add the carrots on top. Combine the ingredients for the dressing and drizzle over the salad. Serve immediately.
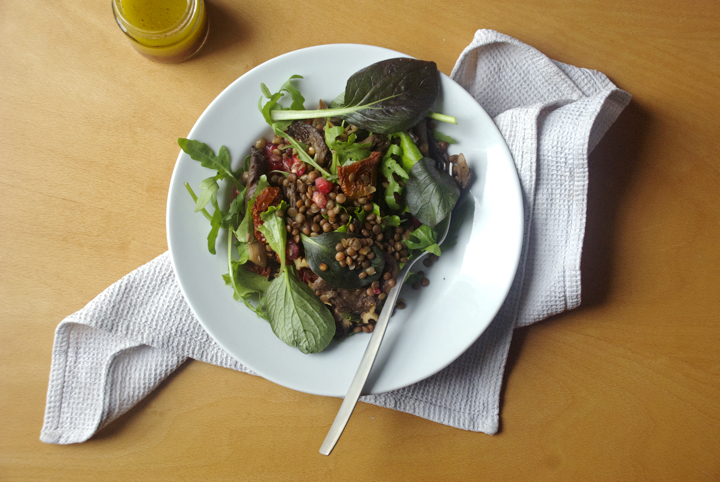
Lentil and Mushroom Salad with Sumac Lemon Dressing
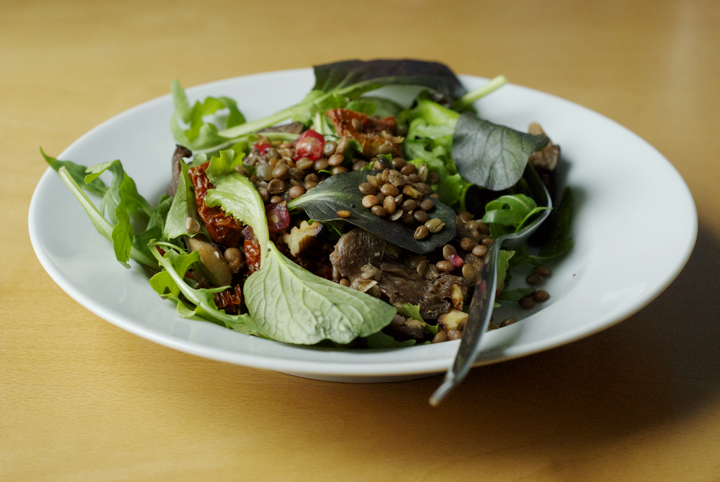 When the weather starts getting colder, I eat soups and stews for the most part of my meals. However though, salads are still welcomed, as long as they’re heartier and incorporate some cooked elements.This salad makes for a perfect, quick lunch anytime of the week. I’ve made it countless times and sometimes substitute the lentils for whole grains such as barley and bulgur and it tastes delicious as well.
One thing you should pay attention to when making this dish is not to overcook the lentils. There’s nothing worse than mushy, soft lentils. To avoid this, cook them for no longer than 15 minutes and they’ll be perfect. As far as the dressing goes, sumac is it’s key component, so please don’t skimp on that. I’ve first found out about sumac one or two years ago when I decided to make my own za’atar. It’s a hard to find and reasonably pricy spice here in Portugal (although some speciality stores sell it these days), but you don’t need to use much to feel its tangy and lemon-y flavour. I hope you enjoy the salad and the start of the new season! Have a good weekend :)
Lentil and Mushroom Salad with Sumac Lemon Dressing
(serves 4, as a starter)
105 g / ½ cup brown lentils, washed, drained and picked through
1 Tbs. olive oil
2 medium garlic cloves, crushed
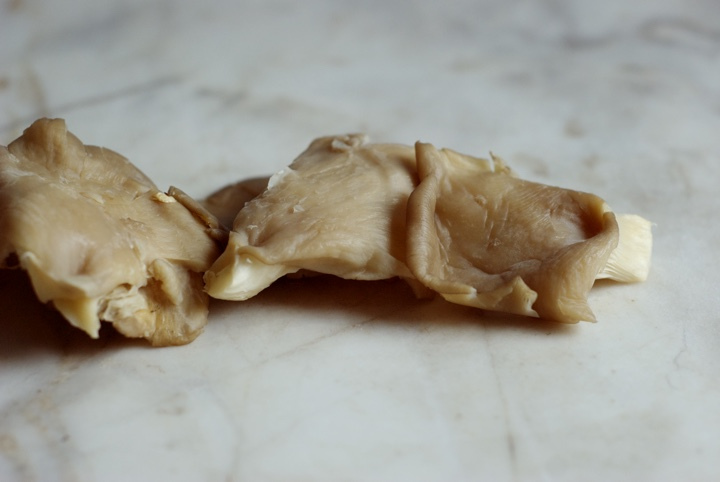
300 g pleurothus mushrooms
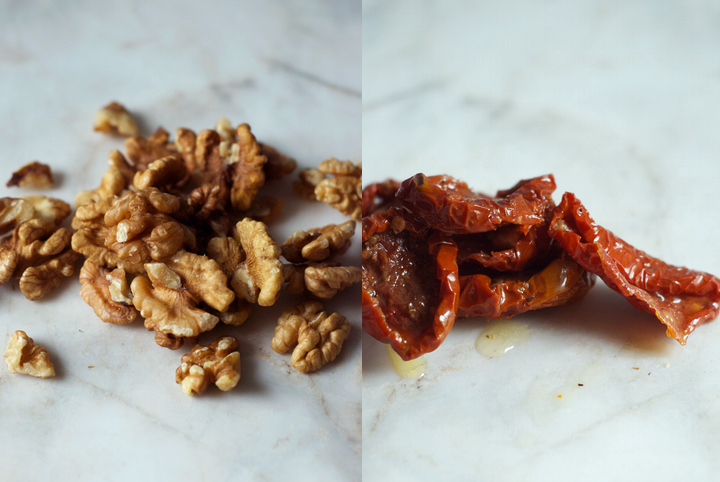
50 g / 8 halves oil packed sundried tomatoes, roughly chopped
50 gr walnuts, toasted and roughly chopped
2 big handfuls / 40 g salad leaves such as rocket, baby spinach, etc.
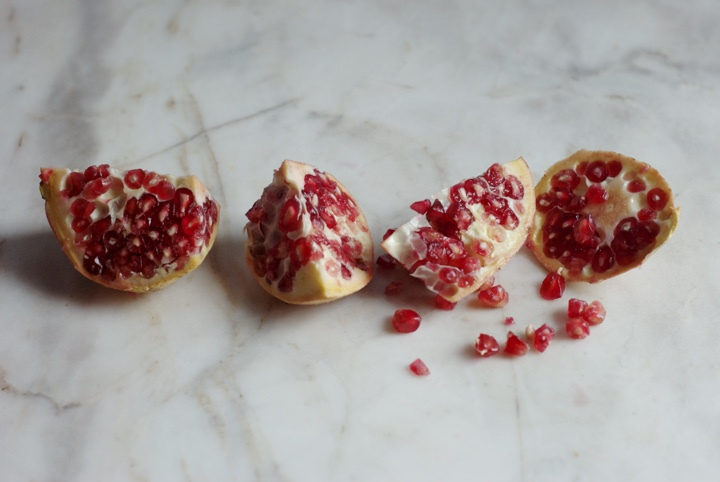
105 g/ ½ cup (packed) pomegranate seeds
for the sumac lemon dressing:
1 ½ tsp. sumac
3 Tbs. lemon juice
60 ml / ¼ cup olive oil
1 small garlic clove, minced
salt and pepper to taste
In a small pan over medium-high heat, add the lentils and 2 cups of water. Bring to a boil and, once boiling, reduce the heat to low-medium and cook for 14-16 minutes or until tender but still al dente. Add ½ teaspoon of salt to the lentils, stir everything, and drain. Add the lentils to a large bowl and reserve.
Heat a large skillet over medium-high heat and add 1 tablespoon of oil. Once the oil is hot, but not smoking, add the mushrooms and garlic cloves and cook for 5-8 minutes or until golden brown. Add a pinch of salt and pepper as soon as they’re cooked, remove the garlic, and add them to the bowl with the lentils.
Add the sundried tomatoes, walnuts, salad leaves and pomegranate seeds to the bowl with the lentils and mushrooms and toss everything together gently.
For the dressing, mix all the ingredients in a small glass jar. Cover the jar with the lid and agitate vigorously until everything’s combined. Pour the dressing over the salad (not all of it – 3 to 4 tablespoons should be enough) and serve immediately.
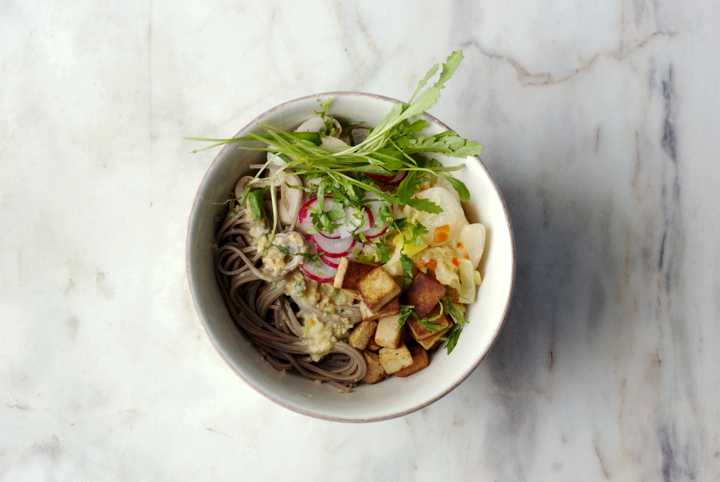
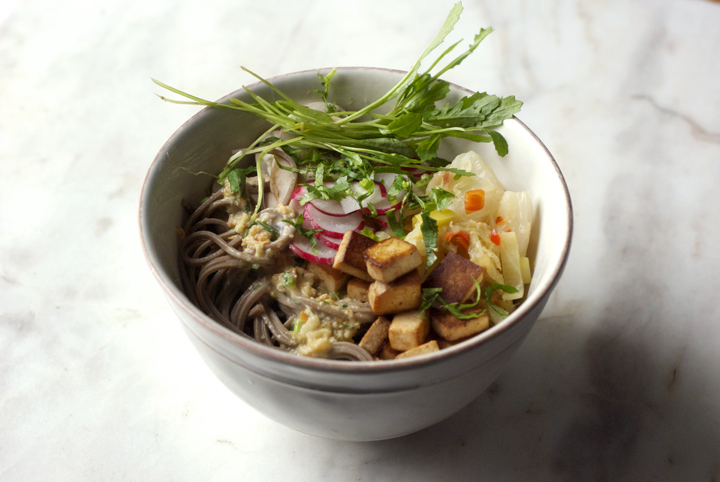
Soba Noodle Bowl with Kimchi and Satay Sauce
One quality I highly admire in people is their ability and willingness to try new or “different-than-usual” foods. While some people sometimes seem to be afraid of new tasting experiences (I know quite a few), others dig into new dishes without blinking an eye and just for the sake of curiosity.
I guess Luís fits into the latter category. The other day I was all excited with my first attempt at making kimchi and, to my surprise, he seemed to like it. He compared it to wasabi, which at first might sound odd, but thinking of it I realized those two foods share the same kind of fresh and invigorating spiciness.
Even though the instructions for this recipe (particularly the kimchi) seem to be long, this is a dish that is really easy to put together. The peanut satay calls for ingredients you probably have in the fridge already, and you can use tahini or almonds in the place of the peanuts if you feel like it. As far the as vegetables go, use what you have on hand, really: spring onions, raw turnips’ or carrots’ batons and assorted greens can definitely replace the ones I call for in here.
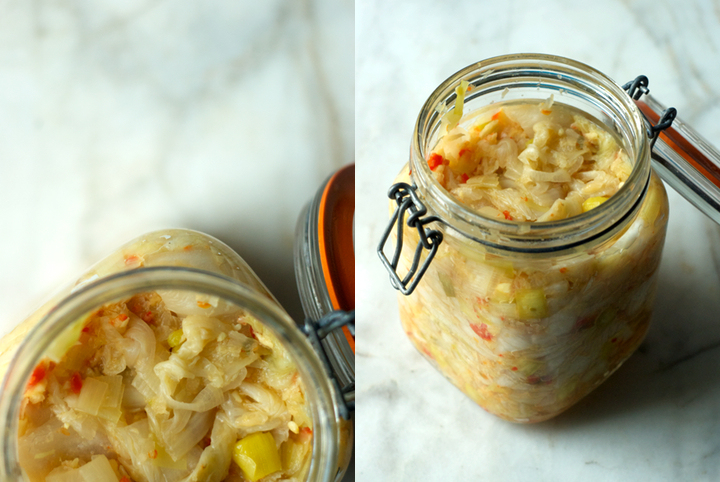
Now, onto the kimchi: I highly encourage you to make your own kimchi and start digging into the fermentation topic a bit – this is a wonderfully written book on that, by the way –, as it’s fascinating how the action of time imparts such a peculiar tangy sourness to vegetables. You might get addicted along the way and, if you’re like me, start fermenting everything in sight. At this moment, I have a jar filled with (almost soured) beets and another one with cabbage, which will soon turn into (hopefully) delicious sauerkraut.
Soba Noodle Bowl with Kimchi and Satay Sauce
(serves 2-3, as a main)
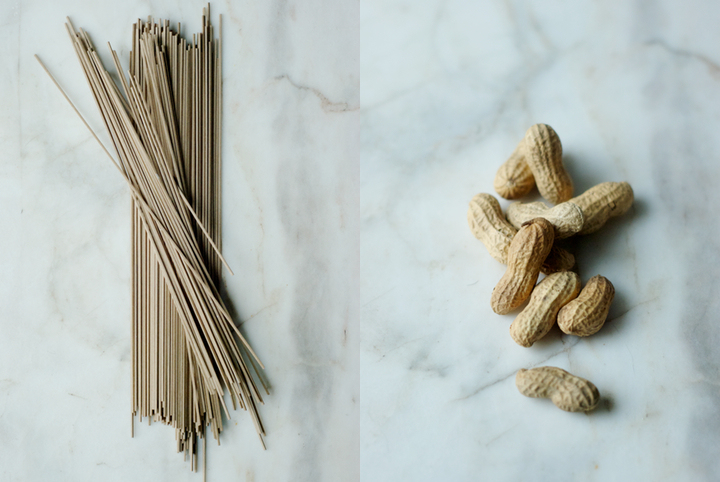
160 gr soba noodles
6 to 8 radishes, thinly sliced
3-4 button mushrooms, thinly sliced
200g pan fried tofu, cubed
plenty of green leaves (I used baby rocket)
1-2 tablespoons fresh coriander, finely chopped
kimchi (recipe follows – as much or less as you want)
for the satay sauce
60 gr / 1/3 cup unsalted peanuts
80 ml / 1/3 cup plus 2 tablespoons coconut milk
juice of one medium-large lemon
¼ teaspoon salt
¼ teaspoon red chili flakes
1 teaspoon soy sauce
15 gr fresh ginger, finely grated
1 small coriander bunch / about 12 gr finely chopped
for the kimchi
1 kg / one very large chinese or napa cabbage, coarsely chopped
6 large garlic cloves
3-4 tablespoons fresh ginger, finely grated
3 red chilis, finely chopped
1 large leek, finely sliced
8 cups water
8 tablespoons sea salt
To make the satay sauce: in a pan over low-medium heat, toast the peanuts until they’re golden brown (3-4 minutes). In a mortar and pestle, mash the peanuts and the salt together. I like my satay fairly chunky, so I don’t mash the peanuts until they come to a paste – I leave some of them broken down for a bit of texture.
Transfer the peanut and salt mixture to a bowl. Add all the remaining ingredients and whisk everything together until you get a creamy sauce. Have a taste and adjust the seasoning, adding more salt if needed be.
In the meantime, bring a large pan with plenty of salted water to a boil. Once boiling, add the noodles and cook them for 6-7 minutes. Drain and set aside.
To make the kimchi: In a large non-reactive bowl, mix the water and the salt. Whisk for a minute or two or until the salt is dissolved. Add the cabbage to the bowl and make sure it’s covered by the salted water (brine). Let it sit in the fridge overnight.
The next day, drain the cabbage and reserve some of the brine (1 or 2 cups should be enough). If it’s too salty, wash the cabbage under cold water, rinse and drain again. If it’s not, simply drain it.
Mash the garlic cloves, ginger and chilli into a mortar and pestle. Rub this paste into the cabbage. Add the chopped leek to the mixture and pack everything together into a clean 1 liter jar. With your clean fingers, press the cabbage down into the jar so that it releases some of the brine. Make sure the cabbage is submerged in the brine (it should be 1 cm above the cabbage). If it’s not, add back some of the brine you previously reserved. Cover the kimchi with another jar, slightly smaller than the one you’re using, filled with water or beans to press the cabbage down. Check your kimchi every day and, with your clean fingers, press it down a little bit each time, always making sure it’s covered by the brine. After a week or so, it’s ready to be eaten and you can store it in the fridge, where it will continue to ferment but at a much slower pace.
To assemble: add to each bowl a fairly good amount of soba noodles, and top them with plenty of sauce (1-2 tablespoons per person or as much as you want). Add the raw vegetables (radishes, mushrooms and greens), the pan fried tofu and, finally, the kimchi (I add about 2 tablespoons per bowl).
The Kimchi recipe is lightly adapted from the book “Wild Fermentation” (2003), by Sandor Ellix Katz
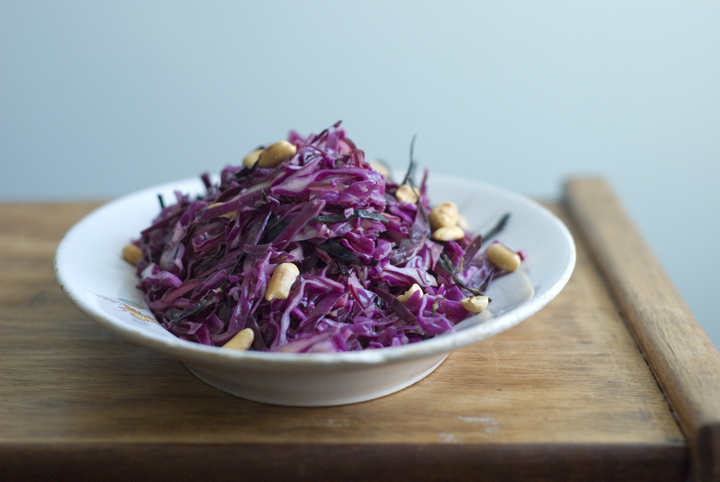
A Purple Salad
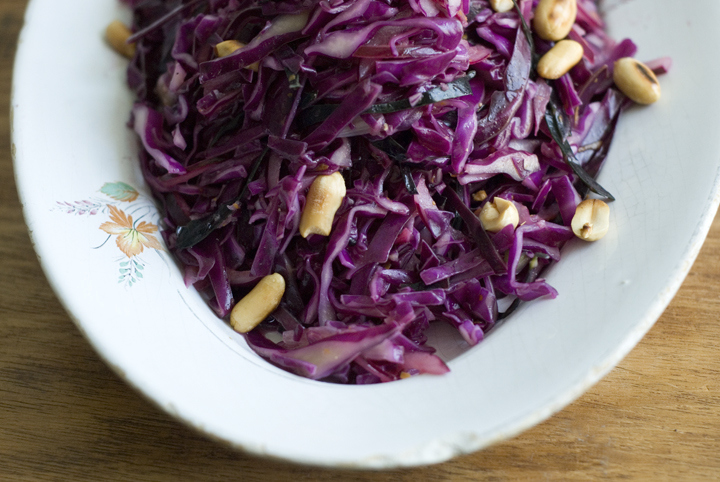
My friend Ana‘s favourite colour is purple. The other day I was driving back home from her place and stopped at this little grocery store. I was into buying some vegetables for lunch and, subconsciously thinking about the conversation we had about colour that day, I decided to bring home, amongst other things, a purple cabbage. Purple cabbage isn’t the kind of vegetable I eat much. I love cabbage and cook it often but, for some reason, I’ve never cared much for the purple variety. However, after making this salad I guess that is about to change. The cabbage is “cooked” in a garlicky and vinegar-y dressing and the toasted nuts add a nice contrast thanks to their depth and earthiness. I didn’t add any fresh herbs to the whole thing because I didn’t have any at hand, but you can definitely finish it off with some finely chopped parsley or coriander. When it comes to salads, I usually think “The simpler, the better”. Work with a few ingredients, cut them appropriately, make a slighty more acidic/vinegary dressing and you’re good to go. And in case you want to know, I’ve already decided what my next “purple experiment” will be: sauerkraut.
A Purple Salad
(serves 4)
½ medium sized / 300 g purple cabbage
½ red onion / 80 g, thinly sliced
3 tablespoons / 30 g toasted peanuts (or walnuts), coarsely chopped
for the dressing:
2 tablespoons olive oil
2 tablespoons red wine vinegar
1 big piece / 15 g of fresh ginger, grated
1 garlic clove
1 teaspoon agave nectar
zest of one orange
Remove the cabbage’s outer and tougher leaves. Then, cut the cabbage in half and remove its white stalk. Cut each half into paper thin slices. Transfer the shreds of cabbage to a large bowl.
Now, it’s time to make the dressing. Add all the dressing’s ingredients (except the ginger) to a bowl and whisk to combine. Finely grate the ginger and squeeze it over the bowl (you’re not going to use the pulp). Add the sliced onion to the bowl with the dressing and let it sit, covered and at room temperature, for at least 15 minutes. The dressing will “cook” the onion making it softer and sweeter to the palate.
Add the dressing and onion to the bowl with the shredded cabbage. Using your hands, massage the salad for at least 3 minutes or until its volume reduces by half. Serve immediately sprinkled with coarsely chopped peanuts or walnuts (preferably toasted).
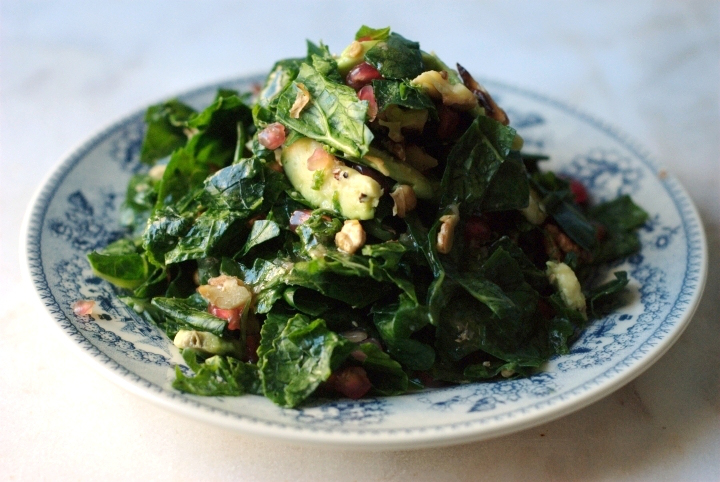
Raw Kale and Pomegranate Salad
Last year was demanding – both physically as well as emotionally – to say the least. A lot of things have happened – some of them were actually quite good, while others were surprising and unexpected in not so good ways. I’ve cooked almost everyday throughout the whole year and never been away from the kitchen, but I guess I just felt uninspired most of the time. That, plus being busy working on other things that left me intellectually drained – 2012 was the year I wrote and presented my master’s thesis – were the major issues that kept me away from this place from what now seems to be a very long time.
However, I’m back. This year I decided to make this blog a priority because either creating recipes from scratch or adapting them from other sources is what makes me happy and what I think I’m good at. To start off the year and to reinaugurate this little place of mine I’m posting a salad recipe I’ve been making a lot.
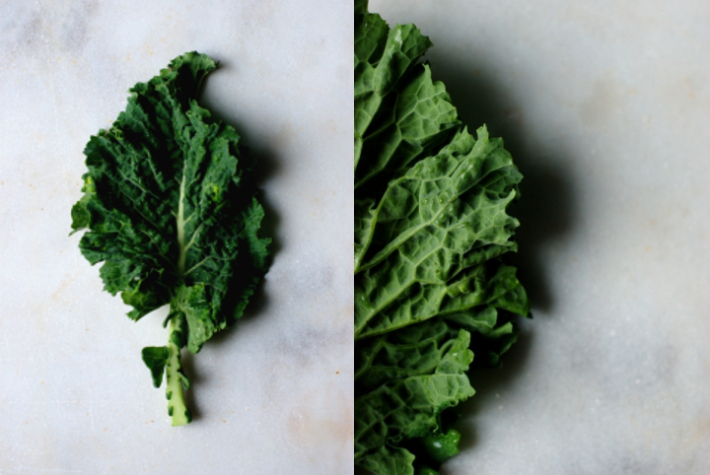
Basically, every weekend my grandmother buys me this huge bunch of kale. I’ve made tons of stews with it, sautéed it with garlic and olive oil multiple times, added it to soups, until I ran out of ideas on how to use it. However, if munching on raw leafs of kale is one of my favourite snacks while preparing dinner, why not to come up with a recipe that calls for this lovely vegetable in its natural state? Raw kale is wonderful in salads thanks to its intense, slightly bitter and cholrophyll-y taste. However, to make the most out it you’ll need to massage its leaves in order to make them softer in texture and sweeter to the palate. Massaging kale leaves will also break down their cellulose structure and make them more easily digestible. This salad calls for kale as its base but all the other ingredients can be easily replaced – instead of pomegranate you could use grapes or tangerine segments, and almonds would also work well in place of the walnuts.
Raw Kale and Pomegranate Salad
(serves 4, as a side)
2 cups (packed) / 110 gr raw kale, coarsely chopped
½ cup / 75 gr pomegranate seeds
half of an avocado (aprox. 100 gr) cut into small slices
¼ cup / 30 gr walnuts, coarsely chopped and lightly toasted
olive oil
lemon juice
for the dressing:
2 tablespoons olive oil
1 tablespoon red wine vinegar
1/8 teaspoon minced garlic
salt and freshly ground black pepper to taste
1. In a small bowl, combine all the dressing’s ingredients. Set aside.
2. Add the kale to a large bowl and combine it with a drizzle of olive oil, a pinch of salt and a few drops of lemon juice. Massage the kale leaves, rubbing them with your hands for 1 to 2 minutes, or until they reduce to half of their original volume and change their colour from bright to dark green.
3. Add the pomegranate seeds, the avocado slices and walnuts to the now tenderized kale. Add the dressing and toss well. Serve the salad right away.
Spicy Tofu with Peas and Mint
My week has been really busy, and all I’ve been eating lately is kind of boring and predictable stuff (basically, lots of sandwiches and soup). So today, I finally gave myself some time to go into the kitchen and prepare a proper lunch. That lunch – for which the recipe follows – relies on a favorite combination of mine: peas and mint. As far as the preparation time goes, this is the kind of dish that will only take you a couple minutes to make, but even so, you can certainly prepare the tofu and rub the spices onto it and left the whole thing in the refrigerator until you start cooking.
Typically, I’d serve this along with some raita (with all natural, unsweetened, soy yogurt, grated cucumber, and good pinch of salt), but today, after an hour running, I was craving a more satisfying meal and made, instead, some buckwheat pancakes to go with it. I often like my tofu the simple (and easy) way - coated in a little olive oil, sprinkled with sea salt, and therefore grilled until golden brown - but rubbing a spice mix into it before grilling/frying, might be a new favorite method. Actually, as I type this, I can’t help myself but thinking on variations to the mixture of spices suggested below: feel free to add curry powder for a more indian scented flavor, or even going a completely different way, by substiting the cumin, ginger, paprika and turmeric, for dried herbs such as rosemary, thyme and oregano.
Spicy tofu with peas and mint
(serves 4)
400 grams extra firm tofu, rinsed, pat dry, and cubbed
450 grams frozen peas
1 teaspoon powdered garlic
2 teaspoons ground cumin
¼ teaspoon black pepper
1 teaspoon ground powdered ginger
½ teaspoon turmeric
1 tablespoon paprika
2 ½ tablespoons lemon juice
1 ½ tablespoons tamari
a few fresh mint leaves, finely chopped
2 tablespoons olive oil
1. Combine the garlic, cumin, black pepper, ginger, turmeric and paprika in a large bowl. Add the lemon juice and tamari and mix well.
2. Rub the spice mixture into the tofu cubes, making sure they’re all well coated. Set aside.
3. Bring enough salted water to a boil, add the peas, and cook for 3 to 4 minutes. Drain the peas, wash them under cold running water and drain again.
4. In a large frying pan over medium-high heat, add the olive oil. Once hot, but not smoking, add the tofu cubes and fry for 6 to 8 minutes, or until golden brown.
5. Transfer the peas and tofu to a large serving plate, and garnish with fresh mint. Serve immediately.
recipe inspired by Rose Elliot’s The Vegetarian Supercook, published by octopus Publishing Group in 2006
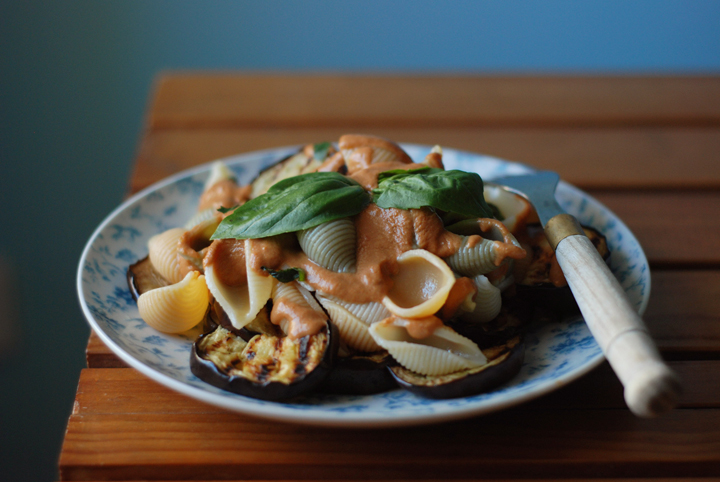
Pasta with Sun Dried Tomato Sauce
The good thing about this pasta dish, is that you can make the sauce ahead of time, and then all you have to do a couple of minutes before lunchtime, is to cook the pasta and grill the aubergine. It’s a quick and very yummy dish, one of those recipes I make specially when I have guests around, because it’s easy to put together and people generally enjoy it very much.
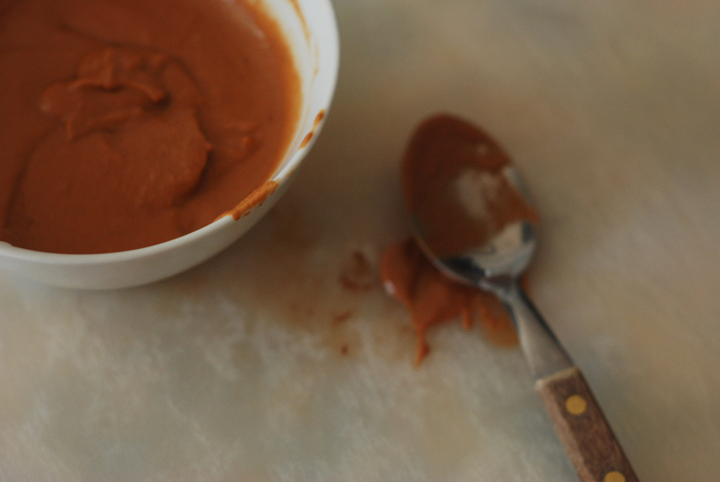
I’ve done it to death around here, with a few varitions though: for instance, sometimes I use slightly cooked vegetables (such as broccoli and cauliflower), while on other occasions I use grilled ones (onions, aubergines, zucchini). Quite frankly, adding grilled vegetables is what I prefer the most, although that is just for the sake of my personal taste. Regarding the sauce, I think it’s one of those sauces you want to eat by the spoonful: salty and slightly tangy, it can also be a nice addition to savory crêpes or used as a dipping sauce for steamed veggies.
It’s funny that I haven’t thought of this recipe to post to the blog before. These days, I’ve been thinking a lot about when I started cooking vegan food, and the recipes that by then I used to enjoy the most. This one was definitely one of those. Actually, some years ago, I wasn’t that much of a cook. Any recipe that would take more than 10 minutes to be prepared, would most likely be ignored by myself. But on the other hand, I feel that that attitude towards cooking really led me to create some quick and tasty meals, and those are the ones I’m focusing on right now. But before we seriously embrace the everyday vegan cooking topic, I must tell you: there’s going to be a cake showing up here in an upcoming post… ; )
Pasta with Sun Dried Tomato Sauce
(serves 4)
450 grams pasta, such as fusilli or conchiglie (I used the latter)
1 large aubergine
olive oil
salt to taste
fresh basil leaves, for garnish
For the Sun Dried Tomato Sauce:
½ cup (40 grams) dry packed sun dried tomatoes
¼ cup sun dried tomatoes soaking water
¼ cup olive oil
3 tablespoons rice vinegar
3 tablespoons lime juice
90 grams natural unsweetened soy yoghurt
½ teaspoon salt
1. In a small saucepan, bring about 2 cups (500 ml) of water to a boil. Turn off the heat and add the sun dried tomatoes. Cover, and let them re-hydrate for 15 to 20 minutes, or until soft and plump. Drain, and save the water.
2. In a large pan, bring plenty of salted water to a boil and add the pasta. Cook for 8 to 10 minutes or until al dente. Drain and chill under cold running water. Drain again.
3. Heat a large grilling pan over high heat. Slice the aubergine into rings of about 0,7 cm thick, and brush each side of the rings with olive oil. Lay down as many pieces of aubergine as the pan will hold in a single layer, and sprinkle with salt. Cook each side for 5 to 6 minutes, or until the aubergine has good grilling marks and has almost started to blacken.
4. To make the sauce, put all the ingredients in the bowl of a food processor and process until creamy. Have a taste and adjust the seasonings if needed.
5. In a large bowl, combine the pasta, grilled aubergine and sauce. Mix well and serve immediately, garnishing each individual serving with a few leaves of fresh basil.
Curried Zucchini and Apple
This recipe is what I had for lunch today, alongside some grilled tofu and toasted bread slices. It’s one of those recipes that you can put together in a matter of minutes, and is really tasty. What is important in here is to slice both apple and zucchini as stated in the directions, so that they cook thoroughly in the amount of time I’ve specified. The point is to just slightly overcook the zucchini, while the apples retain some of their crunchiness (one of the reasons why I haven’t peeled them). Also, you don’t to use tart apples such as, for instance, Granny Smith, but sweet and crisp ones, as a way of balancing the addition of lemon and ginger juices to the dish. For me, Starking apples work the best in here, but if you can’t find them, I bet Red Delicious would make it as well. For some of you who don’t really know what else to do with zucchini, give this recipe a shot – I’m almost sure it won’t disappoint.
Curried Zucchini and Apple
(serves 4, as a side)
540 grams zucchini (3 medium ones)
200 grams Starking apples (2 small ones)
2 garlic cloves, minced
2 tablespoons olive oil
1 teaspoon curry powder
2 tablespoons water
1 tablespoon freshly squeezed ginger juice
1 and ½ tablespoons freshly squeezed lemon juice, plus a bit more
1 tablespoon lemon zest
¼ cup toasted almonds, coarsly chopped
1 small handful of chopped coriander
salt and pepper to taste
1. Quarter the zucchini lengthwise. Then, cut each quarter into two halves. Finally, cut each half crosswise into sticks about 8 centimeters long. Set aside.
2. Quarter the apples and remove their core. Slice each quarter into 3 equal pieces, about 0,5 centimeters thick. Transfer the apples to a bowl, and add a squeeze of lemon juice to them, to prevent oxidation.
3. In a large sautée pan over medium heat, add the olive oil, garlic cloves, and curry powder, and fry for 1 minute. Add the zucchini and the 2 tablespoons of water, cover, and cook for 8 to 10 minutes, stirring occasionally.
4. Add the apples to the pan and cook for additional 5 minutes. In the last minute of cooking, add the lemon and ginger juices, the lemon zest, and season well with salt and pepper.
5. Remove from heat and divide among 4 deep plates. Add the almonds and chopped coriander on top of each serving and serve immediately.
inspired by Vegetarian Cookery, published by Dorling Kindersley, 1991 (I believe the book is now out of print)
Chickpea and Shredded Cabbage Salad with Miso Tahini Dressing
I haven’t been in the kitchen that much in the past few days, hence the lack of posting around here. I have to confess I’ve been feeling lazy to cook, also because here in Portugal we’ve been under extremely hot temperatures - around 35º degrees -, and all I don’t want to do is to spend time in front of an hot stove. So, nothing better than a great and easy salad recipe such as this one, that will only take you a few minutes to prepare.
The only trick in here is to make sure the cabbage is sliced very thinly; if not, the salad will not be as light as it is supposed to be. As far as the dressing goes, it was my first time putting together tahini and miso, and I was surprised by how well the combination worked out: the nutty taste of the tahini seems to soften miso’s typical saltiness, without actually masking its taste. If you shred the cabbage and make the dressing ahead of time, you can put this salad together in less than five minutes. I served this at room temperature, but I bet it would be delicious served cold too. If you’re planning to do the latter, place the salad in a large bowl, cover with cling film, and refrigerate it for 1 to 2 hours or until chilled to your liking. This method will also help the flavors meld together, contributing for a tastier salad.
Chickpea and Shredded Cabbage Salad with Miso Tahini Dressing
(serves 3, as a side)
260 grams canned chickpeas, drained and rinsed
1 small cabbage (180 grams)
1 teaspoon minced chilli
for the dressing:
1 tablespoon tahini
1 tablespoon mugi miso
2 tablespoons lemon juice
2 tablespoons warm water
1 tablespoon olive oil
2 teaspoons agave nectar
1. Start with the cabbage: cut it into halves, remove the hard core, and shred each halve into very thin strips. You don’t want to have very long strips, so cut them in half if needed.
2. In a large bowl, combine the chickpeas and shredded cabbage. Set aside.
3. For the dressing, combine all the ingredients in a medium size bowl, and whisk them together until you achieve a creamy consistency. At this point, you can add a bit more water if you want a thinner dressing, although I like mine on the creamy, slightly thick side.
4. Add half of the dressing to the bowl with the chickpeas and cabbage and toss everything together. At this point, you can refrigerate the salad for at least 1 hour or, as I did, serve it at room temperature.
5. To serve (either cold or at room temperature), divide the salad among 3 plates, sprinkle with the minced chilli, and spoon the remaining dressing over the top of each serving. Serve immediately.



4 comments