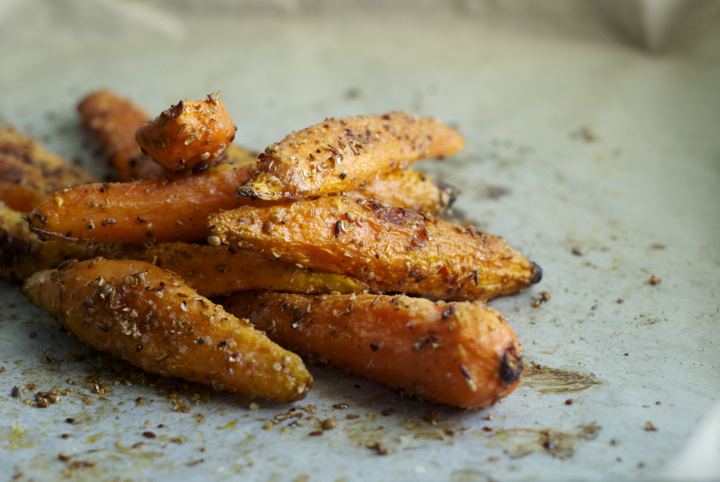
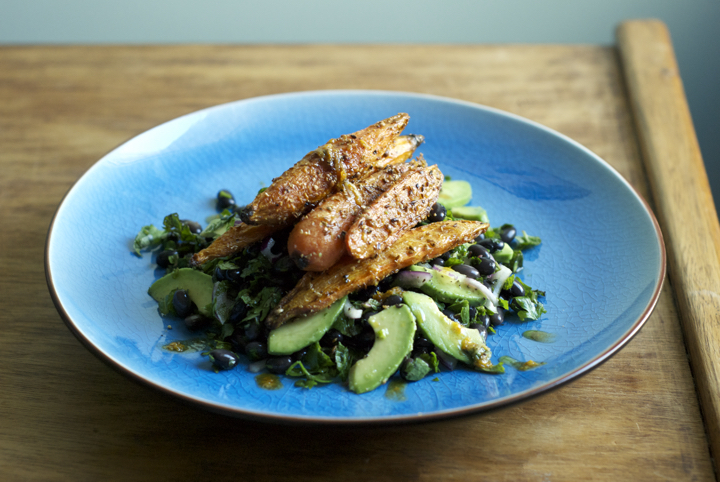
Roasted Carrot & Black Bean Salad with Orange Cinnamon Dressing

I don’t share the enthusiasm most people have for Christmas. My close family is very small and I’m with them all year around, so gathering for an occasion I personally couldn’t care less about (I respect all religions, but I’m not a religious person) just seems a bit pointless. Having said this, it doesn’t come as a surprise that I don’t bother cooking a big, impressive meal for Christmas Eve. In fact, I cook the same kind of food I do everyday, like this little carrot and black bean salad.

This dish is easy to pull off and it’s packed full of good things for you. It’s also perfect for this time of the year when, after the carb and sugar filled holidays, people seek to lighten up their eating. You can also adapt the ingredients, like substituting the black beans for chickpeas or even the carrots for sweet potatoes. The dressing is very fragrant and gives an exotic edge to the salad too. After cooking my way through Plenty More these last couple of weeks, I borrowed some ideas from Ottolenghi, and one of those is adding spices to salad dressings, like cinnamon and/or fennel seeds.
I wish you guys a wonderful new year, and I’ll come back by the end of the week with one of my favourite soup recipes –keeping the mood light and clean. ;)
Roasted Carrot & Black Bean Salad with Orange Cinnamon Dressing
serves 2
For the salad:
645 g / 10 medium sized carrots, peeled and left whole
1 teaspoon cumin seeds, crushed
1 ½ teaspoon coriander seeds, crushed
1 tablespoon olive oil
270 g / 1 ½ cups cooked black beans (canned is fine)
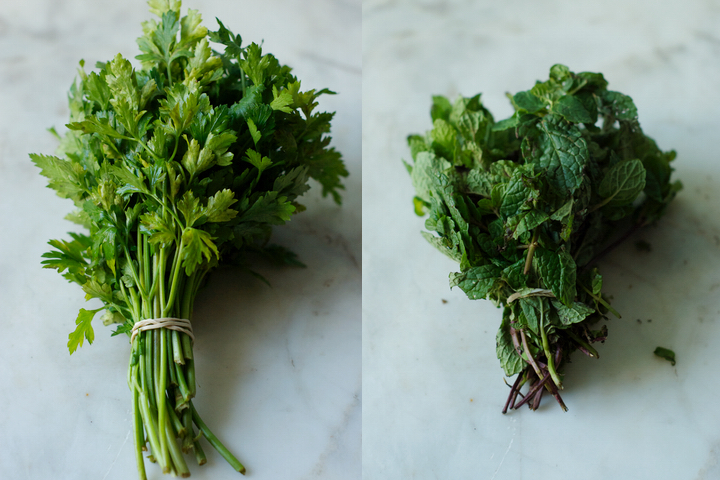
20 grams chopped parsley
20 grams chopped mint
20 grams chopped coriander
30 grams / ½ small red onion, finely diced
1 medium avocado, thinly sliced
salt and pepper to taste
For the orange cinnamon dressing:
zest of one large orange
3 tablespoons olive oil
2 tablespoons lemon juice
1 small garlic clove, minced
¼ teaspoon cinnamon
salt and pepper to taste
Preheat the oven to 180º. Line a baking tray with non-stick baking paper. Combine the carrots with 1 tablespoon of olive oil and the cumin and coriander seeds. Add a generous pinch of salt and pepper, toss, and roast in the oven for 45 minutes or until the carrots have cooked through and are lightly brown.
Mix the remaining ingredients for the salad in a large bowl, and add the carrots on top. Combine the ingredients for the dressing and drizzle over the salad. Serve immediately.
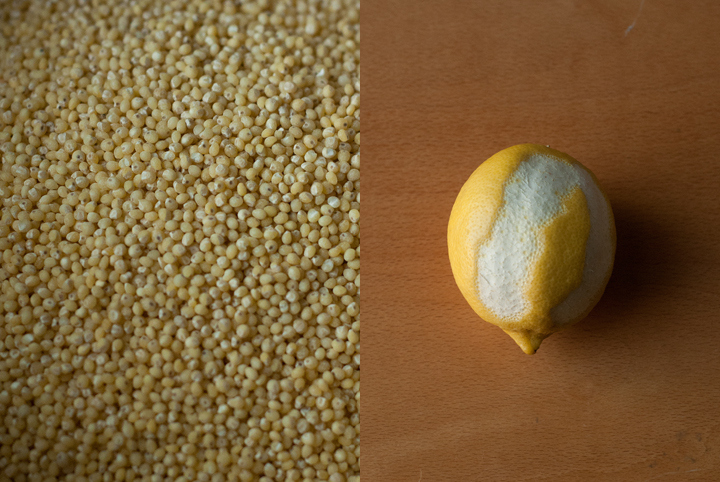
Millet Breakfast Bowl
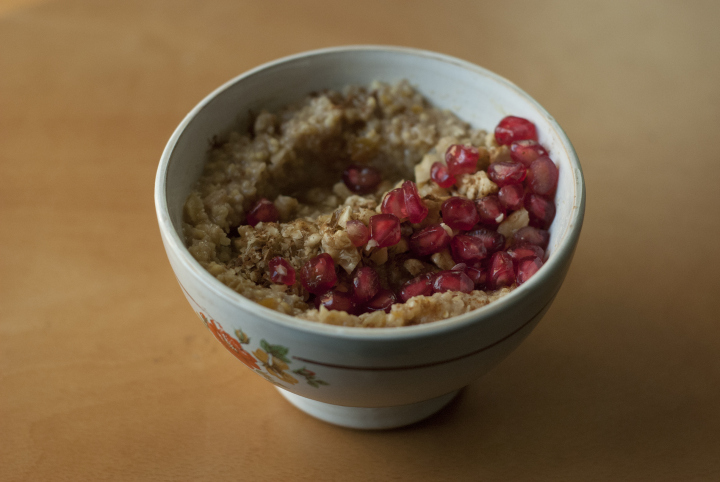
Even though I have a few favourite foods and I’m, at times, fixated over some specific ingredients (this time around, pomegranates is what I’m obsessed with), I pretty much like to vary what I eat. I do not usually plan what I’m going to have; I’d rather go to the market and, based on what I find and seems to be the freshest produce, I make my own choices.
However, this “go with the flow” attitude doesn’t apply to breakfast. For breakfast, I almost always have oatmeal porridge with raw cacao and a sliced banana. When I say “almost always” I actually mean I’ve been having this very same breakfast, everyday, for almost 3 months in a row. Coming from a person who’s pretty curious when it comes to try plant-based foods and ingredients, this is a bit embarrassing. However, having acknowledged that, I’ve been trying to be a bit less predictive when it comes to breakfast fares. This millet bowl, even though sharing the same spirit as my dearest oatmeal porridge (creaminess, warmth…), is a totally different thing. Its flavour profile reminds me, somehow, of Halva, the greek dessert, because of the nuts and dried fruits. It’s sweet, creamy, comforting… and pretty much everything I crave in the cold autumn mornings.

I already have a couple more ideas for different breakfasts on my mind and, as this blog is lacking breakfast foods, I’m eager to share a couple more with you in the meantime. I’ll also come back soon with a few Christmas-inspired recipes. (;
Millet Breakfast Bowl
(serves 4 to 6)
200 g / 1 cup millet
1 tablespoon olive oil
45 g / ¼ cup dried apricots, chopped
35 g / ¼ cup golden raisins
1 big handful /35 g walnuts , finely chopped
1 strip of lemon or orange rind
500 ml / 2 cups unsweetened almond milk
125 ml / ½ cup water
80 ml / 1/3 cup brown rice syrup
½ teaspoon cinnamon
1/8 teaspoon salt
In a medium sized pot, over medium heat, heat the olive oil. Add the millet and fry it in the oil, stirring constantly, until golden brown (about 3-4 minutes).
Add the cinnamon, lemon or orange rind and salt to the millet, followed by the almond milk and water. Bring the mixture to a boil, and once boiling, decrease the heat to medium-low. At this point, add the brown rice syrup, apricots, golden raisins and walnuts and give everything a good stir. Cook over low heat for 20-25 minutes. It’s ready as soon as the mixture is soft and creamy.
Serve and eat while warm, with an extra drizzle of brown rice syrup, a few more walnuts and some pomegranate seeds.
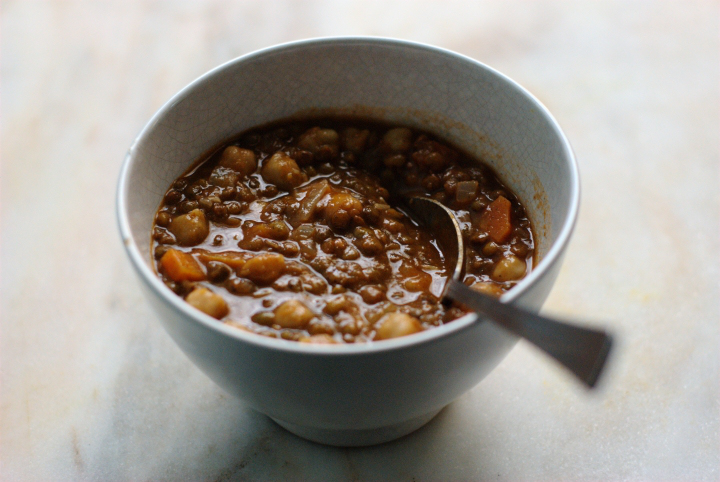
My Take on Harira
When I was a kid (probably 6 or 7 years old) my parents took me on a road trip to the south of Spain. Eventually, after hours and hours of driving under a massive sunlight, we arrived at Gibraltar (which technically is a British territory). Since we were so close to the north of Africa, I proposed we could go to Morocco, something that unfortunately didn’t happen as the plan was to stay for about a week in Málaga.

Flash-forward to date and I have yet to go to Morocco. Until then, I will try to continue to bring Morocco to me by exploring its cuisine and making my own versions of dishes such as tagine and harira. The latter – a chickpea and lentil soup – is traditionally made with meat (which I obviously don’t consume) and, sometimes, rice and vermiccilli noodles. The soup is cooked for a long period of time – sometimes over an hour – and thickened up with a couple tablespoons of flour, almost verging on a hearty stew. It is a one pot meal, and what a delicious and filling one… I’ve been having Harira for dinner for the last couple of days and I can tell for sure it is the best lentil-based soup I have ever made. Its heart-warming nature makes it just the perfect meal for the few cold winter nights we still have ahead.
Harira
(serves 6 to 8)
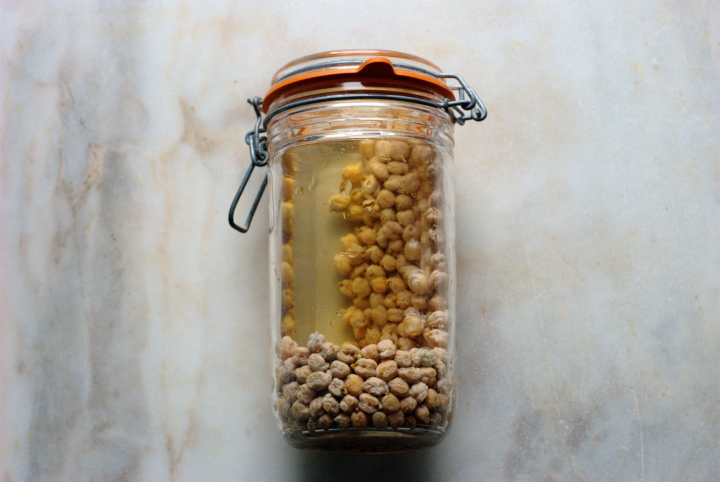
½ cup / 95 g dried chickpeas, sorted, soaked overnight, rinsed and drained
1 cup / 215 g puy lentils
3 tablespoons olive oil
1 medium onion / 1 cup / 130 g finely chopped
3 garlic cloves, peeled and finely sliced
2 medium carrots / 1 cup / 130 g cut into small cubes
1 teaspoon ground cinnamon
2 teaspoons ground ginger
2 teaspoons cumin seeds, coarsely pounded in a mortar
½ teaspoon freshly ground black pepper
a pinch of red pepper flakes
1 can / 2 cups / 450 ml canned tomatoes, liquidized in a food processor
5 ½ cups water
1 ½ teaspoons sea salt
1 tablespoon cornstarch
2 lemons, quartered
1. In a large pot over medium heat add the oil, onion, garlic, carrots, cinnamon, ginger, crushed cumin seeds, pepper and pepper flakes. Sauté for 5 minutes or until the onion has softened. If the mixture seems dry and the spices start to stick to the pot, add up to ¼ cup of water to loosen things up a bit.
2. Add the liquidized canned tomatoes, chickpeas and 5 cups of water to the pot. Turn the heat up to medium-high and let the liquid come to a boil. Once the liquid is boiling, lower the heat to low, cover the pot with a lid and cook for 30 minutes.
3. After that time, add the puy lentils and cook, covered, for another 30 minutes.
4. In the meantime, in a small bowl, combine the cornstarch with ¼ cup of water. Stir well so that the cornstarch dissolves completely.
5. At the very last minute of cooking, add the salt as well as the cornstarch mixture to the soup. Give it a good stir with a wooden spoon (it will thicken up a bit thanks to the cornstarch), have a taste and adjust the seasoning. Serve in large bowls, adding a splash of lemon juice to each individual serving.
(eggless and dairy-free) Crème Brûlée

I’ll start this post by sharing with you some of the kitchen disasters that have happened around here lately. The first one happened a couple days ago, when I attempted to make some hazelnut cookies: some minutes after I’ve put them in the oven, we heard some noises coming from the oven, and in the end it turned out one of the oven glasses has broken. Surprisingly, the cookies weren’t affected and were still edible.
The second disaster happened a few days later: I was working on this crème brûlée recipe and used the food processor to blend all the ingredients I was going to use; suddendly, when trying to pull out the blender jar, all the liquid spilled away on the floor – perhaps I didn’t attach the jar properly to its base? After cleaning the kitchen floor, table and counter, I was determined to start over again – I wanted crème brûlée and, whatever happened next, I’d have my serving of it that night.
This créme brulée fever has triggered thanks to the MasterChef Australia (a TV show I’m completely addicted to, by the way) as in one of the shows I watched recently, the contestants were taught, in a masterclass, how to perfectly make the said dessert. I never cared too much for crème brûlée, but the moment I saw and heard on the show that burnt sugar surface crackling with the hit of the spoon, I was determined to make my own version of the french classic. The MasterChef recipe, even though looking (and certainly tasting) incredible, relied on eggs to get that pudding like texture – soft, smooth, but somehow solid. My purpose, when attempting at making an eggless version, was to achieve a similar consistency as it is nearly all crème brûlée is about. Arrowroot flour and agar agar flakes were then used in order to give creaminess and structure to this vanilla flavored custard; to finish things off, a good layer of golden and sort of smokey-tasting sugar was added, for extra sweetness and yumminess.

(eggless and dairy-free) Crème Brûlée
(for 5 sevings)
ingredients:
4 cups (1 liter) non-dairy milk (I used soy milk, but almond milk would work as well)
1/3 cup (65 grams) muscovado sugar (plus extra, for the topping)
4 ½ tablespoons arrowroot flour
1 3/4 teaspoons agar agar flakes
1 ½ teaspoons vanilla extract
1 cinnamon stick
Notes: I’ve used agar agar flakes in here, and even though I’ve blended all the ingredients in the food processor before actually start cooking (as it’s suggested below), I could still feel some little pieces of agar which haven’t been blended properly. They were so few I actually didn’t mind, but if you want to avoid this, use powdered agar instead – you have to use less, I’d say ¾ to 1 teaspoon (I haven’t tested, so this is merely referential). On the other hand, feel free to use a vanilla bean (split in half, lengthwise, seeds scrapped straight into the pot) instead of vanilla extract.
1. Put all the ingredients in a food processor or vitamix and mix, at medium-high speed, for 30 seconds, or until everything is well blended.
2. In a large pot over medium heat, pour the mixture and stir with a spoon, until it barely starts boiling. It might happen that some scum forms on the surface – you can skim it off easily with a metal spoon. As soon as the liquid is boiling, decrease the heat to low and continue to whisk vigourously for 10 to 12 minutes longer. The mixture should thicken up substancially and you’ll know it’s ready when, while stirring, the spoon leaves trail marks, showing off the bottom of the pot.
3. Divide the créme brulée among 5 ramekins, and let them cool at room temperature. Once cooled, refrigerate for at least 30 minutes.
4. To make the “burnt” topping, add 1 tablespoon of sugar on top of each serving and, using a kitchen torch, caramelize the sugar, working in circular moves. Add up to 1 more tablespoon of sugar to each rameking, if you want a slightly more thick topping.
5. Let it set for 5 minutes before serving. Bon appetit!
Roasted Butternut Squash and Red Lentil Soup with Cinnamon

I served this soup yesterday to some house guests who came over for dinner and got such great reviews that I thought sharing it with you. We were eight at the table yesterday night, meaning that I made a huge pot of soup and will be enjoying the leftovers today as part of my Christmas dinner. Red lentils and butternut squash really are a great combo, and the natural sweetness of the latter (enhanced by roasting) is complemented by the addition of cinnamon. To give things a little punch, dried chiles are added to the soup, and the final result - yet very delicate - has some background heat, almost like the role played by back vocals in melodies. A couple more technical notes on the soup: it lasts for a couple of days in the refrigerator (three to four), but as it has the tendency to thicken over the time, add a little water when reheating it. Also, if you don’t have the chiles at hand, you can add some cayenne pepper instead (1/4 teaspoon should be enough).
And finally last, but not the least: there are a couple of traditional portuguese recipes (both sweet and savory ones) typical for this of the year that I’d like to post up here. I still do have to work on them, as they’re not vegan, but once I get them right, they’re all yours too. Mery Christmas to all of you. Love, J.
Roasted Butternut Squash and Red Lentil Soup with Cinnamon
(for 8 to 10 servings)
1,3 kg butternut squash, seeded and cubed, but not peeled
1 and ½ cups (270 grams) red lentils
8 cups (2 liters) light vegetable broth
3/4 teaspoon plus 1 teaspoon ground cinnamon
1/2 teaspoon ground ginger
3 small dried red chiles, stemmed and finely cut
salt to taste
2 large white onions, finely chopped
olive oil
a handful chopped coriander, for serving
8 tablespoons pine nuts
1. Pre-heat the oven to 180ºC. Line a baking dish with parchment paper and lightly coat it with olive oil. Add the cubed butternut squash, sprinkle with a little salt, and roast for 30 to 40 minutes, or until the squash is tender and golden brown. Remove from the oven and let cool at room temperature.
2. In the meantime, heat a large pot over medium-heat, add a few glugs of olive oil (2 to 3 tablespoons), the chopped onion, dried chiles, 3/4 teaspoon of ground cinnamon, and the ground ginger. Cook, stirring often, for 8 to 10 minutes, or until the onion has softened and browned just a bit.
3. Add the lentils and stock to the pan. Bring to a boil and, once boiling, reduce the heat to a low-medium and simmer for 20 minutes, or until the lentils are cooked. Once the lentils are cooked, add the roasted butternut to the pot, and season with salt to taste.
4. With an immersion blender, puree the soup until smooth.
5. Toast the pine nuts in a large dry skillet over medium-high heat. It should take about 3 to 4 minutes to get them slightly brown. At the last minute of toasting, stir in 1 teaspoon of ground cinnamon and a pinch of salt, mixing well until the pine nuts are well coated.
6. To serve, transfer the soup to deep plates and add plenty of chopped coriander and one tablespoon per person of the toasted pine nuts.
recipe loosely inspired by Moro East
Upside-down Pear Cake

When I first started this blog I promised myself I’d be posting a recipe at least once a week. Back then, I was so excited about this whole blogging thing that I found myselft posting two, three, recipes a week. But school work has been leaving me with very little time to cook these days, and that’s the main reason why I can’t keep with my former promise all the time. Anyway, today, after an almost 12 hour sleep (yes, that’s possible), I cured my tiredness from the very busy week I had, and sit in front of the computer after lunch - this time, not to work on the projects I have on hand, but to write you the recipe for a delicious upside-down pear cake.

As I’ve told you in the previous post, I’ve been working with gluten-free flours recently and the results couldn’t be better. So, this cake not only is gluten-free but delicious on its own. Chickpea flour is here used in place of eggs and the pairing of buckwheat with fall fruits such as pears, seems to work extremely well. As we’re approaching Christmas, and I’m experimenting with a couple ingredients typicall for this time of the year, it’s more likely that the following recipes will be desserts, cakes, and hearty savory dishes - we’ll then have plenty of time in January to get back on track. ; )
Upside down Pear Cake
(one 23 cm cake, 6 to 8 slices)
for the fruit layer:
3 medium-sized pears, ripe but firm, cored and sliced
3 tablespoons muscavado sugar
3 tablespoons vegan margarine
a pinch of cinnamoon
for the cake layer:
140 grams (1 cup) buckwheat flour
130 grams (1 cup) white rice flour
1 teaspoon powdered ginger
1 teaspoon ground cinnamon
¼ teaspoon salt
2 teaspoons baking powder
5 tablespoons melted vegan margarine
100 grams unsweetened soy youghurt
45 grams gram flour
60 ml (¼ cup) plus 3 tablespoons water
160 ml (2/3 cups) soy milk
120 grams muscavado sugar
80 ml (1/3 cup) agave nectar
1. Pre-heat the oven to 180ºC. Oil a 23 cm round baking pan.
2. Heat a large skilllet over medium heat. Add 3 tablespoons of vegan margarine, pears, sugar, and cinnamon, and cook, covered, for 5 to 10 minutes, or until the pears are tender and slightly caramelized. Let the cooked pears cool to room temperature. Transfer the pears and their syrup to the prepared pan, spreading evenly.
3. In a large bowl, combine the buckwheat and white rice flours, powdered ginger, ground cinnamon, salt and baking powder.
4. In another large bowl, whisk the melted vegan margarine and sugar. Add the yoghurt, soy milk, and agave nectar to the mixture, stirring to combine.
5. In a medium-sized bowl, add the gram flour and water, whisking everything until you get a smooth consistency. Slowly pour this mixture over the wet mixture and combine well.
6. Using a rubber spatula, fold the wet mixture into the dry mixture, being careful not to overmix.
7. Pour the batter into the prepared pan – over the pears - and bake for 40 to 45 minutes, or until a toothpick inserted in the center of the cake comes out clean.
8. Cool the cake in the pan for 20 minutes before inverting onto a large plate.
Carrot Orange Cake with Cinnamon Sauce

When I was a kid, the cake I enjoyed the most was an apple cake my grandmother used to make. It was a rustic, unassuming cake, and even when so many years have passed since the last time I ate it, I can still feel its taste and smell with my eyes closed. Actually, my grandmother’s cakes used to be my favorites: the apple cake was the one I’d prefer over any other, although I’d be quite content with a few slices of the orange or the cinnamon cakes too.
As far as carrot cakes go, I don’t exactly remember the last time (before last Saturday) I ate one. I’m almost sure my grandmother has baked it some time in the past, but I can’t exactly recall when or even how good it was (I’m sure it was good anyway). The other day I came over to her place for a visit, and she told me about a carrot cupcake she used to eat in a bakery downtown. I feel that “cupcake” isn’t a fair translation for the kind of sweet treat she was talking about… it’s like a cake made with very little flour, moist, rich, and with an intense carrot flavor. As you can imagine, that left me with a big craving for something similar. I was digging on the internet trying to find recipes for the actual cake my grandmother described (as a kid, I used to eat it very often too), but the ones I’ve found mainly relied on eggs for structure. It’s not that I gave up on trying to find a vegan version for this particular kind of cake, but in the meantime, and in order to satisfy my cravings, I baked a simple, sort of traditional, carrot cake instead. And shared it with my grandmother.

The cake, we thought, was very good, but I tell you straight away: if carrots aren’t your thing, this cake is not for you. The carrot flavor is quite present, and the addition of orange zest and juice gives this baked good a fresh, citrus tang. As far as the preparation goes, it is really easy to make - with all the ingredients on hand, the batter will only take you a few minutes to prepare -, and the cinnamon sauce is a great complement to the whole thing, although I think the cake could also be enjoyed plain. And as a last note: do let the cake sit for a while (preferably overnight) before enjoying it, as it really makes a difference (the flavors will mature and be way more pronounced).
Carrot Orange Cake
(makes 8-10 slices)
dry mixture:
1 cup (125 grams) bleached all-purpose flour
1 cup (125 grams) rye flour
1 teaspoon baking soda
¾ teaspoon baking powder
¼ teaspoon nutmeg
1 teaspoon ground cinnamon
1 teaspoon ground ginger
2 teaspoons orange zest
wet mixture:
1 and ½ cups (255 grams) cooked carrots (from about 5 carrots)
1 cup (125 grams) finely grated carrots (from about 1 large carrot)
1 cup (250 ml) agave nectar
½ cup (125 ml) olive oil
1/3 cup (80 ml) freshly squeezed orange juice
1 heaped tablespoon flax seed
¼ cup (60 ml) warm water
for the cinnamon sauce:
1 and ½ cups (375 ml) soy milk
2 heaped teaspoons cornstarch
3 tablespoons muscavado sugar
2 cinnamon sticks
1 teaspoon ground cinnamon
1. Preheat the oven to 180ºC. Lightly oil a 20 cm round baking pan. Coat the pan with flour, shaking out the excess.
2. In a bowl, sift together the flours, baking soda, baking powder, the ground spices and the orange zest.
3. In the bowl of a food processor, add the flax seed and the water. Process until smooth. Now, add the cooked and raw carrots, as well as the agave nectar, olive oil, and orange juice. Process until totally smoth. Transfer the mixture to a large bowl.
4. Using a spatula, gradually add the dry mixture to the wet mixture, blending well.
5. Pour the batter into the prepared pan. Bake for 1 to 1 and ¼ hours, or until a toothpick inserted in the center of the cake comes out clean.
6. In the meantime, prepare the cinnamon sauce: in a saucepan over medium heat, add the soy milk, cornstarch, sugar, cinnamon sticks, and ground cinnamon, and bring to a boil, whisking constantly. Once boiling, immediately reduce the heat to low and simmer for 10 to 15 minutes (don’t stop whisking), or until the sauce has thickened. Serve over each slice of the cake.
Hazelnut and Banana Bread

I’ve baked a lot this week: there was a birthday cake for my boyfriend, a spice cake to bring to a picnic, and this hazelnut and banana bread, that I made yesterday. I’ve told you before that I’m not that much of a baker. Actually, baking cakes always scared me a bit, since so far I had way too many unsuccessful experiences to count. But, anyway, it seems I’m mastering the art of vegan baking, as those three cakes that I baked this week turned out quite yummy. The hazelnut and banana bread is the one I decided to share with you, since it’s almost 100% created by myselft.
To be fair, I first started to follow a recipe from an old cookbook that my mom bought a long time ago, but things weren’t working out (the recipe didn’t call for enough wet ingredients, and the batter ended up not coming together at all), so I started things over with a whole new approach. I might have been on a lucky day, as the bread turned out quite good: it’s definitely moist, and as far as the flavor goes, it’s delicate and slightly sweet, which makes it perfect for breakfast. First things first: use very, very, ripe bananas, as it makes all the difference. Baking them will enhance even more their sweet flavor, so make sure not to skip that step. A final note: I used hazelnuts in here, but feel free to substitute them for walnuts or pecans, as they work out very well too.

Hazelnut and Banana Bread
(makes one loaf)
4 very ripe bananas, unpeeled
½ cup (125 ml) olive oil
½ cup (55 grams) muscavado sugar
1 and ½ tablespons ground flax seed, mixed with 8 tablespoons water
1 non dairy, unsweetened, yogurt (100 grams)
½ cup (125 ml) soy milk
1/3 cup (80 ml) agave nectar
1 teaspoon baking soda
1 teaspoon baking powder
2 teaspoons cinnamon
1/8 teaspoon salt
¾ cup rolling oats
1 cup (135 grams) unbleached all purpose flour
1 cup (135 grams) bleached all purpose flour
¾ cup (120 grams) hazelnuts, toasted and coarsly chopped
1. Preheat the oven to 180ºc. Line a (25 by 12 by 7 cm) metal loaf pan with non stick parchment paper. Set aside.
2. Put the bananas, unpeeled, in a large baking dish and bake them for 15 minutes or until their skins are totally black. Remove from the oven and let cool. When they’re cool enough to be handled, take the flesh out of the bananas and put it into a bowl. Set aside.
3. In a large bowl, sift together the flours, baking soda, baking powder, salt and cinnamon. Mix in the rolling oats.
4. Beat together the olive oil, agave nectar and muscavado sugar in the bowl of an electric mixer at medium-high speed, until well incorporated. Reduce the speed to low and add the yogurt, soy milk and flax seed mixture. Finally, mix in the bananas.
5. Remove the bowl from the mixer and fold in the flour mixture and hazelnuts.
6. Pour the batter into the loaf pan, spreading evenly, and bake in the middle of the oven for 50 to 60 minutes, until golden brown and a toothpick inserted in the center comes out clean. Mine was done after 50 minutes, but after 35 minutes of the baking time, I covered the top of the pan loosely with aluminium foil, to prevent the top crust of the bread from browning too much.
7. Cool the loaf in the pan for 10 minutes, then turn it out onto a rack to cool completely. I think this bread is at its best the day after it’s baked.

5 comments