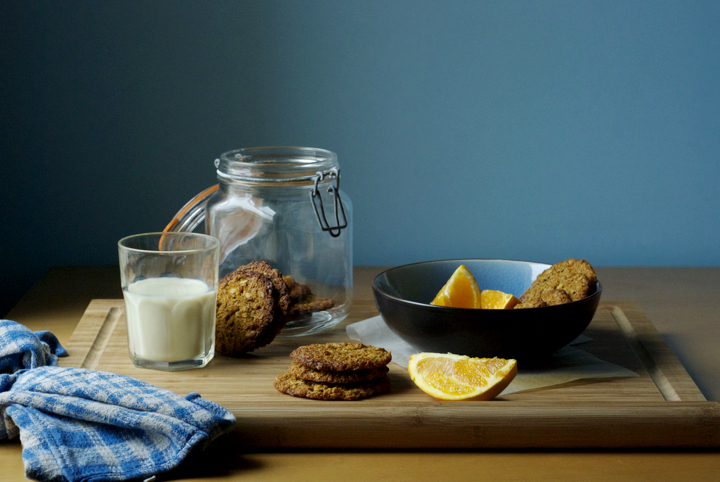
Ginger & Orange Oat Cookies
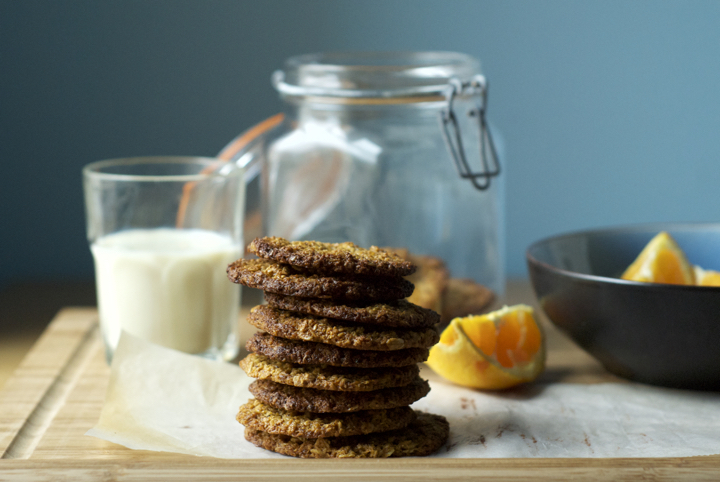
My first idea was to share with you a chocolate dessert today, but unfortunately the dish I envisioned – a beautiful chocolate and toasted oatmeal mousse – didn’t really work out. Instead of a mousse, I ended up making a ganache, and a ganache is just a dessert component, not a dessert in itself. For that reason, I threw it into the freezer and decided to go on a totally different direction. In the end, I made something I was actually craving for quite a while – thin and crisp oat cookies.
Ginger and orange are ingredients that I almost always have in my fridge, and I knew beforehand how well they go together (they’re the base of a Moroccan inspired marinade I make quite often to flavour tofu). The only thing I had to do in the process of making this recipe was to taste the cookie dough a few times and adjust the amounts of both ingredients to make sure the flavours were discernible.
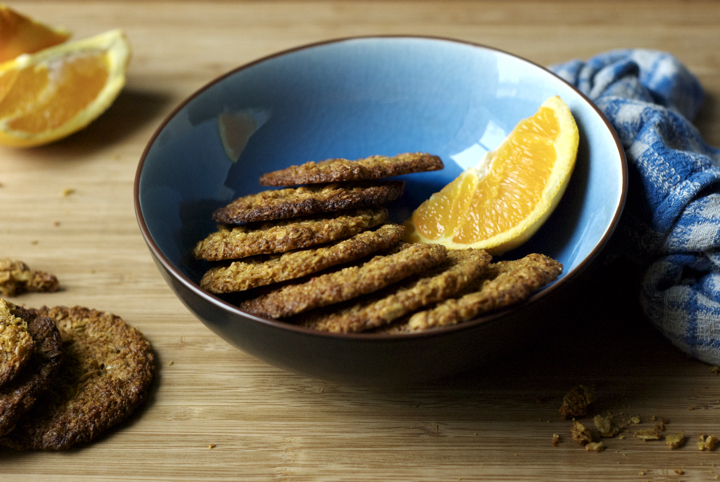
I’m very pleased with how the cookies turned out, they’re wonderfully spicy thanks to the ginger but also fresh and citrus-y because of the orange. Just a little note: after you take them out of the oven they’ll be soft to the touch, but after 5 minutes or so they’ll crisp up and be ready to eat. :)
Ginger & Orange Oat Cookies
Makes about 35 cookies
Dry mixture
138 g / 1 ¼ cups old fashioned rolled oats
110 g / 1 cup oat flour
50 g / ½ cup desiccated coconut
3 teaspoons ground ginger
1 teaspoon baking soda
½ teaspoon sea salt
Wet mixture
1 Tablespoon fresh ginger, minced
1 ½ Tablespoons orange zest (from about 2 ½ medium sized oranges)
80 ml / 1/3 cup olive oil
185 ml / ¾ cup brown rice syrup
2 Tablespoons flaxseed meal
60 ml / ¼ cup water
In a small bowl, combine the flaxseed meal and water together. Whisk well, cover, and let it rest for about 5 minutes or until it thickens.
Mix the dry ingredients in a medium sized bowl. In another bowl, whisk together the remaining wet ingredients and the flaxseed mixture.
Pour the wet mixture over the dry and mix with a wooden spoon until everything is well combined. Refrigerate the cookie dough for at least 1 hour before using. In the meantime, pre-heat the oven to 180 C and line a large tray with baking paper.
After the dough is chilled, scoop out 1 tablespoon of it at a time. Wet your hands and flatten each piece of dough between your hands, until you get a cookie that is about 2 mm thick. Arrange each cookie at least 4 cm (1.6 inches) apart from each other in the prepared baking tray. They’ll spread out quite a bit.
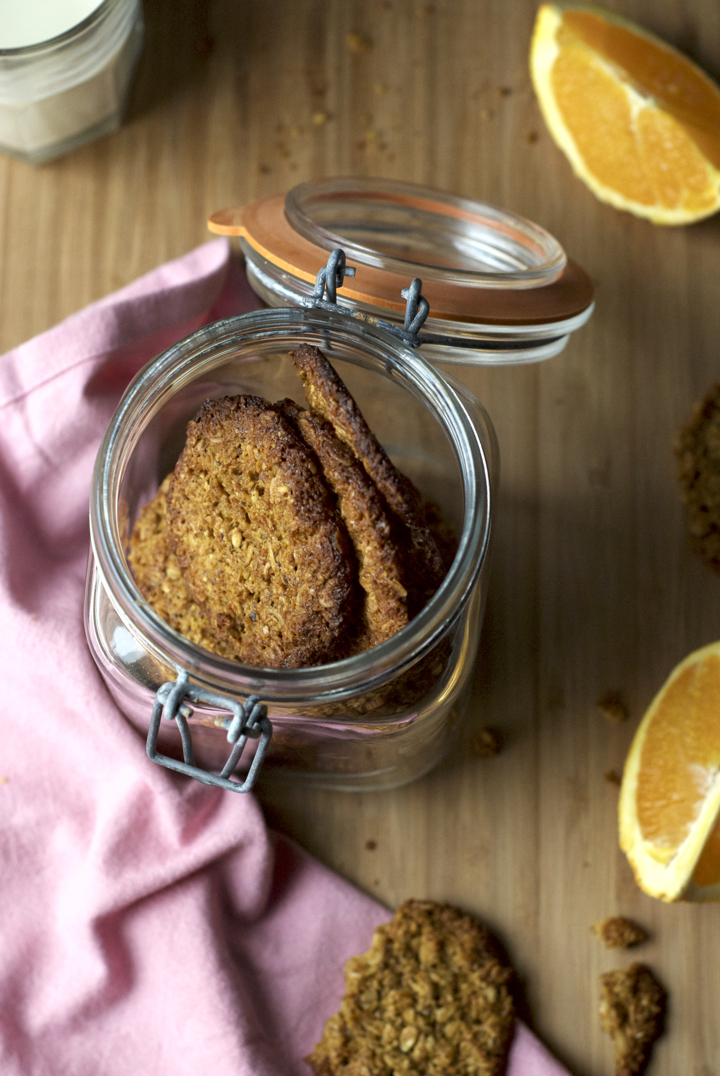
Bake the cookies for 10-12 minutes or until golden brown around the edges. Let them cool on a rack before eating and store them in an airtight container.
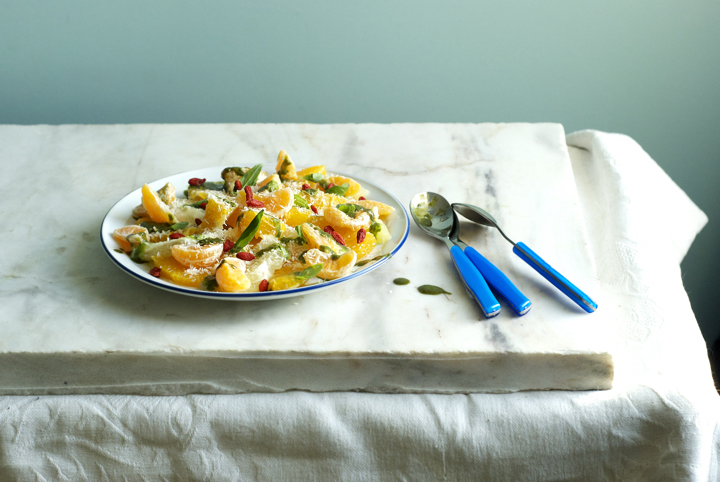
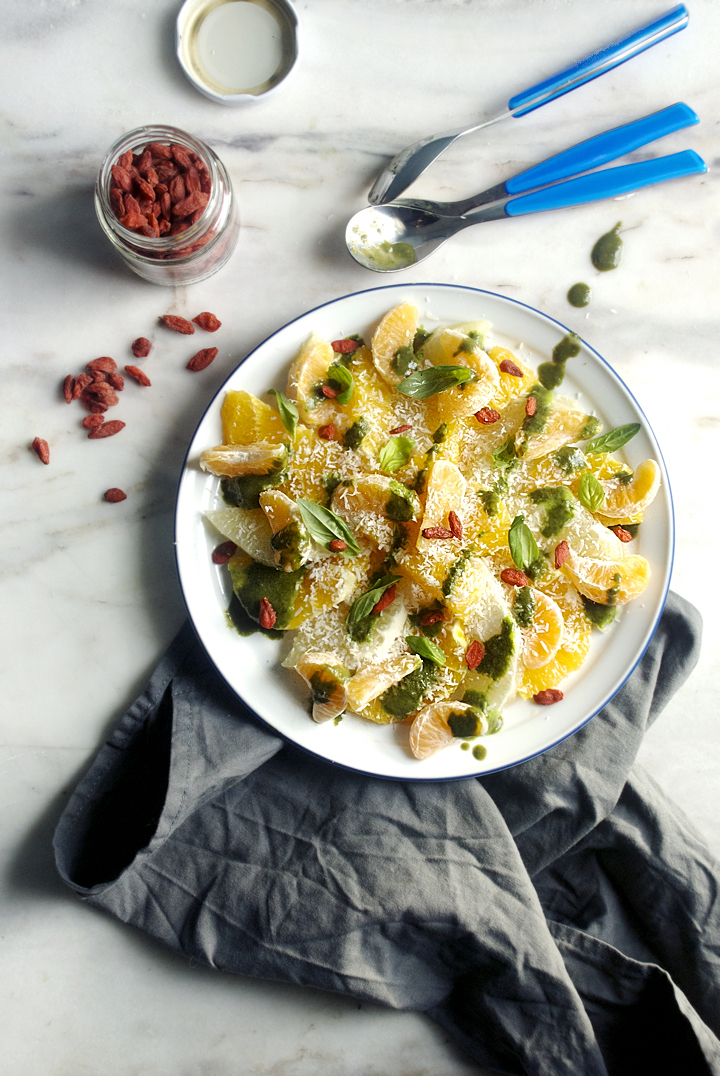
Citrus Salad with Basil-Coconut Sauce
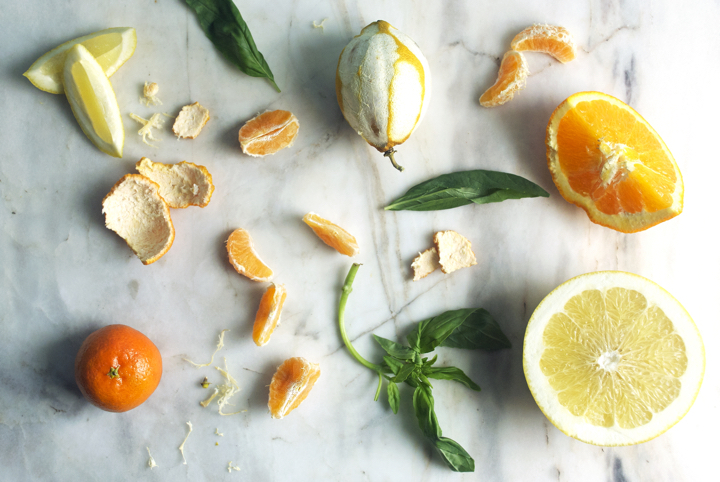
I always do my food shopping on Saturdays. I go to the farmers market in the early afternoon and buy fresh fruit and vegetables for the week. Unless I have friends coming over for dinner, I almost never plan what I’m going to bring home – I just buy seasonal and fresh produce. Last Saturday, the market stalls were filled with tons of oranges, grapefruit, tangerines and lemons. Being a citrus lover, I couldn’t help but buying some, and on the way back home I even manage to peel and eat a giant orange while at the same time carrying all the bags packed full of fresh produce.
Back at home, I fantasized about baking an old fashioned orange cake with a beautiful orange glaze, but then I just thought that the fruit was so delicious and fresh that throwing it into a cake wasn’t the best way to make it justice.
I remembered years ago seeing Jamie Oliver on a show making a savoury basil sauce to go with a raw tomato salad, and that idea kind of got stuck in my head and ended up being the inspiration for this dish. The combination of flavours might seem unusual but it works incredibly well. I ate the salad as an afternoon snack but it could easily be served as a light dessert. Needless to say, there’s room for adaptations here: you can omit the grapefruit if you want to (subbing it for more orange and tangerine), or you can take a different route, by using pineapple instead of all the citrus (I bet it’s equally delicious).
Citrus Salad with Basil-Coconut Sauce
Serves 2
Note: all the fruit was weighted after being peeled.
For the salad:
185 g / 1 large grape fruit
166 g / 1 large orange
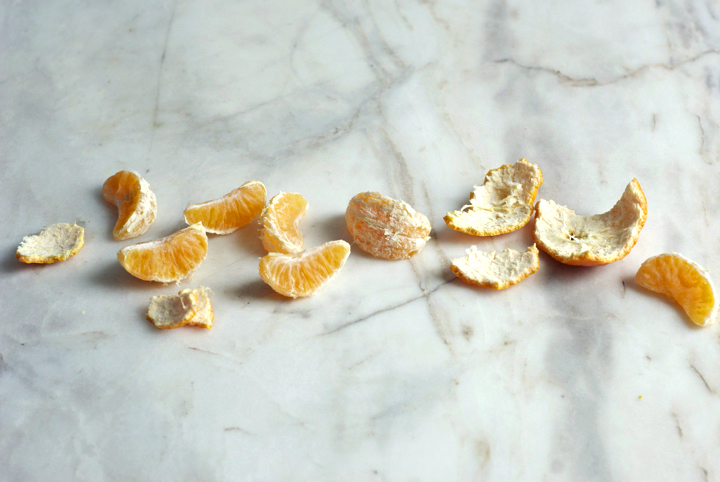
75 g / 2 small tangerines
2 Tablespoons dried coconut
a small handful of goji berries
for the basil-coconut sauce:
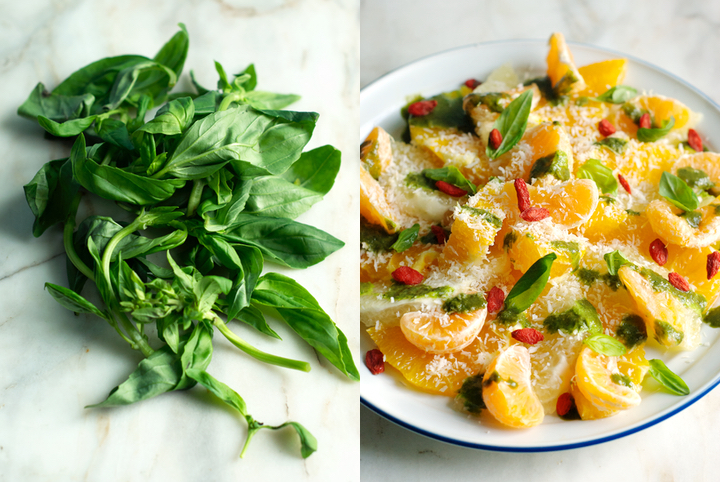
18 g / 1 medium bunch basil leaves
4 Tablespoons coconut milk
2 Tablespoons brown rice syrup
In a small skillet over medium-high heat, toast the coconut until it’s fragrant and just beginning to brown.
Cut the orange and grapefruit into 0,5 cm round slices. Split the tangerines into segments and remove the pits (if they have any).
In a blender, combine all the ingredients for the sauce and process until smooth. If it’s too thick, add an extra tablespoon of coconut milk.
Put the sliced fruit in a serving plate and sprinkle with the toasted coconut and goji berries. Drizzle with the sauce and serve immediately.
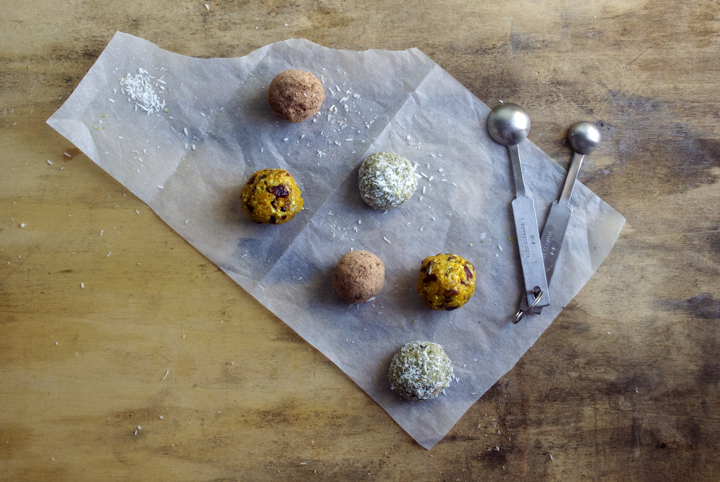
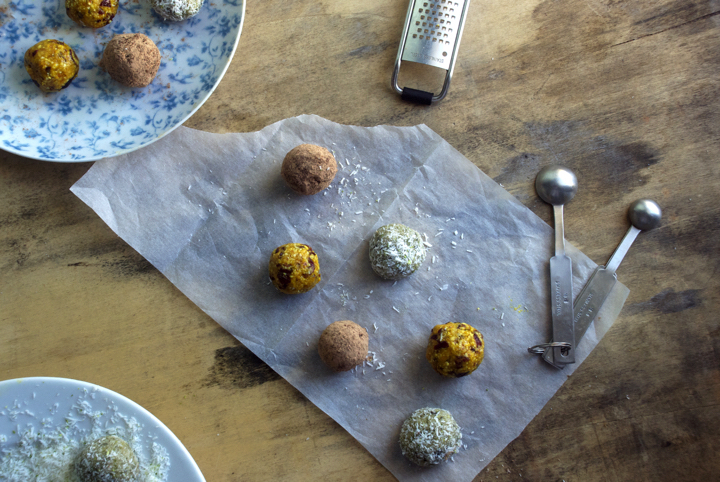
Little Energy Bites, Three Ways
The other day I was going to dinner at my brother’s and was asked to bring dessert. My first plan was to bake a cake – a carrot one – but I didn’t have much time and ended up improvising these raw truffles with the ingredients I already had at home. By now you already know that I’m the kind of cook who likes to “freestyle” in the kitchen, combining ingredients, adjusting here and there, and tasting as I go. The truffles I bring you today were made just like that, with the sort of approach I usually use when cooking savoury dishes.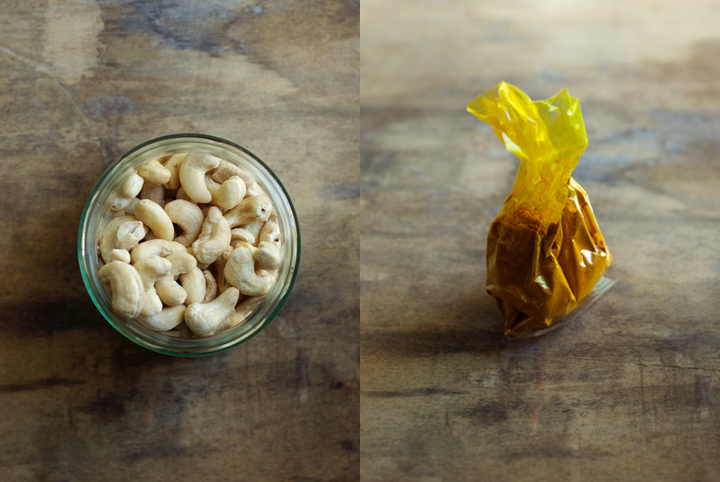

Turns out, everyone at the table loved the truffles. The cashew, currant and turmeric version is inspired in one of my all-time favourite protein bars, while the one with sunflower seeds and maca powder in it is my brother’s personal favourite (he likes warmer, toasty flavours). I’m particularly happy with the hemp seed, coconut and lime combo though, because it’s fresh and exotic at the same time.
Needless to say, you don’t have to stick with the ingredients I used and should feel free to make your own combinations too. Instead of sunflower seeds, you could use toasted hazelnuts, and if you’re not a fan of maca, you could probably substitute it for a combination of spices such as ginger and/or nutmeg (although not in the same proportion). The possibilities are endless here, just have some fun mix and matching and I’m sure you’ll come up with something delicious.
Little Energy Bites, Three Ways
makes 24 truffles, 8 of each flavour
Sunflower Seed, Figs & Maca
55 g / 1/3 cup + 1 Tablespoon sunflower seeds, lightly toasted
95 g / about 12 small dried figs, chopped
¼ teaspoon ground cinnamon
1 Tablespoon Maca powder
1 Tablespoon Water
pinch of salt
cocoa powder for coating
Add the sunflower seeds to the bowl of a food processor and run the machine until they’re finely ground. Add the remaining ingredients and process once again until a paste comes together. Form 8 truffles with your hands. Roll the truffles in cocoa powder and store in the fridge for at least 30 minutes before eating.
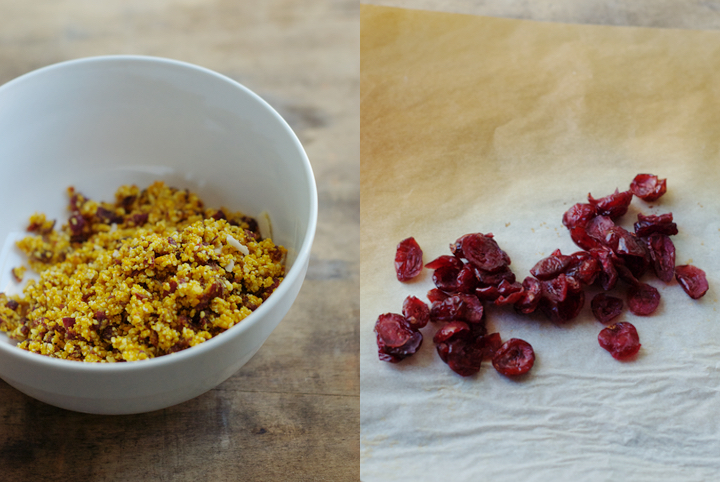
Cashew, Currants & Turmeric
78 g / ½ cup cashews
40 g / 1/3 cup currants
1 ½ Tablespoons brown rice syrup
1 teaspoon ground turmeric
zest of one orange
pinch of salt
Pulverize the cashews in a food processor. Add the remaining ingredients and run the machine until a paste comes together. Shape the mixture into 8 balls.
Refrigerate for at least 30 minutes before eating.
Hemp Seeds, Coconut & Lime
60 g / 1/3 cup + 1 Tablespoon raw shelled hemp seeds
2 Tablespoons brown rice syrup
5 Tablespoons dried shredded coconut, plus extra for coating
zest of one lime
pinch of salt
Combine all the ingredients in the food processor and run the machine until you get a paste-like mixture. Shape the mixture into 8 truffles – this mixture will be a softer than the other two, but the truffles will harden in the fridge. Roll the truffles into shredded coconut (I like to mix some extra lime zest with coconut). Refrigerate for at least 30 minutes before eating.
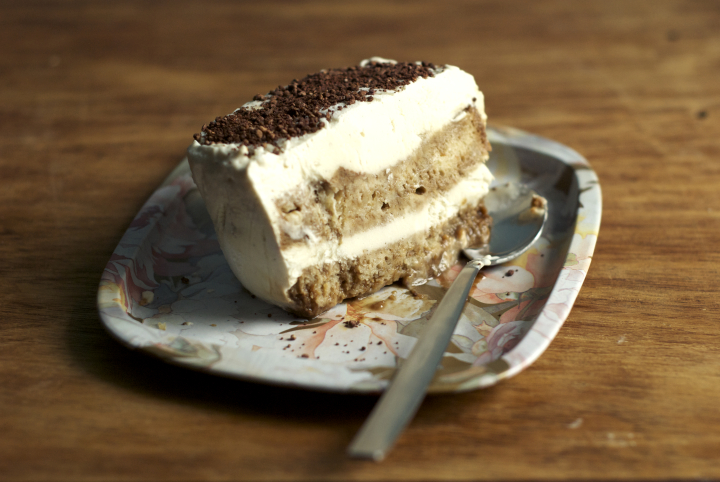
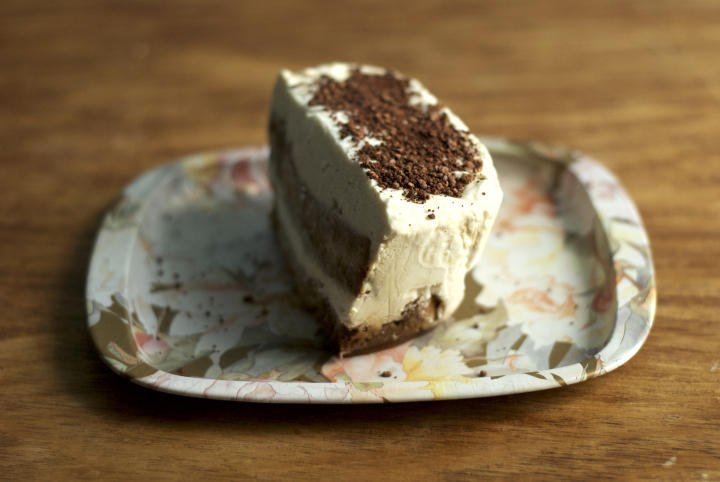
Vegan Tiramisu
For a long time I wanted to make a vegan version of Tiramisu, the classic Italian dessert. However, though, that required some planning as I had to make the cake or cookie base from scratch, and because I’m usually not so go at planning recipes ahead of time, I kept postponing and almost forgot about it. Almost.
The other day I was reminded of my Tiramisu mission while having dinner with my dutch friend Anne-Marie, who came to visit me here in Porto. We went to an Italian restaurant I particularly like and she ordered Tiramisu for dessert. We brainstormed a bit about what would be the best approach to veganize it (Anne-Marie is the ultimate Tiramisu connoisseur), and came to the conclusion that, instead of trying to mimic the regular version, by using whipped soy cream and the likes instead of the dairy cream, the focus should be on the core flavours and textures of Tiramisu: coffee, Amaretto and biscuits.
The creamy component of this dish is made by combining silken tofu and coconut cream, and I can guarantee you it’s quite a subtle combo, where you won’t either taste the tofu or be overwhelmed by the coconut flavour. As far as the biscuit part goes, I made a simple almond and amaretto cake that is then cut into thick slices and soaked with coffee. The final result is quite pleasant, not overly sweet and light in texture. Unfortunately, by the time I was making this dessert Anne-Marie have already returned home, but I’m positive she would give her approval. Guess I’ll make it next time we meet, we always happen to come up with creative food ideas when cooking together ;)
Vegan Tiramisu
(serves 6-8)
For the Almond Amaretto Cake:
Dry ingredients:
175 g / 1 ½ cups almond meal, slightly toasted in a dry skillet
270 g / 2 cups white spelt flour
¼ teaspoon fleur du sel
2 Tbs. flaxseed meal
1 ½ tsp. baking powder
Wet ingredients:
½ cup + 2 Tbs. brown rice syrup
125 ml / ½ cup soya or almond milk
2 Tbs. Amaretto
1 tsp. lemon juice
60 ml / ¼ cup olive oil
granulated brown sugar (1 to 2 Tbs.) and extra oil for coating the pan
For the Coffee Sauce:
185 ml / 3/4 cup boiling water
2 Tbs. coffee granules
2 Tbs. brown rice syrup
For the Coconut and Tofu Cream:
2 cans /400 ml full fat coconut milk, turned upside down and refrigerated overnight
1 package / 300 g silken tofu
1 vanilla bean, split lengthwise, seeds scraped and added to the bowl of a food processor
5 Tbs. brown rice syrup
1 Tbs. Amaretto
cocoa powder for coating
Pre-heat the oven to 180ºC.
To make the cake: In a large bowl, combine all the dry ingredients for the cake except the flaxseed meal. In another bowl, whisk together the wet ingredients along with the flaxseed meal. Put the wet mixture over the dry one and mix everything until a thick batter comes together.
Grease a rectangular baking dish with olive oil and coat it with the granulated brown sugar. Add the cake batter, smooth the top with the back of a spoon, and bake in the pre-heated oven for 35 to 40 minutes. Let the cake cool in the pan for at least 1 hour before unmolding and slicing.
To make the coffee sauce: In a heat resistant bowl, whisk the boiling water with the coffee granules and brown rice syrup until thoroughly combined.
To make the coconut and tofu cream: Open the coconut cans and discard the water (you only want the creamy part). Simply put all the ingredients in the bowl of a food processor and run the machine until the mixture is smooth and creamy.
To assemble: Cut the cake into 14-15 slices (they will be about 1cm thick). Add 5 of the cake slices to the bottom of a rectangular pan and cover them with half of the coffee sauce. Add half of the cream mixture on top of that, followed by 5 more cake slices and the remaining coffee sauce. Finally, cover with the remaining cream mixture.
Refrigerate the tiramisu for at least 24 hours. I like mine well chilled, almost frozen, so I cover the pan with cling film and put it in the freezer for 1-2 hours before serving (but only after it has chilled in the refrigerator). Dust the tiramisu with cocoa powder and serve.
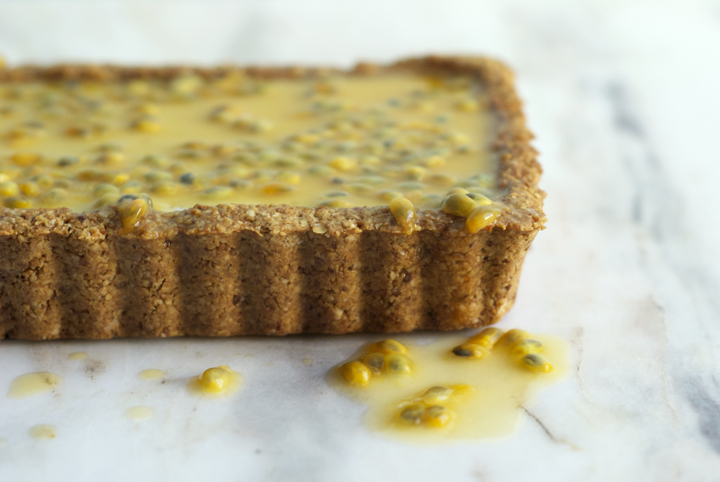
Coconut, Roasted Banana and Passion Fruit Tart
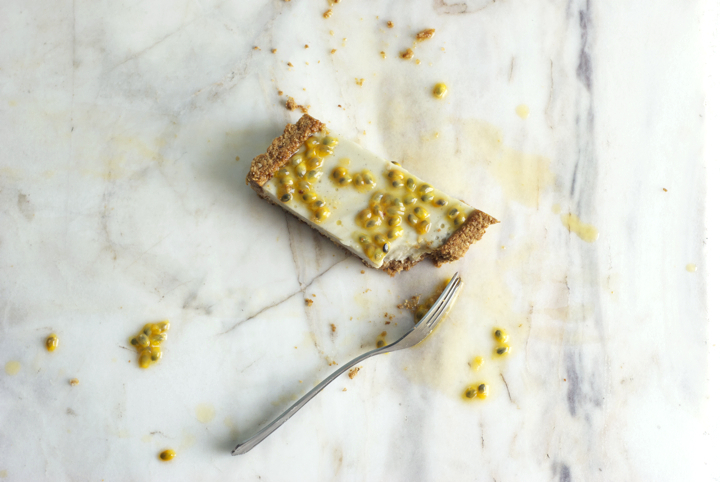
I live in an apartment and therefore do not have any available outdoor space to grow vegetables and fruit (the balcony doesn’t count). However, though, I’m lucky enough to have friends who, knowing my obsession with food and natural produce, occasionally bring me goodies from their gardens. This time around, my dear friend Filipa has brought me tons of thyme, an extra large zucchini (they’re everywhere around this time of the year, aren’t they?) and a bag full of passion fruit.
I knew straight way what to do with the first two ingredients (a huge batch of za’atar with the thyme, and a simple zucchini and apple soup), but I struggled with the latter. I’ve never been a huge fan of passion fruit, but knowing how outstanding it looks on desserts, specially cheesecakes and the like, I decided to make a tart with it. I approached it the way I usually do with vegan cheesecake-y desserts – I’m not a fan of using tofu, so the filling was coconut and banana based, firmed up with the help of Mr. Agar. I was very happy with how it turned out, specially because the filling had just the right texture – not too firm, but not too jiggly either. Eaten cold, I dare say it was probably the best dessert I’ve made this year.
Coconut, Roasted Banana and Passion Fruit Tart
(serves 8)
for the crust:
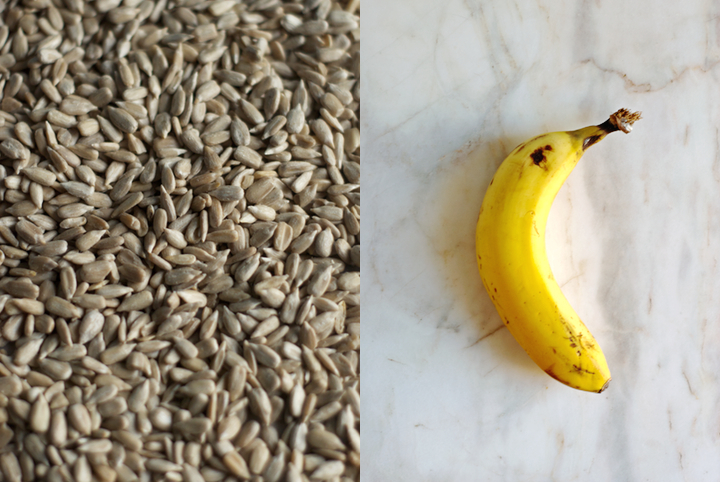
1 cup sunflower seeds
1 1/2 cups oat flour (gluten free or not)
2 Tbs. flaxseed meal + 1/4 cup water
1/3 cup brown rice syrup
1/4 tsp. fine grain sea salt
1/4 cup coconut oil, melted
for the filling:
400 ml /2 cans full fat coconut milk
2 tsp. agar agar flakes
1/3 cup brown rice syrup
1 vanilla bean, split lengthwise, and seeds scraped
2 Tbs. tapioca starch
5 Tbs. water
for the passion fruit sauce:
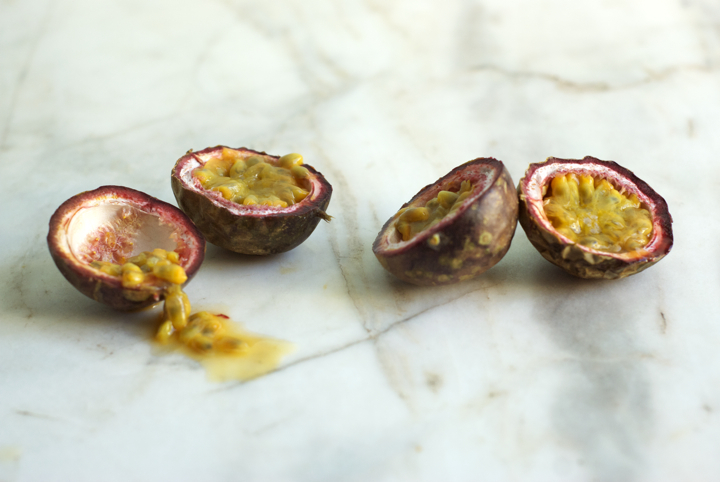
6 medium sized passion fruit
3 Tbs. brown rice syrup
1. Pre-heat the oven to 180ºC/350F. Line two small trays with parchment paper. Add the banana, unpeeled, to one of the trays, and the sunflower seeds to the other. Put the trays in the oven and roast the seeds for 10-15 minutes (redistribute them halfway through, so they’re evenly toasted), and the banana for 5 minutes longer. Take the trays out of the oven and let the seeds and banana cool down.
2. When the toasted seeds are cool enough to handle, add them to a food processor and process until finely ground. In a large bowl, add the seeds, oat flour and salt. In another bowl, add the flaxseed meal along with 1/4 cup of water. Mix well and add the coconut oil and brown rice syrup, stirring everything together until thoroughly combined. Add the wet mixture to the dry one and mix until a firm dough comes together. If the dough seems wet, add a little more flour. Basically, it’s perfect as long as it doesn’t stick to your hands or the bowl.
3. Lightly oil a 33 x 9 cm non stick pie pan and, with your fingers, press the dough into it. Cover it with parchment paper, add some beans or pie weights and blind bake for 20-25 minutes, or until the edges of the tart are golden brown.
4. While the crust is baking, make the filling. In a small bowl, whisk together the tapioca starch and 5 Tbs. of water until well combined. In a small pot over low-medium heat, add the coconut milk, agar agar flakes, vanilla seeds and brown rice syrup. Whisk the mixture constantly for about 8 minutes. Now, add the tapioca mixture to the pot and whisk for additional 2 minutes, or until the liquid has thickened.
5. Unpeel the banana and add it to a blender or food processor. Add the coconut milk mixture and blend until smooth. Add the filling to the previously baked crust. Let it cool to room temperature and refrigerate for at least 2 hours before serving.
6. Right before serving, cut the passion fruit in half and extract their pulp with a spoon to a bowl. Add the brown rice syrup and stir to incorporate. Drizzle the sauce over the tart and serve.
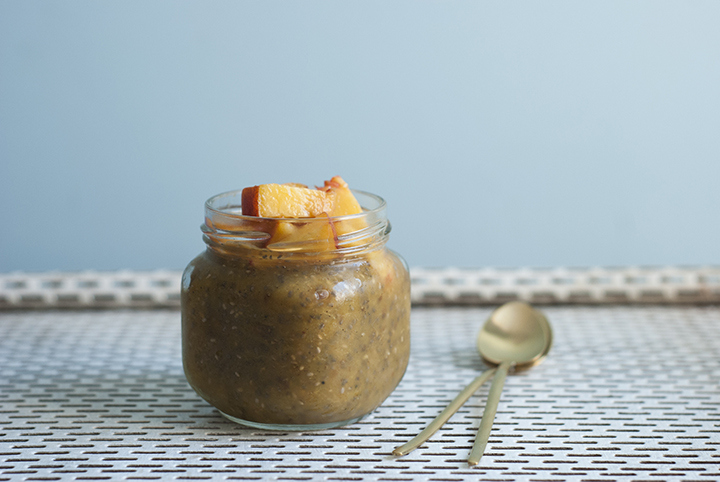
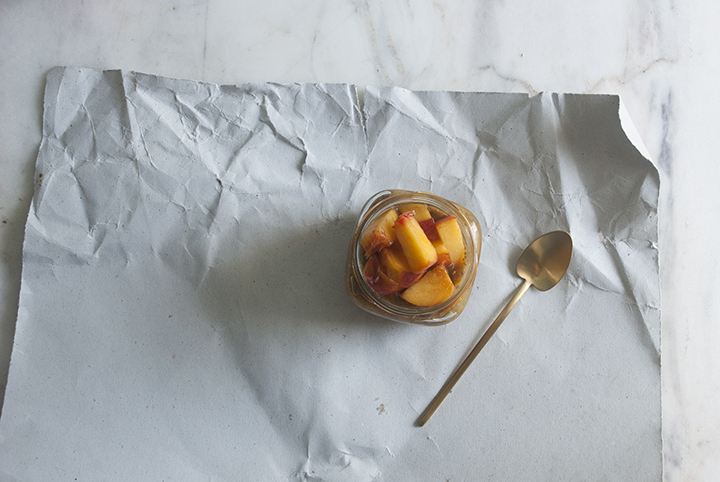
Summer Peach Pudding
What I’m about to say might sound a bit weird, especially coming for someone in her mid-twenties who lives relatively close to the sea, but, I do not like going to the beach. I don’t like walking on sand and lying down in a beach towel with the sun hitting my back. I’m also not a fan of swimming (nor I do know how to swim well), particularly when the sea is packed with people (and, this time of the year, it is most of the time). Having said that, summer isn’t the season I’ve been anxiously waiting for the whole year.
But, even thought warm weather (particularly when it’s above the 30 degrees) and salty water aren’t my cup of tea, I do love summer’s produce. Watermelon and peaches are amongst my favourite fruits and I seem not to get enough of them these days. Early in the week, I went to the market and those good looking peaches definitely caught my eye. I was probably too enthusiastic about them, having bought way more than I could realistically eat before they start to over ripe. Not wanting to turn on the oven to bake a peach tart (my original plan), a raw pudding was in order.
Now, everyone who’s into whole foods have probably already used chia seeds to make puddings – it’s quick, almost effortless, and fits into the healthy-guilt-free-dessert category. I kind of regret having arrived late at the chia pudding party, because I definitely didn’t expect this treat to taste so good. It’s the perfect summer dessert – light, fresh and fruity. Did I say it’s also ridiculously easy to make? All you have to do is to peel and cut a couple of peaches and mix them in a food processor with chia seeds and dates. Pulse a few minutes, refrigerate for 1 or 2 hours – so that the chia start doing their magic (aka absorbing the moisture and thickening things up) – and that’s about it. Next time around I’ll be using apricots instead of peaches, and maybe trying out a different version with frozen watermelon, for an even fresher and almost sorbet-like dessert. Wish you guys a great weekend! (:

Summer Peach Pudding
(serves 4)
3 large peaches or nectarines / 700 grams, peeled, cored, and cubed
2 medjol dates, finely chopped
55 g / 1/3 cup chia seeds
1 vanilla bean, open lengthwise and seeds scraped (optional)
Combine all the ingredients in the bowl of a food processor. Blend for a few moments or until smooth. Have a taste and, if it’s not as sweet as you’d like, add a few more medjol dates and blend again. Transfer the pudding to small bowls or jars, refrigerate for 2 hours, and serve. Garnish with extra chopped peaches if you like.
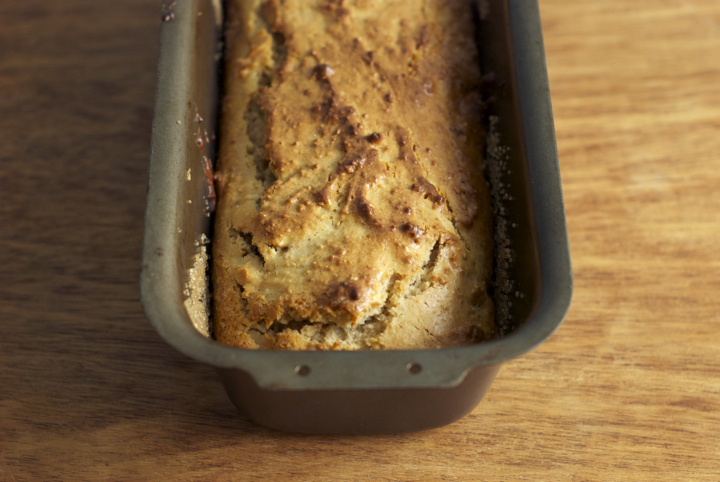
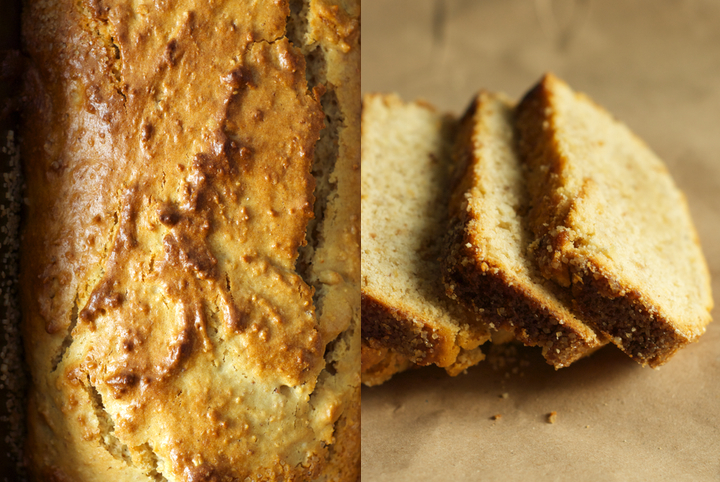
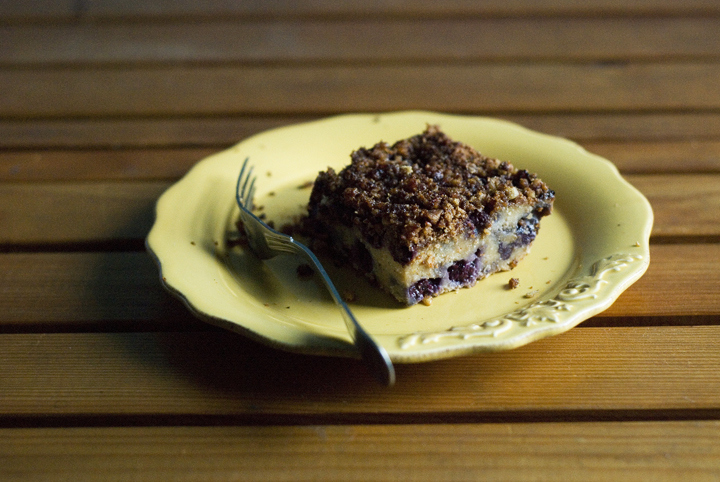
Blueberry Coconut Cake
When God gives you blueberries…. you either a) eat them in one sitting on a particularly lazy Sunday night (as if they were popcorn), or b) drag yourself into the kitchen and, despite the hot temperature (the thermometer has been reaching – and even passing – 30º degrees these days) decide to bake a blueberry cake. After giving the issue some thought and, frankly, not without a few doubts, I went with the last option.
I haven’t baked anything with any sort of berries before, mostly because I can’t help myself from eating them in their natural state, as they taste so incredibly good when in season (as now). However, I most say, if you’re going to make this cake you’re into something. Because, that night, I didn’t bother to check up online recipes and ratios for this particular baked good, I approached it in the same way I work with savoury foods – tasting as I go, paying attention to the amount of liquid added in order to reach the right batter’s consistency…. that sort of intuitive thinking.
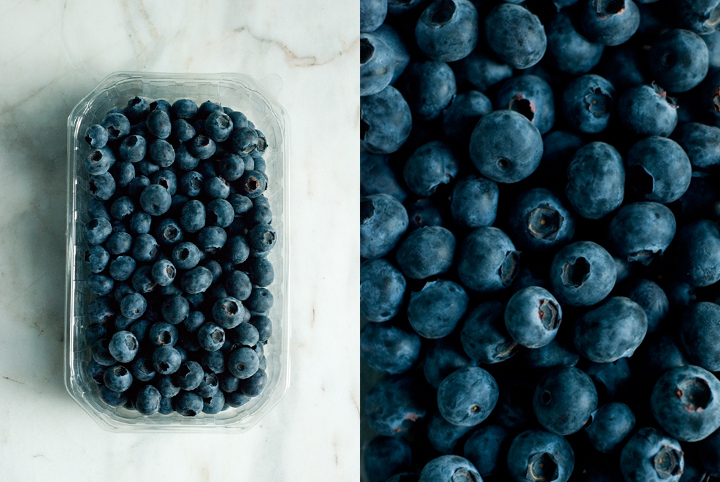
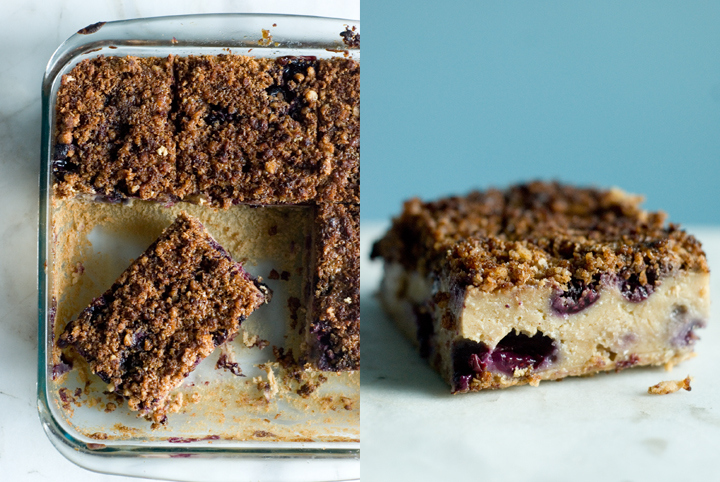
I know (as we all do) that berries love coconut, so that really was my starting point. The cake is full with blueberries (that you could easily substitute with raspberries or blackberries), not too sweet, and with that nutty-crunchy finish that gives it character and an extra boost of flavour. Now, you guys can definitely call me inconsistent – I deserve the title – because I’ve been saying way too many times that baking is not my cup of tea but, honestly, and what I’m about to say is quite a statement, this is probably the best and most accomplished sweet treat I have ever made and shared on this blog.
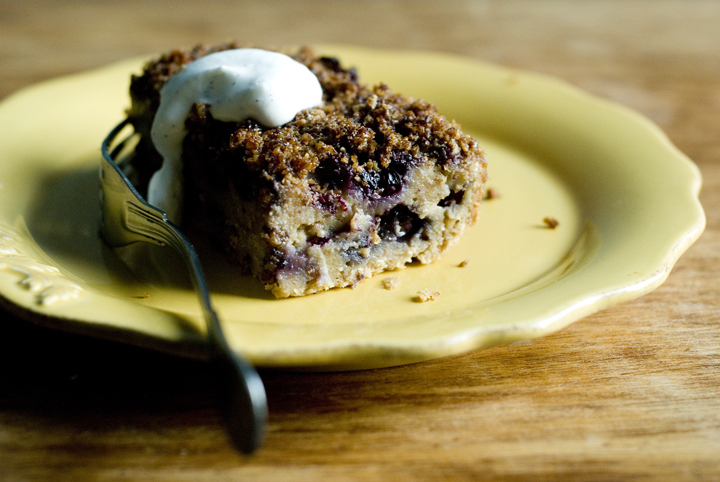
Just a little last note: you can definitely serve the cake with some coconut whipped cream on the side. I don’t have a particular recipe for it but this is how I generally do it: freeze, upside-down, a can of coconut milk for a few hours; open the can, pour the creamy part into a bowl (discard the liquid), add a sweetener (I usually go with agave) and maybe the seeds of half a vanilla bean, mix everything together, et voilà!
Enjoy the summer, do not forget the sun protection cream, and eat your berries (they’re full of antioxidants and other good things that google will be more than happy to tell you). ;)
Blueberry Coconut Cake
(makes 1 cake in a square 20 cm pan)
for the dry mixture:
1 ½ cups / 180g brown rice flour
½ cup / 40 g desiccated coconut
¾ cup / 80 g quinoa flour
1 tablespoon baking powder
¾ teaspoon salt
zest of one lemon
for the wet mixture:
¼ cup / 60 ml melted coconut oil
1/3 cup /55 g coconut sugar
¼ cup / 60 ml agave nectar
2 tablespoons flaxseed meal mixed, in a bowl, with ¼ cup / 60 ml water
1 ½ cups / 375 ml light coconut milk
for the topping:
½ cup / 52 g coarsely ground walnuts
½ cup / 40 g desiccated coconut
2 tablespoons coconut oil
4 tablespoons coconut sugar, divided
½ teaspoon cinnamon
¼ teaspoon salt
–––
2 cups / 290 g blueberries
extra coconut oil, for greasing the cake pan
Pre-heat the oven to 180ºc /350 F. Grease a square 20×20 cm pan with melted coconut oil. Set aside.
In a medium sized bowl, mix the topping’s ingredients, adding only two tablespoons of coconut sugar instead of the four written above (you’ll use the remaining two tablespoons later).
Sift the dry ingredients into a large bowl. In a separate bowl, whisk together the wet ingredients. Pour the wet mixture over the dry one and mix slowly until everything’s well incorporated and you end up with a slightly thick batter.
Pour half of the cake batter into the bottom of the pan. Add one cup of blueberries on top, making sure to distribute them evenly. Add the remaining half of cake batter, followed by the last layer of blueberries. To finish things off, cover the cake with the coconut-walnut topping.
Bake the cake, in the pre-heated oven, for 45 minutes. After that time, take the cake out of the oven and scatter the remaining two tablespoons of coconut sugar on top of it – make sure you cover all the cake’s surface with the sugar, so that you end up with a crisp and caramelised layer. Return the cake to the oven for an additional 5 minutes. Once done, let it cool to room temperature, cut into squares and serve. Even though I like to eat it plain, it goes particularly well with coconut whipped cream.
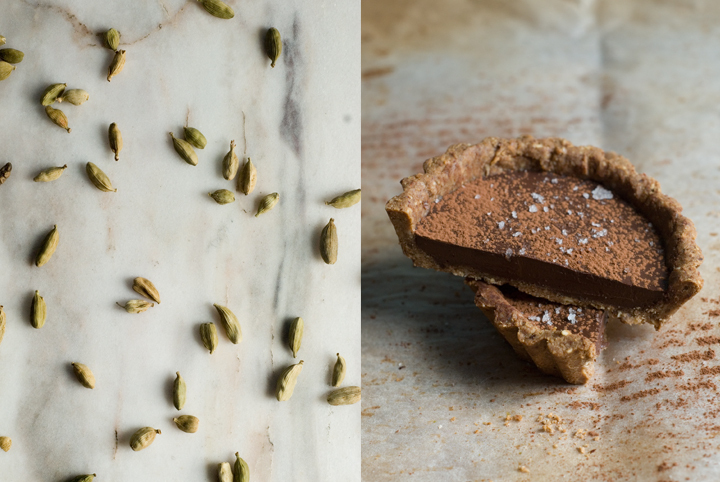
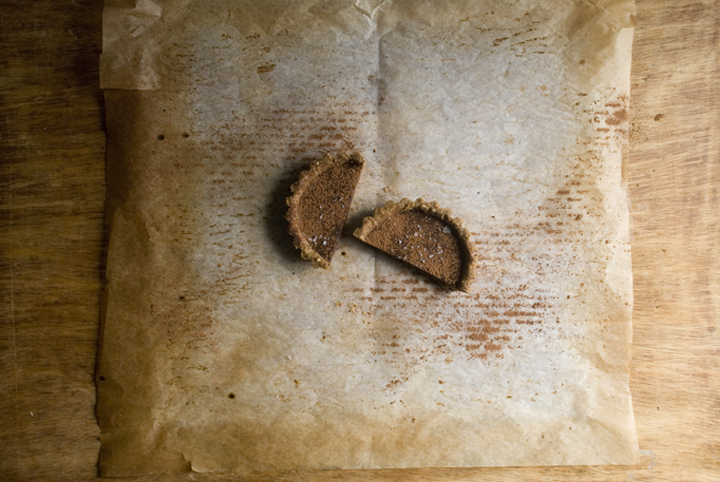
Chocolate Cardamom Tarts

I had the idea for this recipe on my mind for a few weeks now, but was holding back to try it out because sweet goods “don’t really suit my style”. Chocolate desserts, in particular, are far from being my forte. Don’t get me wrong though, I think this one is a great dessert. For chocolate fans. I mean, not the milk-chocolate-candy-bar ones, but for those who appreciate chocolate’s bitterness and more authentic flavour. Let’s say the hardcore fans.
Cardamom is one my favourite spices (followed by cinnamon) and I recently found out it pairs incredibly well with chocolate. These two, coupled together as a filling for a nutty crust, give the little tarts a lot of depth and intensity in flavour. Having said that, and even though this recipe only makes four small tarts, you’ll probably be fine, as I was, with only half of one. A couple specifics: the crust used in here is gluten-free, and because gluten-free doughs tend to be temperamental and hard to work with, you won’t need to roll it, but to press it directly into the tart shells. It won’t look as perfect as if it was rolled but, really, there’s no need to complicate things unnecessarily and only for the sake of presentation…
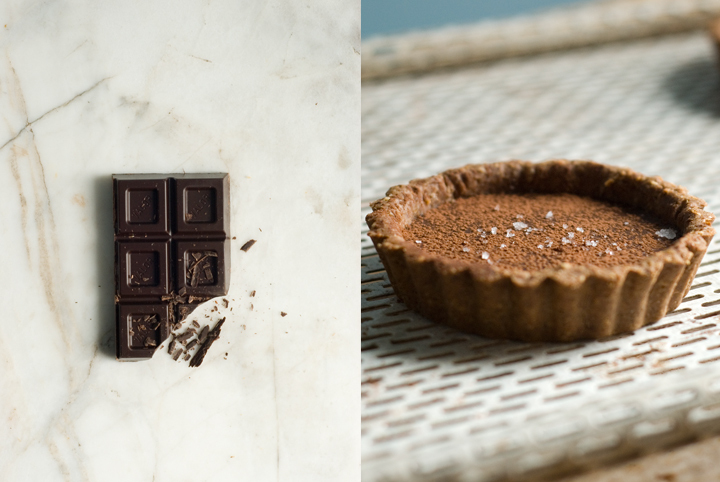
You might also realise this recipe doesn’t call for any sugar and for me it’s fine as is. However, your taste buds are certainly different than mine and if you find the filling too bitter, one or two tablespoons of coconut sugar or other sweetener of your choice won’t hurt. Lastly, do add the flaky salt or fleur de sel on top of the tarts – it really makes a difference, as salt is known to work as chocolate’s flavour enhancer.
Chocolate Cardamom Tarts
(makes 4 tarts, using small tart shells of 7,5 cm in diameter)
for the crust:
70 g / ½ cup chestnut flour
50 g / ½ cup hazelnut meal
¼ teaspoon salt
1 tablespoon flax seed meal
60 ml / ¼ cup melted coconut oil
2 tablespoons cold water
for the filling:
6 cardamom pods, green shells removed and crushed in a mortar
and pestle into a fine powder
100 g / roughly ¾ cup 70% dark chocolate, cut into small pieces
125 ml / ½ cup coconut milk
extra coconut oil for greasing the tins
cocoa powder
flaky sea salt or fleur de sel
Pre-heat the oven to 175º/350ª degrees.
Sift the chestnut flour, hazelnut and flaxseed meals and salt into a bowl. Add the melted coconut oil and the water, and work the mixture with your hands until you get a firm dough. Divide the dough into 4 equal portions.
Using a pastry brush, grease your tart tins with extra melted coconut oil. Press one piece of dough into one of the tart shells and, working with your hands, make it evenly cover its bottom and sides. Using a fork, pinch the dough a few times. Repeat this procedure with the remaining dough and shells.
Cover the pastry shells with greaseproof paper, fill it with baking beans or pie weights and bake blind for 15 minutes. After that time, remove the beans and paper and bake the tarts for additional 10 minutes, or until they’re golden brown.
In a small pan, heat the coconut milk with the ground cardamom until it almost starts to boil (don’t let it boil, though). Remove from the heat and add the chocolate. Stir around with a wooden spoon until the chocolate has fully melted. Let the mixture cool a bit, but not to the point of starting to set.
Divide the mixture evenly between the four tart shells. Let it set for 1 to 2 hours at room temperature. After that time, you can refrigerate the tarts for 1 additional hour if you prefer them cold (I actually ended up eating a forth of one at room temperature and enjoyed it). Unmold before serving and sprinkle with cocoa powder and flaky sea salt or fleur de sel.
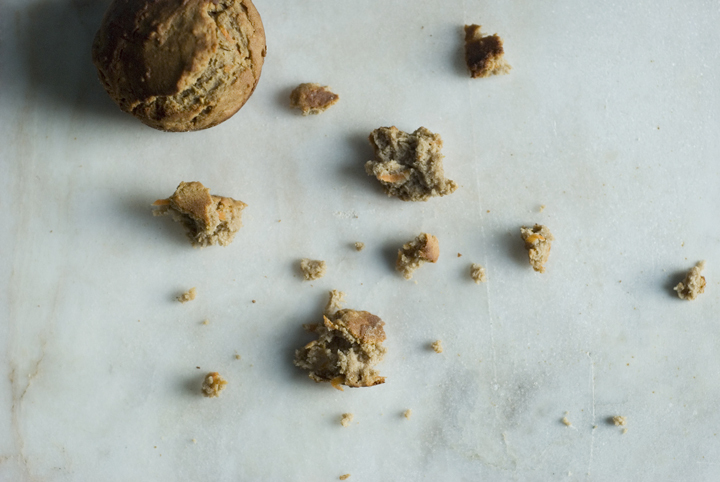
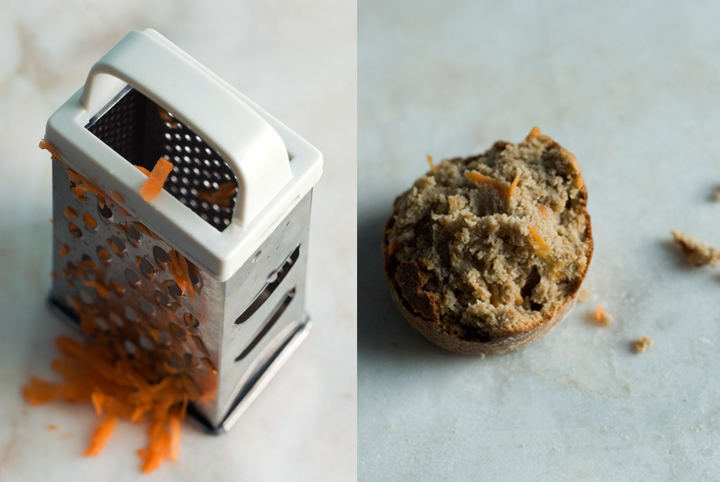
Carrot and Tahini Muffins
Some of my culinary experiments don’t turn out as well as I thought they would, either by lacking flavour and/or photographic charisma. Lately, there were at least three dishes I conceptualized, took notes of and photographed, but ended up not posting up here because, well, they weren’t good enough. A weird tasting celeriac and roasted garlic soup, a watery korma, some herb crusted tempeh that turned out too dry after being baked… I’m well familiar with failure and I’m not defeated by it, as I try to evaluate what went wrong, what could have I done better, and so on – the worst part is, I guess, to actually eat those not so well succeeded attempts.
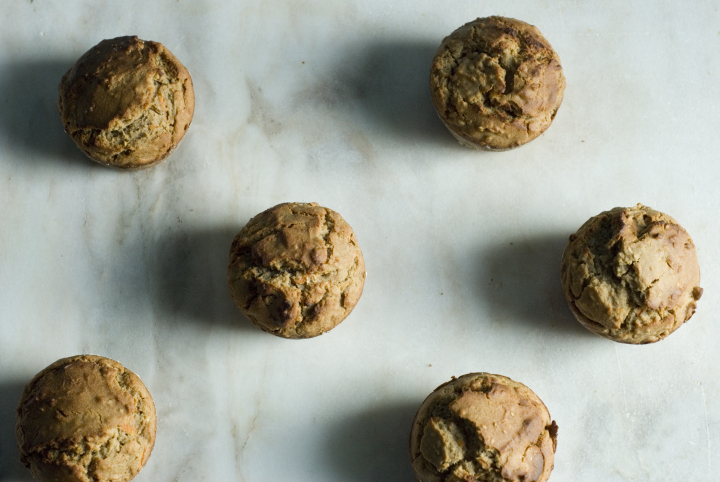
So, when things go wrong, I turn to what I know it’s good – and I’m here talking about these carrot and tahini muffins. I have a (healthy) obsession with tahini. I just love it. I always keep a jar of it in the fridge and another one in the pantry. I have the nasty habit of opening up the tahini jar, take a teaspoon of it, top it up with a few drops of agave nectar, and in it goes. These muffins are dense and nutty in flavour, punctuated by shreds of carrot and toasted sesame seeds. They’re the perfect accompaniment for a cup of tea in the mid-afternoon when, sometimes, that sugar cravings just start to pike up.
Carrot and Tahini Muffins
(for 8 muffins)
Dry mix:
1 cup / 140 g buckwheat flour
1 cup / 120 g brown rice flour
½ teaspoon baking powder
¼ teaspoon baking soda
¼ teaspoon salt
½ teaspoon cinnamon
4 tablespoons toasted sesame seeds
wet mix:
1 tablespoon flax seed meal mixed with 5 tablespoons water
1 cup / 250 ml unsweetened nut milk (I used almond milk)
½ cup / 135 g dark tahini
¾ cup / 185 ml agave nectar
1 cup / 108 g shredded carrots (about 1 large carrot)
melted coconut oil or sunflower oil to grease the muffin tins
1. Pre-heat the oven to 175º/350ºF. Grease with sunflower oil or melted coconut oil 8 muffin tins.
2. In a large bowl, sift the flours, baking powder, baking soda, salt and cinnamon. Add the sesame seeds and stir well to combine.
3. In another bowl, whisk together the flax seed mixture, nut milk, tahini and agave nectar, until well incorporated.
4. Add the wet mixture to the dry ingredients stirring well to combine. Finally, add the grated carrots.
5. Pour the mixture into the greased muffin tins. Bake in the oven for 20 to 25 minutes (mine took exactly 23 minutes). Let the muffins cool a bit in the tins before unmolding and transferring them to a cooling rack. Eat!
Avocado and Kiwi Fruit Pudding with Lime
Avocado is one of those fruits I always keep handy. I used to use it strictly for making guacamole, but then I started incorporating it into salads and, more recently, smoothies and desserts. Fruit desserts and salads are something I’m particular fond of, and today’s recipe was born out of the need to use a great part of the huge bag of kiwi fruit my aunt gave us (she grew and picked it herself). Don’t be skeptical about the use of avocado in here: its primary function is to give creaminess, and you’ll barely feel its taste. On the other hand, if you’re planning on doing this, it’s key to use ripe kiwi fruit, otherwise it’ll taste bitter and give you this weird feeling in the mouth (at least that’s what happens to me when I eat it underripe). Also, and I know this comes with a bit of a delay, but I wish you all a great 2012, full of exciting projects and recipes (I made this list where I wrote down recipes I want to have on my repertoire, and Socca is the first in line, so I guess this is a hint of what might come up next in here).
*Another reason to convince you to try out the avocado-kiwi fruit combo: Jennifer and Jaclyn’s version of a similar pudding.
Avocado and Kiwifruit Pudding with Lime
(serves 4)
for the pudding:
2 avocados (I used one large and one medium sized), (320 g)
7 kiwis (310 g)
½ banana (50 g)
¼ cup (60 ml) agave nectar
zest of two limes
juice of one lime
garnish:
a few banana slices
2 to 3 kiwis, cut into cubes
fresh mint leaves
1. Put all the ingredients for the pudding in a food processor or blender and process until smooth.
2. Divide the pudding among four small bowls and add a few banana and kiwi fruit slices on top, as well as some mint leaves. Serve and enjoy!

8 comments