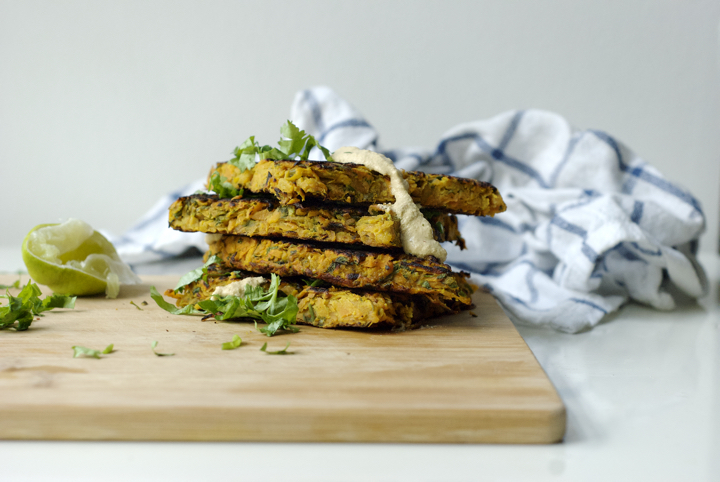
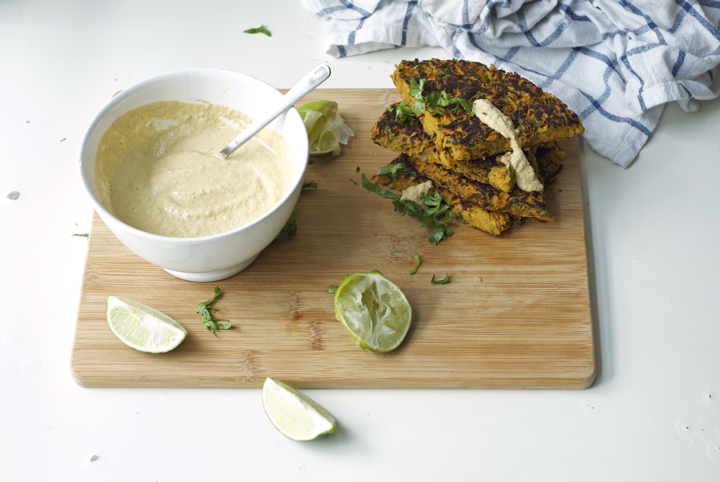
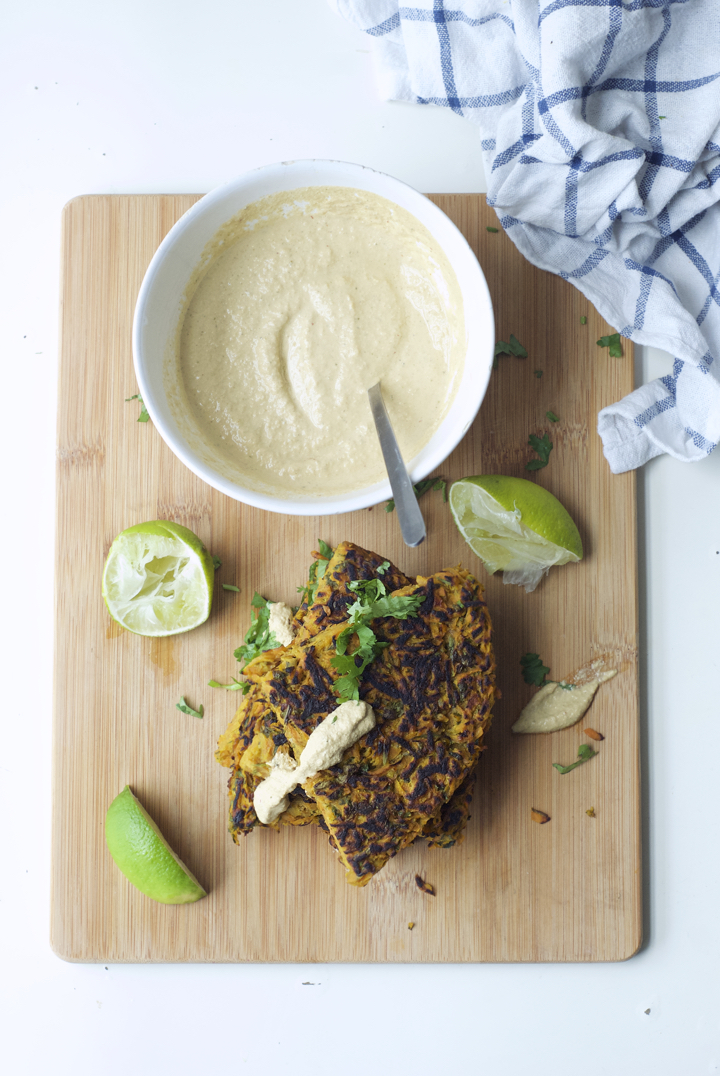
Carrot Fritter with Sunflower, Pumpkin Seed & Harissa Sauce
One of my grandmother’s signature dishes is carrot fritters. They’re all small and irregular in shape, and are pan-fried until golden brown, sometimes on the verge of burnt around the edges. She usually serves them with broccoli rice on the side, which is actually just rice cooked with broccoli florets on top, but tastes delicious nonetheless. The simple meals I have at her place are some of the best I’ve ever had (her lentil rissoles are insane, as it’s her sautéed cabbage with peas and mint), proving that vegan food doesn’t have to be complicated to be tasty or rely heavily on expensive, hard to find ingredients.
The other day I had a sudden urge to eat the carrot fritters and made my own version of her classic, only slightly changing the shape and making one big fritter instead of various small ones. I also added chickpea flour instead of wheat flour to bump up the protein content of my fritter. This one isn’t a particularly inventive recipe, but I’m amazed at how good it tastes, especially when served with the sunflower and pumpkin sauce. I don’t generally like to brag about recipes, but this is one really is a hell of a sauce. It’s very easy to put together and doubles as a pasta and salad sauce too. Plus, it’s full of healthy fatty acids, which is good for you and your skin.
Now, into more specifics: the fritter’s “dough” might seem like it doesn’t hold together very well, but I can assure you it won’t fall apart while cooking. Using a non-stick frying pan (look for non-teflon options, like these), or seasoning your regular pan with a generous glug of olive oil is key here, since you don’t want all that crispy bits to get stuck.
Hope you like the fritter as much as I do. I’m already thinking about how I’ll style and shoot the next recipe (which happens to be today’s dinner), so see you soon!
Carrot Fritter with Sunflower, Pumpkin Seed and Harissa Sauce
Serves 2, as a main
For the Carrot Fritter
2 Tablespoons melted coconut oil or olive oil, divided
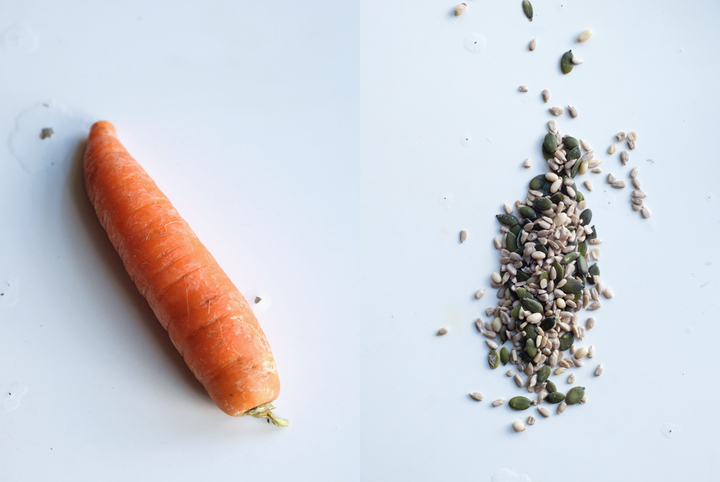
3 large carrots, grated
½ teaspoon sea salt
freshly ground pepper, to taste
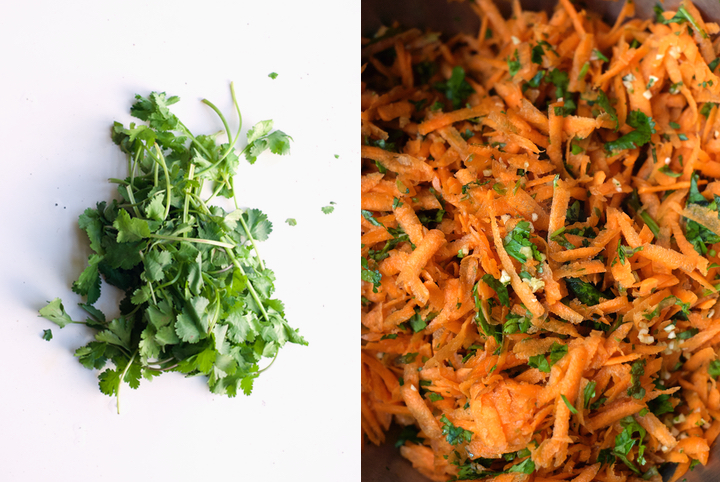
1 handful fresh coriander, finely chopped
1 large garlic clove, minced
3 heaped Tablespoons chickpea flour
For the Sunflower, Pumpkin Seed & Harissa Sauce
2 ½ Tablespoons Sunflower seeds
2 ½ Tablespoons Pumpkin seeds
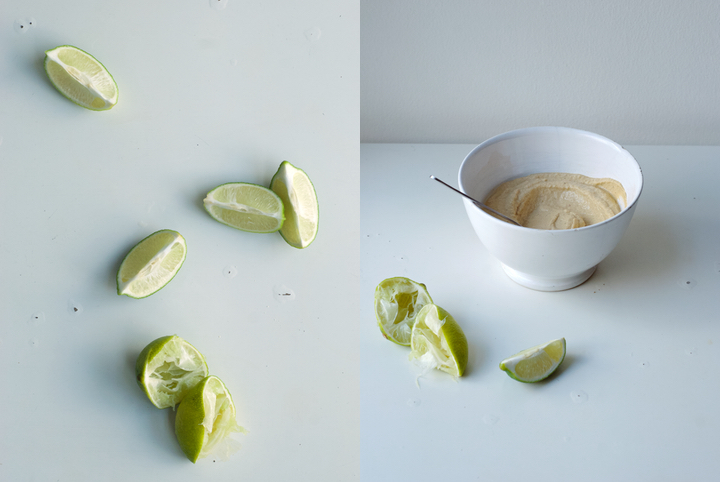
juice of one lime
7 Tablespoons water
1 Tablespoon olive oil
1 /2 teaspoons harissa
¼ teaspoon sea salt
freshly ground black pepper
Combine the sunflower and pumpkin seeds in a medium sized bowl. Pour one cup of boiling water over them, cover with a lid and let the seeds soak for at least 1 hour. After that time, drain and add them, along with the other ingredients for the sauce, to a blender. Blitz until you get a creamy, smooth mixture. If it seems too thick, add a little more water (1 or 2 Tablespoons should do). Adjust the seasoning before serving.
Combine all the ingredients for the fritter in a large bowl. Add 1 Tablespoon of coconut or olive oil to a small, 18 cm in diameter non stick frying pan over medium heat. When the oil is hot, but not smoking, add the carrot mixture. Using a spatula, spread the carrot mixture over the pan, smoothing the surface by gently pressing it down. Cook for 4-5 minutes. After that time, place a plate over the top of the frying pan and gently flip the fritter over. Add the remaining tablespoon of coconut or olive oil to the pan, return it to the heat and, once hot, add the fritter back in, golden side up. Fry for additional 5 minutes. Serve with the sauce.
Bindaetteok (Korean Mung Bean Pancakes) with Sesame-Ginger Sauce
 I had some friends coming over for dinner last weekend to taste some of my fermentation experiments. Amongst kimchi, sauerkraut (which will be covered soon), a sour coconut chutney and other little things, these mung bean pancakes were served. They’re not fermented per se, but do call for the use of kimchi, one of my favourite live foods.
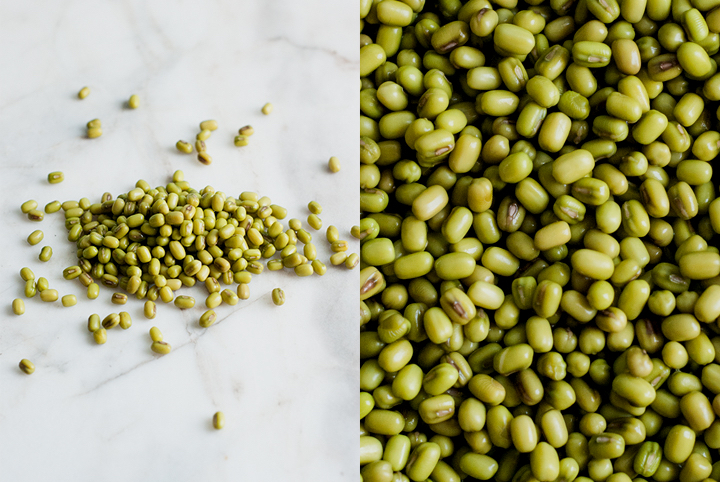
I looked up online for several bindaetteok recipes and they all used the same basic ingredients – dried mung beans, sesame oil, rice and water. The amount of rice called for in those recipes was so little that I actually decided to omit it altogether. I also realised that the mung beans they use in Korea to make these pancakes are peeled and split, whereas the ones I find in the stores are sold whole. Needless to say, I used them whole and had not issues at all. I assume the batter is probably coarser than if I had used split beans, but I do like the extra texture.
 Kimchi is hard to find in Portugal and even though I prefer these pancakes with it – because of the tangy and sharp flavours it gives to the batter – it’s possible to use finely chopped spring onions instead. Just bear in mind kimchi is the ingredient that gives them character, so a kimchi-free version of the pancakes won’t certainly taste as authentic. Having said this, I highly encourage you to make your own (recipe here!) – it’s quite easy and, if you haven’t tasted if before, you’ll be in for a wonderful taste experience that’s unusual for the western palate.
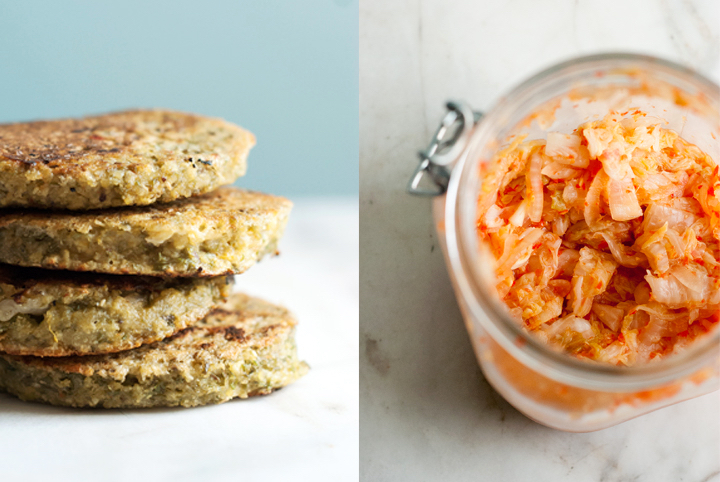
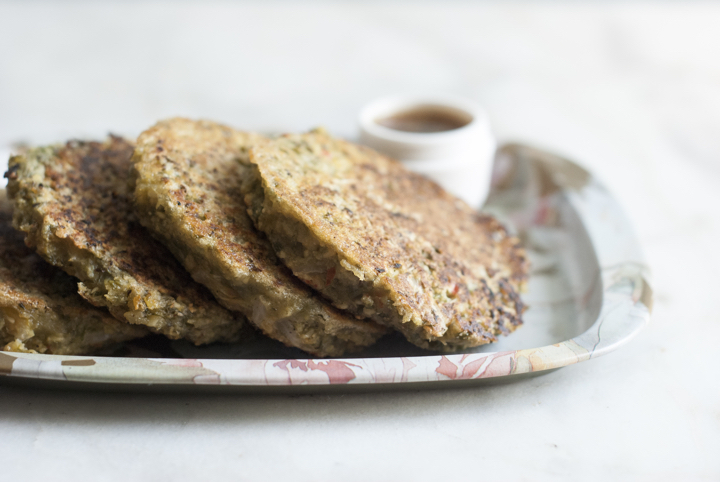
Bindaetteok (Korean Mung Bean Pancakes) with Sesame-Ginger Sauce
(makes 8-10 pancakes)
for the pancakes:
190 g / 1 cup mung beans, soaked overnight
1 teaspoon toasted sesame oil
1 teaspoon tamari sauce
½ teaspoon salt
60 ml / ¼ cup kimchi juice
60 ml / ¼ cup water
90 g / ½ cup kimchi
vegetable oil for shallow frying
for the sesame-ginger dipping sauce:
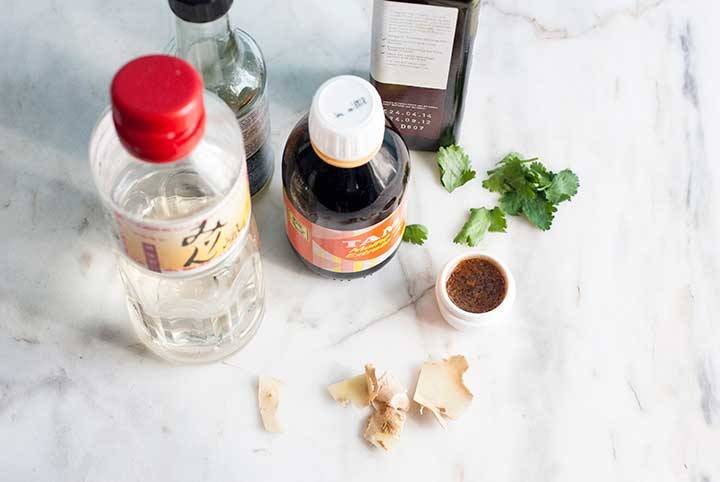
20 g fresh ginger
1 teaspoon toasted sesame oil
2 tablespoons tamari sauce
1 small garlic clove minced
1 tablespoon mirin
2 tablespoons water
1 tablespoon rice vinegar
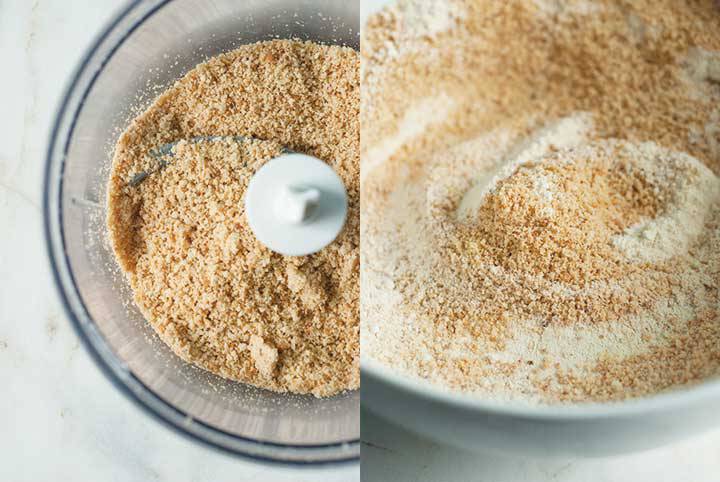
Drain and rinse the beans. Add them to the bowl of a food processor along with the other pancake ingredients, except the kimchi. Process until a thick batter comes together – don’t worry if it doesn’t get perfectly smooth; it’s okay if it’s only coarsely pureed.
Heat a large skillet over medium high heat and add 1 to 2 tablespoons of oil, tilting the pan to ensure the oil is evenly distributed. When the oil is hot, but not smoking, drop 2 tablespoons of the batter at a time. Cook the pancakes for 2-3 minutes on each side or until golden brown.
For the sesame ginger sauce, peel and grate the ginger. Squeeze the ginger over a bowl to extract its juices and discard the pulp. Add the remaining sauce ingredients to the bowl and whisk everything together.
Turmeric & Almond Cookies

My oven is mostly used to roast vegetables (during the last couple of weeks, it roasted an obscene amount of beets and onions) and to make bean casseroles and kale chips. The occasional loaf of bread also comes out of it but cakes and cookies really are a from-time-to-time affair. I have way more ideas for savory dishes than I have for desserts so, whenever I have an idea for a sweet treat, I put my hands to work.
 These gluten free turmeric-almond cookies are dead simple to make. The dough comes together in a breeze and you don’t even have to roll it. They aren’t overly sweet and I like to eat them plain, but you can definitely slather them with a fruit compote or marmalade if you wish. As I’m writing this, it comes to my mind that you could add some caraway seeds to the dough or use orange zest instead of lemon. Turmeric is a spice with a mild earthy taste, so a few additional flavours are always welcomed.
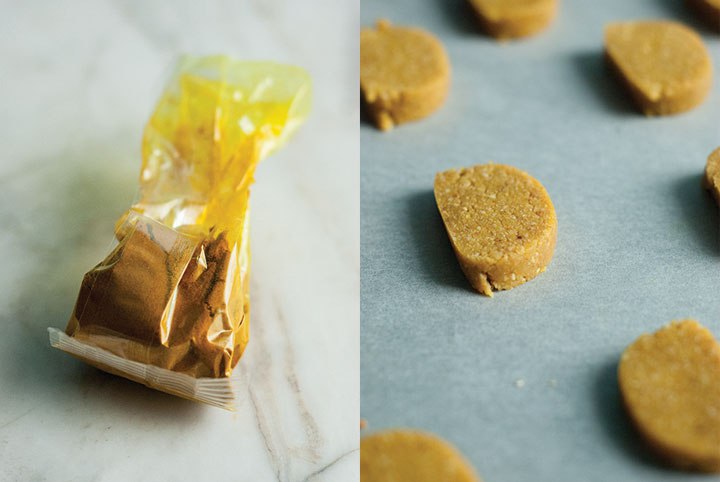
 Turmeric & Almond Cookies
(makes about 30 cookies)
90 g / ¾ cup peeled almonds
105 g / 3/4 cup brown rice flour
60 g / ½ cup corn flour
60 g / ½ cup quinoa flour
½ teaspoon salt
2 teaspoons ground turmeric
zest of one lemon
125ml / ½ brown rice syrup
80 ml / 1/3 cup olive oil
In a dry skillet over medium heat, toast the almonds for 4 to 5 minutes, or until they’re golden brown. Let them cool and, once cooled, grind them in a food processor until you a fine meal.
Add the almond meal, brown rice, corn and quinoa flours, salt, turmeric and lemon zest to a large bowl. Mix everything together. In a separate bowl, combine the brown rice syrup with the olive oil.
Add the wet mixture to the dry one and mix, forming a dough. Cut the dough into two equal pieces. In a lightly floured surface, roll each piece of dough into a log with roughly 4 cm in diameter. Wrap the logs tightly with cling film and seal the ends with kitchen twine. Put the logs in the freezer for 45 minutes to an hour, to firm up. In the meantime, Pre-heat the oven to 180C /350F.
Once the logs have chilled, cut them into 0.7-1 cm disks. Place the disks in a large baking tray lined with parchment paper. Since the cookies won’t rise much while baking, you can put them close together. Bake for 10-12 minutes or until golden brown.
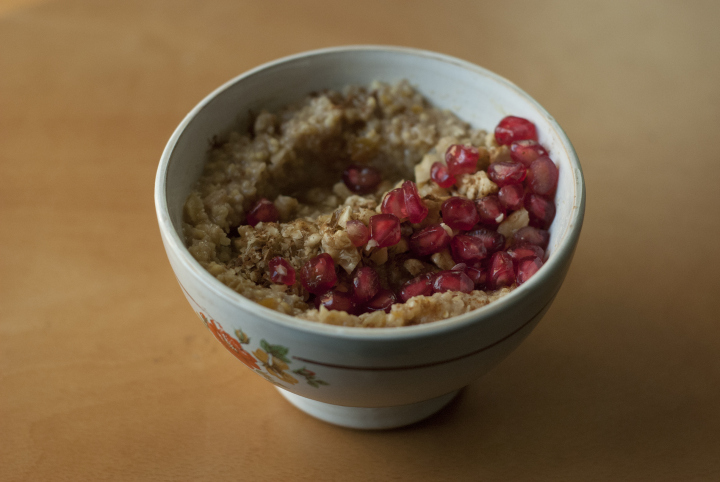
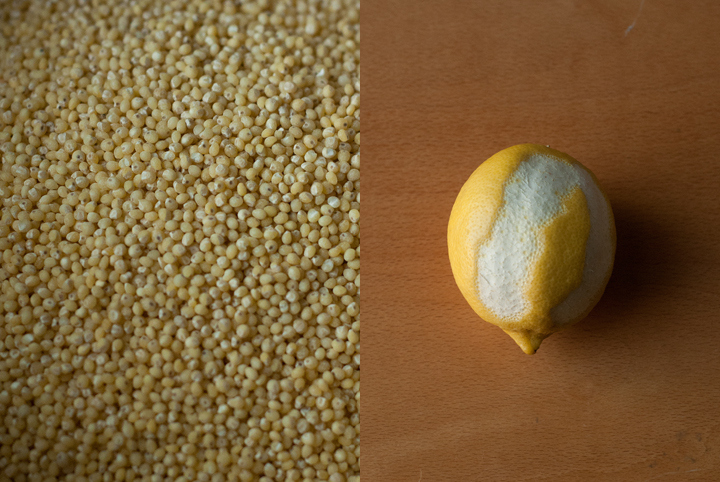
Millet Breakfast Bowl
Even though I have a few favourite foods and I’m, at times, fixated over some specific ingredients (this time around, pomegranates is what I’m obsessed with), I pretty much like to vary what I eat. I do not usually plan what I’m going to have; I’d rather go to the market and, based on what I find and seems to be the freshest produce, I make my own choices.
However, this “go with the flow” attitude doesn’t apply to breakfast. For breakfast, I almost always have oatmeal porridge with raw cacao and a sliced banana. When I say “almost always” I actually mean I’ve been having this very same breakfast, everyday, for almost 3 months in a row. Coming from a person who’s pretty curious when it comes to try plant-based foods and ingredients, this is a bit embarrassing. However, having acknowledged that, I’ve been trying to be a bit less predictive when it comes to breakfast fares. This millet bowl, even though sharing the same spirit as my dearest oatmeal porridge (creaminess, warmth…), is a totally different thing. Its flavour profile reminds me, somehow, of Halva, the greek dessert, because of the nuts and dried fruits. It’s sweet, creamy, comforting… and pretty much everything I crave in the cold autumn mornings.

I already have a couple more ideas for different breakfasts on my mind and, as this blog is lacking breakfast foods, I’m eager to share a couple more with you in the meantime. I’ll also come back soon with a few Christmas-inspired recipes. (;
Millet Breakfast Bowl
(serves 4 to 6)
200 g / 1 cup millet
1 tablespoon olive oil
45 g / ¼ cup dried apricots, chopped
35 g / ¼ cup golden raisins
1 big handful /35 g walnuts , finely chopped
1 strip of lemon or orange rind
500 ml / 2 cups unsweetened almond milk
125 ml / ½ cup water
80 ml / 1/3 cup brown rice syrup
½ teaspoon cinnamon
1/8 teaspoon salt
In a medium sized pot, over medium heat, heat the olive oil. Add the millet and fry it in the oil, stirring constantly, until golden brown (about 3-4 minutes).
Add the cinnamon, lemon or orange rind and salt to the millet, followed by the almond milk and water. Bring the mixture to a boil, and once boiling, decrease the heat to medium-low. At this point, add the brown rice syrup, apricots, golden raisins and walnuts and give everything a good stir. Cook over low heat for 20-25 minutes. It’s ready as soon as the mixture is soft and creamy.
Serve and eat while warm, with an extra drizzle of brown rice syrup, a few more walnuts and some pomegranate seeds.
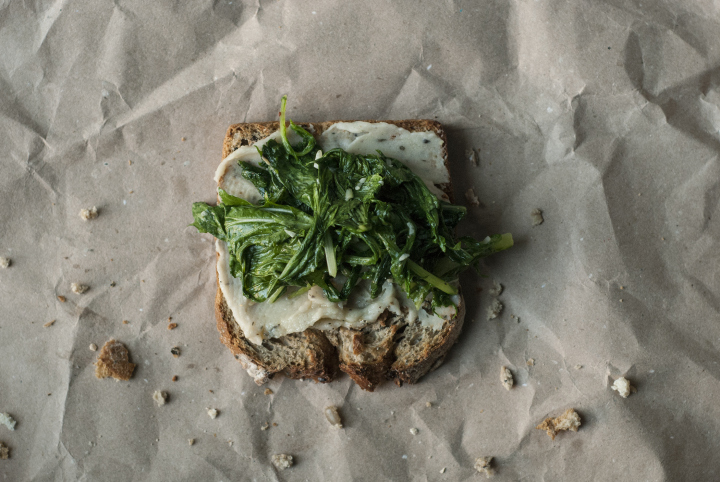
White Bean and Roasted Garlic Tartines with Wilted Greens
My favourite sources of plant-based proteins are, without doubts, beans and legumes. I’ve been eating them in abundance since I was a kid (usually in the form of soups) so they’ve never been things I’ve had to learn to like. Part of the reason why I prefer legumes over soy-based products such as tofu, for protein, is because they bring more variety of textures and flavours to the dinner table. Chillis, hearty stews, dips… there’s a whole world of possibilities with beans (and there are quite a lot different varieties to try). Besides, they’re minimally processed, something tofu isn’t.
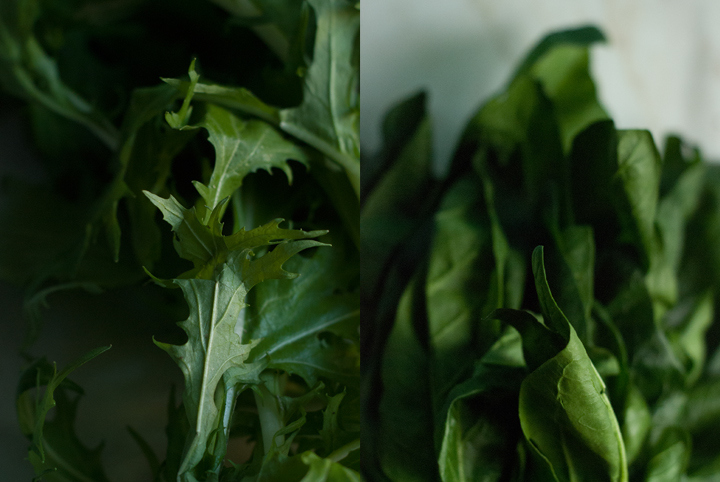
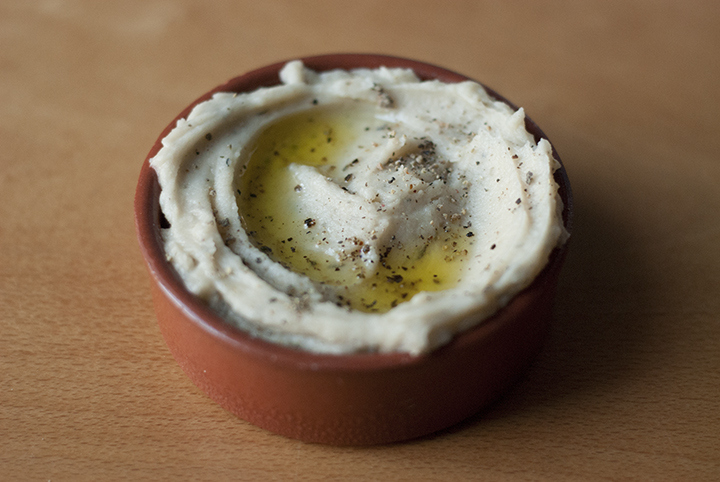 Casseroles/stews and dips have been my favourite ways of eating beans. White beans work particularly well in veggie dips as they get really soft and smooth when blended. Plus, their taste isn’t particularly strong or dominant, so you can play around quite a bit and combine them with a lot of different ingredients (another favourite of mine is the white bean and miso combo). As far as the greens go, I used both spinach and Japanese greens in here. They were simply and quickly (no longer than 2 minutes) sautéed with garlic and olive oil and added atop of the toast for a bit of bitterness. You’ll probably end up with more bean dip than you’ll actually need for the toasts – the leftovers keep well in the fridge for a week and are really great smeared on savoury pancakes and/or as a filling for lettuce wrappers.
White Bean and Roasted Garlic Tartines with Wilted Greens
(makes 4 to 6 toasts)
for the white bean and roasted garlic dip:
1 large garlic head / 70 g, top sliced off
1 ½ cups cooked white beans (canned is fine)
¼ teaspoon salt
½ teaspoon dried thyme
¼ teaspoon black pepper
2 tablespoons lemon juice
1 tablespoon olive oil
for the wilted greens:
250 g spinach or Japanese greens or, as I used, a mixture of both in equal parts
1 big garlic clove, minced
2 teaspoons olive oil
1 pinch red pepper flakes
salt to taste
lots of freshly grated nutmeg
4 to 6 slices of a good, whole grain bread
Pre-heat the oven to 180º.
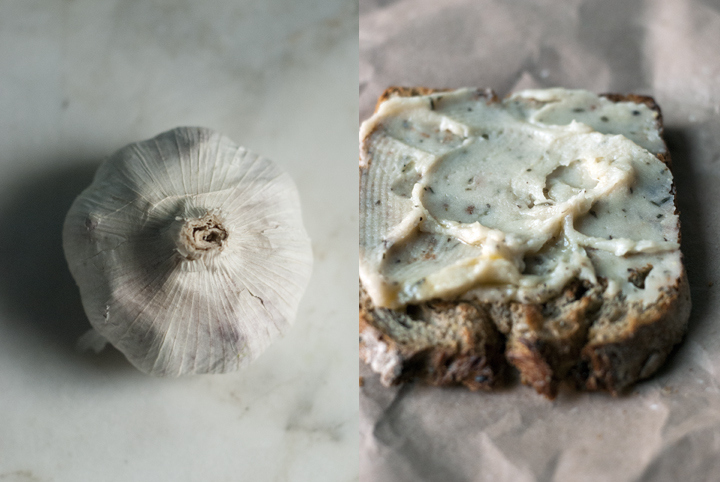
Grab a piece of aluminium foil (15 by 15 centimetres is more than enough) and add a drizzle of olive oil over it. Place the garlic head, cut side down, over the foil and add a pinch or two of salt. Wrap the foil around the garlic head and put it in the oven, in the middle rack. Roast for 30 to 40 minutes.
In the bowl of a food processor, combine the white beans, salt, dried thyme, black pepper, lemon juice and olive oil. Squeeze the roasted garlic cloves out of their skins and add them to the bowl. Process everything until very smooth.
In a cast iron pan over medium heat, add the garlic, olive oil and red pepper flakes and fry for no longer than 30 seconds. Add the greens and gently stir everything together so that the greens get evenly wilted. Cook the greens no longer than 2 minutes and, at the very last moment, add freshly grated nutmeg.
In a separate pan, toast the slices of bread.
Spread a layer of the bean mixture over the bread slices and add the greens on top. Drizzle a bit more olive oil over each toast, if desired, and eat immediately.
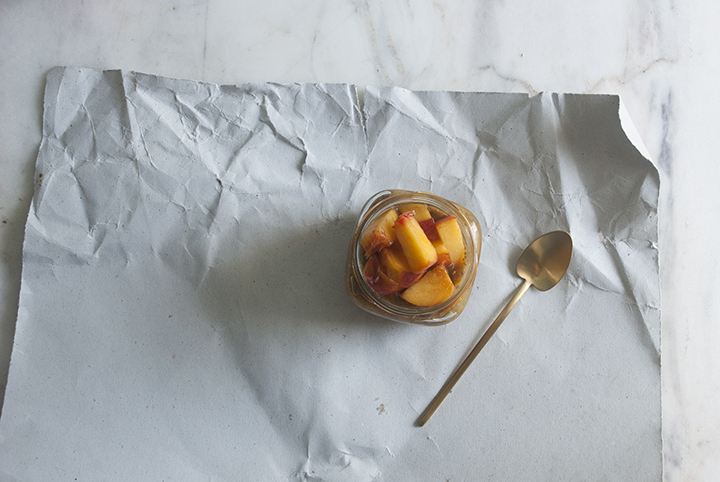
Summer Peach Pudding
What I’m about to say might sound a bit weird, especially coming for someone in her mid-twenties who lives relatively close to the sea, but, I do not like going to the beach. I don’t like walking on sand and lying down in a beach towel with the sun hitting my back. I’m also not a fan of swimming (nor I do know how to swim well), particularly when the sea is packed with people (and, this time of the year, it is most of the time). Having said that, summer isn’t the season I’ve been anxiously waiting for the whole year.
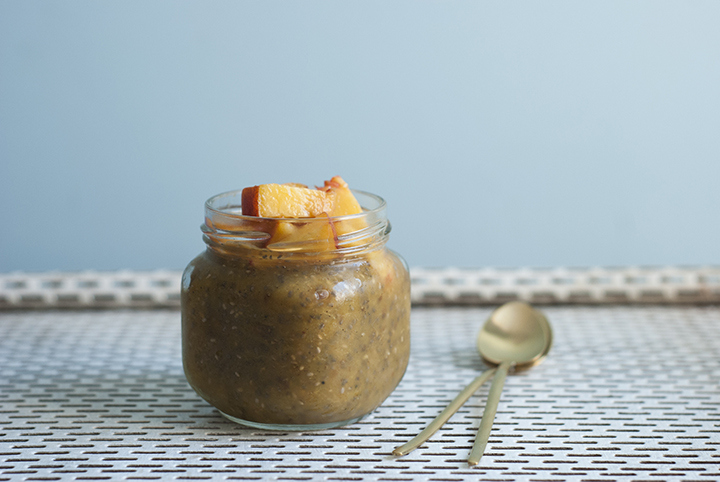
But, even thought warm weather (particularly when it’s above the 30 degrees) and salty water aren’t my cup of tea, I do love summer’s produce. Watermelon and peaches are amongst my favourite fruits and I seem not to get enough of them these days. Early in the week, I went to the market and those good looking peaches definitely caught my eye. I was probably too enthusiastic about them, having bought way more than I could realistically eat before they start to over ripe. Not wanting to turn on the oven to bake a peach tart (my original plan), a raw pudding was in order.
Now, everyone who’s into whole foods have probably already used chia seeds to make puddings – it’s quick, almost effortless, and fits into the healthy-guilt-free-dessert category. I kind of regret having arrived late at the chia pudding party, because I definitely didn’t expect this treat to taste so good. It’s the perfect summer dessert – light, fresh and fruity. Did I say it’s also ridiculously easy to make? All you have to do is to peel and cut a couple of peaches and mix them in a food processor with chia seeds and dates. Pulse a few minutes, refrigerate for 1 or 2 hours – so that the chia start doing their magic (aka absorbing the moisture and thickening things up) – and that’s about it. Next time around I’ll be using apricots instead of peaches, and maybe trying out a different version with frozen watermelon, for an even fresher and almost sorbet-like dessert. Wish you guys a great weekend! (:

Summer Peach Pudding
(serves 4)
3 large peaches or nectarines / 700 grams, peeled, cored, and cubed
2 medjol dates, finely chopped
55 g / 1/3 cup chia seeds
1 vanilla bean, open lengthwise and seeds scraped (optional)
Combine all the ingredients in the bowl of a food processor. Blend for a few moments or until smooth. Have a taste and, if it’s not as sweet as you’d like, add a few more medjol dates and blend again. Transfer the pudding to small bowls or jars, refrigerate for 2 hours, and serve. Garnish with extra chopped peaches if you like.
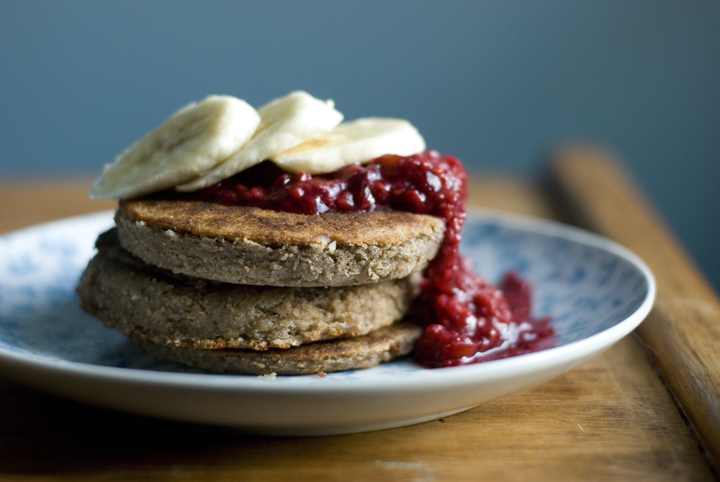
Buckwheat and Hazelnut Pancakes
I think I just found out the reason why I don’t normally post breakfast recipes in here. I love breakfast and, in fact, mornings are the time of the day when I feel the most hungry. However, shooting breakfast foods is, for me, a bit painful because that means I have to hold back my hunger and only eat after I’ve taken pictures of said foods (which can take a while).
After waking up and drinking a few glasses of water, I go into the kitchen and, usually, cook myself a big bowl of porridge. When I’m feeling lazy, granola with almond milk will do. I like routine and I’m pretty good at sticking to it, so my breakfast doesn’t vary much. Actually, and that might come as shock to some of you, I only tasted pancakes a few years ago, when this book came out and I tried its recipe (which I highly recommend) for the well known breakfast treat. This time around, though, I decided to create a pancake recipe following my own instinct. I’m not quite sure that was a good idea: my early attempts didn’t come out well, so I kept trying through the whole last week and ended up eating pancakes for breakfast for the most part of it.
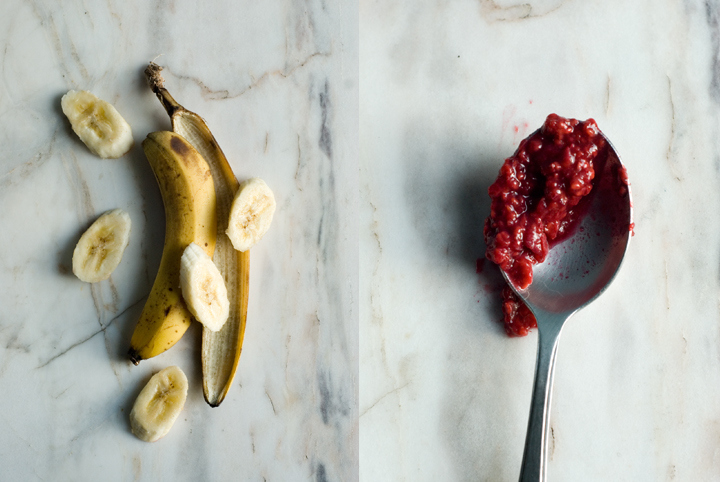
There’s no actual science behind making pancakes and you can definitely adjust the process a bit to your own liking. There are people who prefer theirs fairly thick, while others might like them more on the thinner side. I fit into the former category. For this recipe, and in order for the pancakes to have a good height, I used a metal ring so that the batter didn’t spread to the sides. This is, of course, an optional extra step. For serving, I topped mine with a raspberry-date compote I’ve made early last week, but they do taste heavenly with just a good drizzle of maple syrup on top.
Buckwheat and Hazelnut Pancakes
(makes 4 to 8 pancakes, depending on their size)
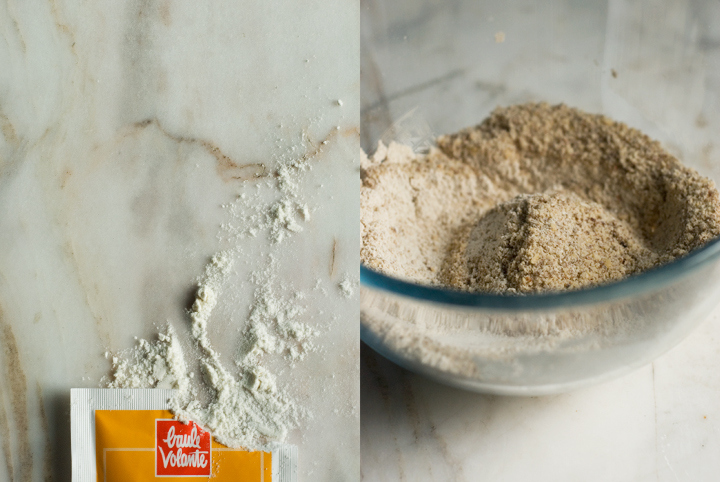
50 g / 1/2 cup hazelnut meal
120 g / 3/4 cup buckwheat flour
2 teaspoons baking powder
1/4 teaspoon salt
1 tablespoon coconut sugar
310 ml / 1 1/4 cups oat milk (or any other dairy-free milk)
melted coconut oil for greasing the skillet
Add all the ingredients (except the oat milk) to a bowl and mix well. Slowly pour in the oat milk and whisk to combine. You’ll get a fairly thick batter, which is what you’re looking for.
Using a pastry brush, grease a large non-stick skillet with the melted coconut oil. Turn the heat to medium and, when the pan is hot, drop for each pancake 3 to 4 tablespoons of the batter. Cook the pancake for 2 to 3 minutes or until its top has just started to set. With a spatula, turn it over and cook for one additional minute.
Repeat the process with the remaining batter. Make sure you grease the pan with additional coconut oil each time you drop the batter into the skillet. Serve the pancakes with agave nectar or maple syrup or, as shown above, with a raspberry-date compote and banana slices.
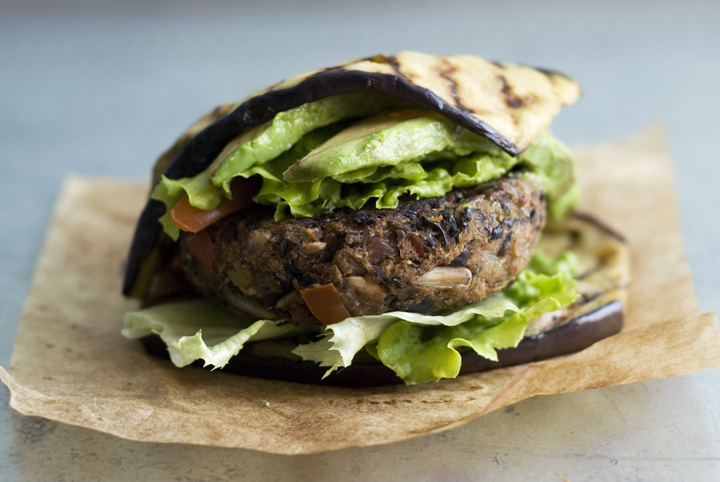
Black Bean and Red Pepper Burgers
If you check this blog regularly, chances are you’ve probably noticed that I have a soft spot for veggie burgers. Out of the 62 recipes posted to date in here, 6 of them consist of some sort of patties – and being honest, I think there will be a lot more to come. What I mostly like about veggie burgers is that you can play around with ingredient and flavour combinations – mixing spices, nuts, whole grains, legumes and vegetables – and end up with a protein-packed component of a dish. When paired with a salad of sorts, they make quite a satisfying meal.
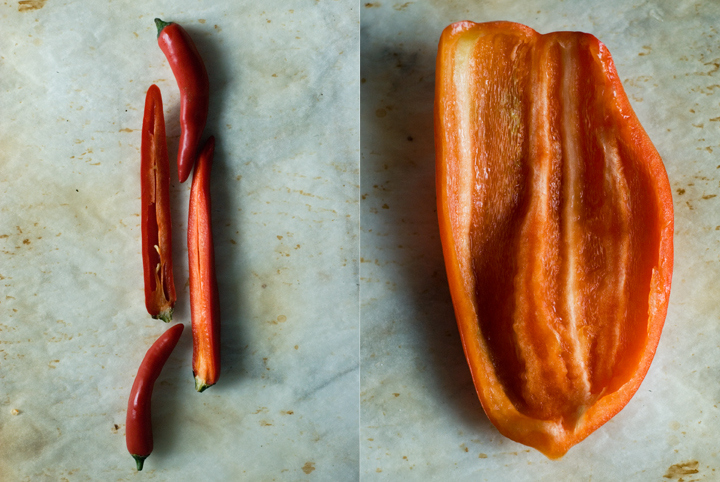
This burger in particular came out of the need to clean up the fridge: there was this neglected pepper in the bottom shelf that would go bad in a matter of days, halves of onions wrapped up in parchment paper for a supposed later use, a nearly empty large jar of olives… I could go on. I strongly encourage you to give these a try as they have a contrast of flavour and texture – soft and salty olives / crunchy and nutty seeds – that really seals the deal for me.
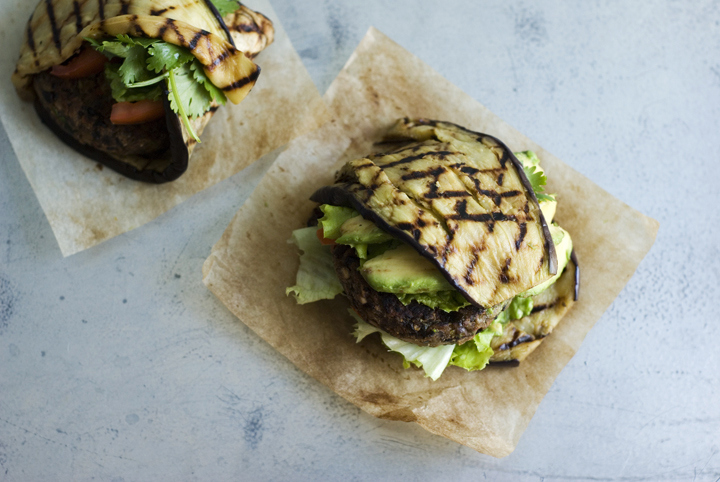
When it comes to serve them, this time around I thought of something different from “the classic” – in between two pieces of bread – and came up with the idea of wrapping the patties in thin slices of grilled eggplant. The eggplant adds extra moisture and a distinct smoky flavour that I’m particularly fond of. In case you want to up the patties’ (already high) protein content, an open-faced “sandwich” made with grilled Portobello mushrooms – just like this one – would be an excellent choice.
Black Bean and Red Pepper Burgers
(makes 6 patties)
2 large onions / 300g / 2 cups, finely chopped
1 medium sized red bell pepper / 220g / 1 cup, finely chopped
1/2 teaspoon salt
2 large garlic cloves, finely chopped
1 teaspoon coriander seeds, lightly crushed in a mortar and pestle
1 ½ teaspoons cumin seeds, lightly crushed in a mortar and pestle
2 tablespoons olive oil
¼ teaspoon smoked paprika (1/2 teaspoon if using regular paprika)
240 g / 1 ½ cups cooked black beans, rinsed and drained
60 g / ½ cup buckwheat flakes (you can substitute with rolled oats)
55 g / 1/3 cup green olives, coarsely chopped
40 g / 1/3 cup sunflower seeds
1 big handful chopped coriander
Heat a large skillet over medium-high heat. Add the sunflower seeds and toast them for 3 to 4 minutes, or until they’re golden brown and smell fragrant.
In the same skillet you used for toasting the seeds, add the finely chopped garlic cloves, coriander and cumin seeds, smoked paprika and olive oil. Cook the spices and garlic over a medium-high flame for 1 minute.
Add the onions, pepper and salt to the skillet, give it a good stir, and turn the heat down to medium-low. Cover the skillet with a lid and let the mixture cook for about 15 minutes, or until the onion and pepper bits are soft and slightly caramelised. You should check the skillet every 5 minutes to avoid burning the mixture – if the latter seems dry, add up to 2 tablespoons of water each time you check it out.
Once the onion mixture has been cooked and cooled down, add half of it to the bowl of a food processor. Add the beans as well. Pulse a few times, or until you get a sticky but consistent paste.
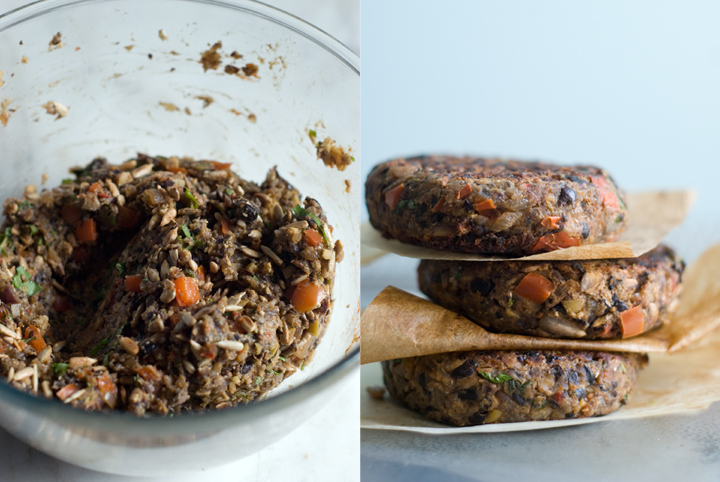
Transfer the bean and onion mixture to a bowl. Add the buckwheat flakes and incorporate well using a wooden spoon. Add the chopped green olives, toasted sunflower seeds and coriander as well. Mix again. You’ll end up with a slightly moister mixture, but it should still be possible to make patties out of it. To make the job easier, wet your hands with cold water and shape the mixture into 6 burgers (or more, depending on the size you choose).
Heat 1 tablespoon of oil, over a medium flame, in a large skillet. Add the patties and cook them for 3-4 minutes on each side. Serve with your favourite condiments and fixings or as suggested above.
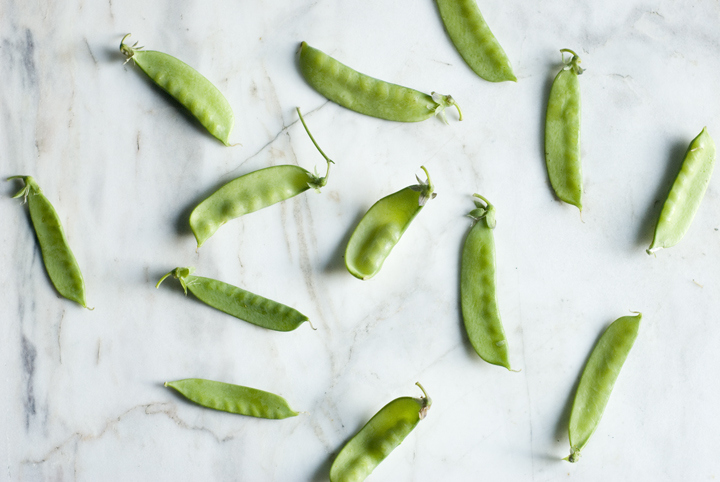
Snow Pea and Roasted Almond Pesto
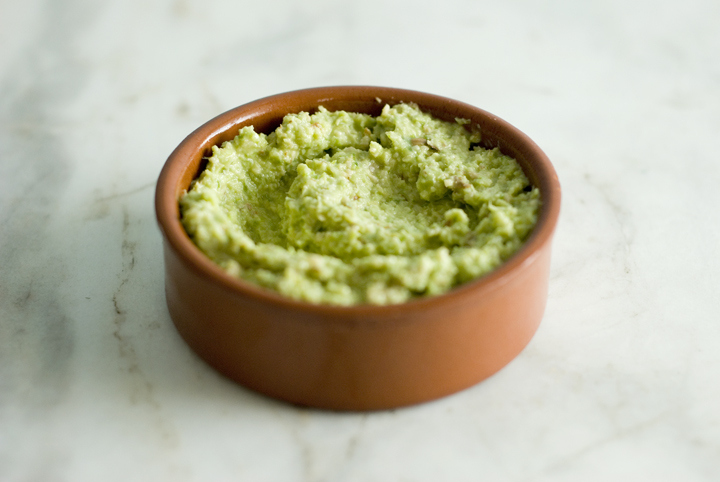
The other day I got a big bag full of spring goods from my aunt’s garden – it had snow peas, pea pods and fava beans (also still in their pods) in there. I sat down in front of the tv for a good hour peeling the pea and fava pods, and by the end of it there was this huge pile of green pods and a smaller one with the actual edible produce (that was eaten in the next two or three days). However, the bag also contained a considerable amount of snow peas (and, thankfully, those do not need to be shelled), and even though I love eating them the simplest way possible – sautéed for just a few minutes with garlic and olive oil – I felt I needed to do something a little bit different with them just for the sake of variety. And so this pesto recipe was born.
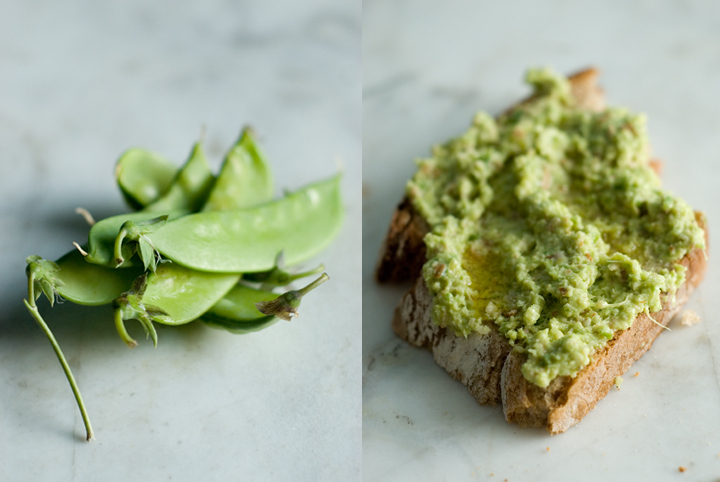
It’s as easy as it gets – mix a couple ingredients in the food processor, purée, season and enjoy. I prefer my almonds toasted (I think they’re more flavourful that way), but if you don’t want to turn on the oven just to toast them, you could use them in their natural state and still end up with a tasty, somewhat unusual, pesto. I brought some of it to a dinner party and we ate it over bread, crackers and even as a dipping sauce/paste to spring rolls but, really, you could do a whole lot of things with it – it’s excellent as pasta sauce, for instance.
Oh and last, but not the least: this blog is now on facebook. Go over there if you want to follow it as it is going to be updated regularly.
Snow Pea and Roasted Almond Pesto
(makes, roughly, 1 1/2 cups)
200 g snow peas
1/3 cup / 55 g almonds with their skins on
zest and juice of one medium lemon
½ cup / 125 ml extra virgin olive oil
½ plus 1/8 teaspoons sea salt
2 garlic cloves
a few sprigs of lemon thyme
Pre-heat the oven to 180ºc /350 F.
Rinse the snow peas and, while trimming their ends, slide your finger along one side to remove any tough strings. Coarsely chop them.
Arrange the almonds evenly on a baking tray. Roast them for 8 to 10 minutes or until golden brown. Set them aside to cool. When the almonds are cool enough to be handled, chop them coarsely.
Put all the chopped snow peas and almonds in the bowl of a food processor along with the other ingredients. Process for 1 to 2 minutes until smooth. Have a taste and adjust the seasonings if needed. Transfer the pesto to a large bowl and store in the fridge. Use within 2-3 days.
Luísa’s Flatbread

I’m glad to have friends who like to cook. More than that, I’m glad to have friends who can actually cook quite well. There are some who have an undeniable sweet tooth; others who are their best when cooking savoury dishes; some others who are experts on the art of ultimate clean-up-the-fridge meals; those who don’t actually cook at all, and even those rare species who don’t actually cook at all but always value a great, high-quality meal.
Having said this, I’m not quite sure if Luísa matches any of these patterns. I’d rather say she just enjoys cooking, and specially fascinates (as I do) with the social phenomenons which revolve around the act of preparing and eating food such as, for instance: people cooking together, exchanging ideas, methods and recipes; sitting at the table and sharing a good, homemade meal, with closest friends and family. We’ve been talking lately about making a sort of cooking meeting, where we (amongst other people) would cook and share our specialities and enjoy a great meal together in the end – I’m so looking forward to that to happen.

We didn’t know we had common visions towards food until a few months ago, when we got to know each other better at that barbecue party thrown in order to celebrate the end of the semester. She was preparing flatbreads and, as a bread lover you already know I am, that immediately caught my attention. Her method (I won’t call it a recipe, as she was actually following her intuition in order to achieve the desired results) couldn’t be easier: flour, salt, olive oil and water, all mixed together in order to produce a lovely soft dough which is afterwards rolled out and cooked in the oven until crisp. Since then, I’ve used her “method” a lot of times always with successful and delicious outcomes, so today I thought writing down a proper recipe for you. This time around, I have made the flatbreads in the grilling pan and actually enjoyed them more that way (by grilling them, you can control the cooking time more easily, avoiding over-cooking). Luísa had, in her version, only used regular flour ,so I thought combining it with spelt flour for a dough with a more distinct flavour – if you don’t have it at hand, regular (preferably high grade) flour will do it. You can certainly play a lot with this recipe too: adding spices, fresh or dried herbs to the dough is always a good idea. So far, I’ve tried a batch with dried thyme and oregano and another one with crushed cumin seeds – both were that good. Thank you Luísa! ; )
Luísa’s flatbread
(makes 5 to 6 portions)
Ingredients:
108 grams (3/4 cups) high grade flour
65 grams (1/2 cup) spelt flour
½ teaspoon fleur de sel
¼ cup olive oil, plus extra, for drizzling
1/3 cup (80 ml) warm water
1. In a large bowl, combine the dry ingredients.
2. Add the olive oil to the bowl, stir with a spatula or a wooden spoon, and then slowly pour in the water, stirring as you go. Now, you can start working the dough with your hands.
3. Transfer the dough to a floured surface and kneed it for 5 minutes, or until it’s elastic. Add a bit more flour to the dough if it feels sticky (I didn’t have to add any, but I suspect it always depends on the temperature and/or humidity of the place you are in).
4. Divide the dough into 5 equal portions. Roll out each portion so that it’s about 32 cm (about 12.5 inches) long. Let it rest, covered with parchment paper, for 5 minutes at room temperature.
5. In the meantime, heat a large grilling pan over medium-high heat and lightly coat with olive oil. When hot, but not smoking, add the flatbreads (I added one at the time since my pan wasn’t large enough to accommodate more than one unit) and grill them for 1 to 2 minutes on each side or until golden brown.
6. Serve right after cooking, drizzled with a little more olive oil and with an extra pinch of salt.

leave a comment