Carrot Fritter with Sunflower, Pumpkin Seed & Harissa Sauce

One of my grandmother’s signature dishes is carrot fritters. They’re all small and irregular in shape, and are pan-fried until golden brown, sometimes on the verge of burnt around the edges. She usually serves them with broccoli rice on the side, which is actually just rice cooked with broccoli florets on top, but tastes delicious nonetheless. The simple meals I have at her place are some of the best I’ve ever had (her lentil rissoles are insane, as it’s her sautéed cabbage with peas and mint), proving that vegan food doesn’t have to be complicated to be tasty or rely heavily on expensive, hard to find ingredients.
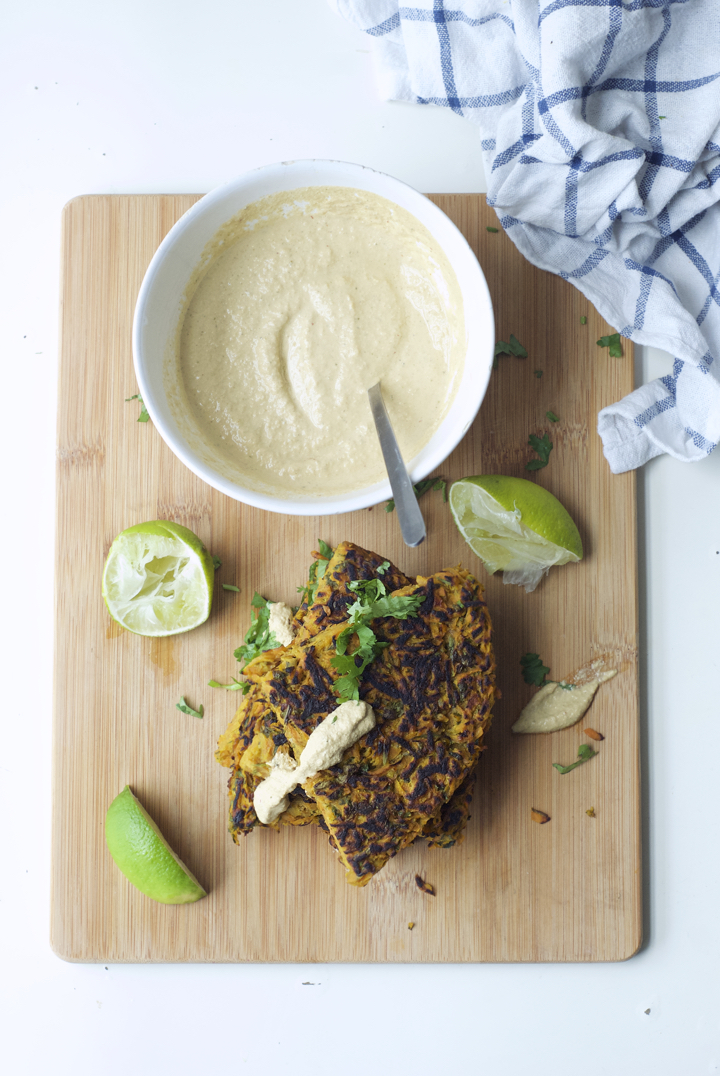
The other day I had a sudden urge to eat the carrot fritters and made my own version of her classic, only slightly changing the shape and making one big fritter instead of various small ones. I also added chickpea flour instead of wheat flour to bump up the protein content of my fritter. This one isn’t a particularly inventive recipe, but I’m amazed at how good it tastes, especially when served with the sunflower and pumpkin sauce. I don’t generally like to brag about recipes, but this is one really is a hell of a sauce. It’s very easy to put together and doubles as a pasta and salad sauce too. Plus, it’s full of healthy fatty acids, which is good for you and your skin.
Now, into more specifics: the fritter’s “dough” might seem like it doesn’t hold together very well, but I can assure you it won’t fall apart while cooking. Using a non-stick frying pan (look for non-teflon options, like these), or seasoning your regular pan with a generous glug of olive oil is key here, since you don’t want all that crispy bits to get stuck.
Hope you like the fritter as much as I do. I’m already thinking about how I’ll style and shoot the next recipe (which happens to be today’s dinner), so see you soon!

Carrot Fritter with Sunflower, Pumpkin Seed and Harissa Sauce
Serves 2, as a main
For the Carrot Fritter
2 Tablespoons melted coconut oil or olive oil, divided
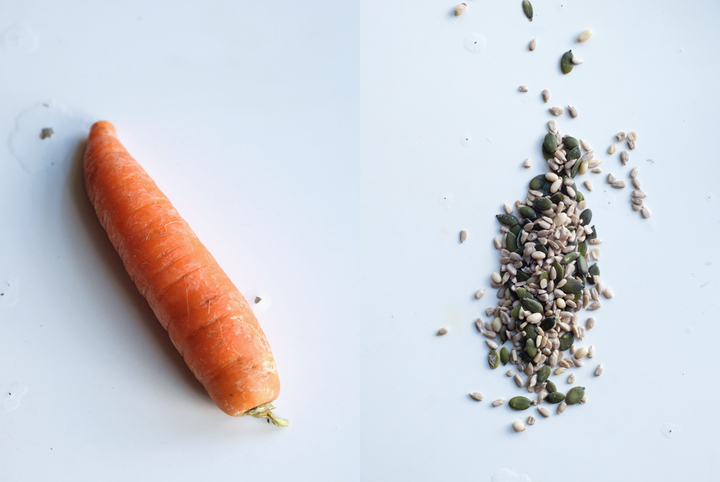
3 large carrots, grated
½ teaspoon sea salt
freshly ground pepper, to taste
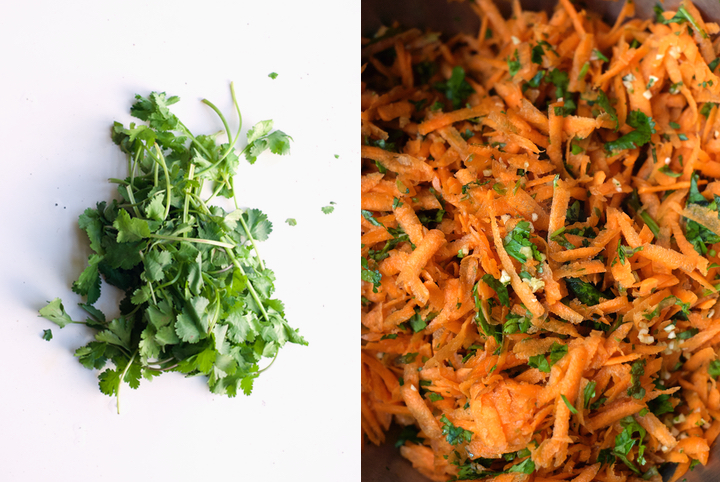
1 handful fresh coriander, finely chopped
1 large garlic clove, minced
3 heaped Tablespoons chickpea flour
For the Sunflower, Pumpkin Seed & Harissa Sauce
2 ½ Tablespoons Sunflower seeds
2 ½ Tablespoons Pumpkin seeds
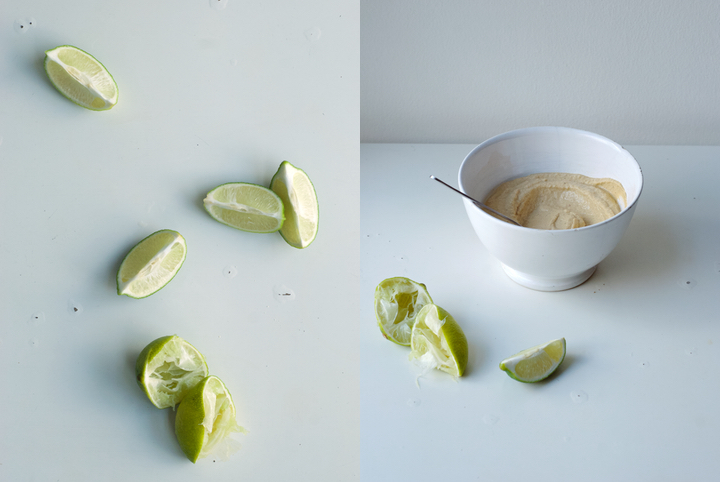
juice of one lime
7 Tablespoons water
1 Tablespoon olive oil
1 /2 teaspoons harissa
¼ teaspoon sea salt
freshly ground black pepper
Combine the sunflower and pumpkin seeds in a medium sized bowl. Pour one cup of boiling water over them, cover with a lid and let the seeds soak for at least 1 hour. After that time, drain and add them, along with the other ingredients for the sauce, to a blender. Blitz until you get a creamy, smooth mixture. If it seems too thick, add a little more water (1 or 2 Tablespoons should do). Adjust the seasoning before serving.
Combine all the ingredients for the fritter in a large bowl. Add 1 Tablespoon of coconut or olive oil to a small, 18 cm in diameter non stick frying pan over medium heat. When the oil is hot, but not smoking, add the carrot mixture. Using a spatula, spread the carrot mixture over the pan, smoothing the surface by gently pressing it down. Cook for 4-5 minutes. After that time, place a plate over the top of the frying pan and gently flip the fritter over. Add the remaining tablespoon of coconut or olive oil to the pan, return it to the heat and, once hot, add the fritter back in, golden side up. Fry for additional 5 minutes. Serve with the sauce.
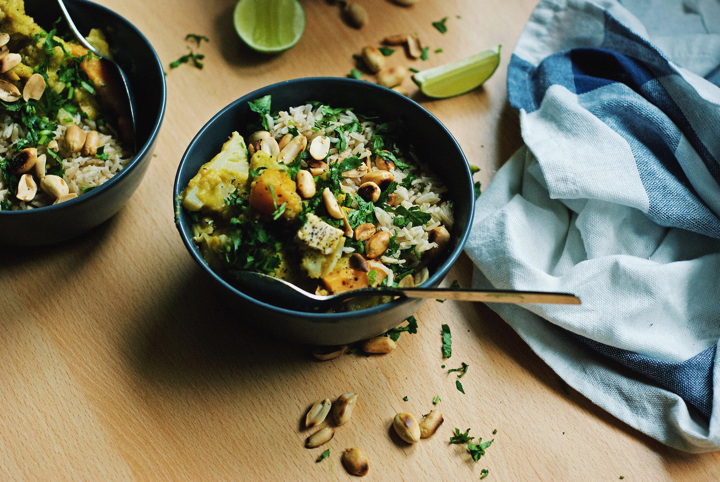
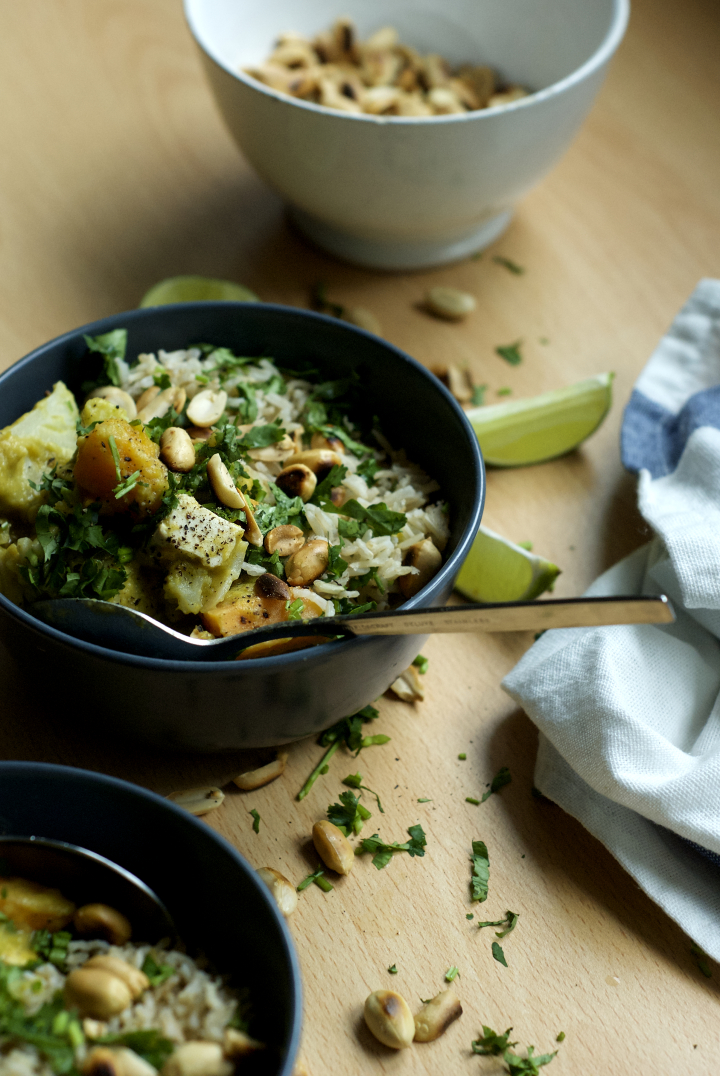
My Favourite Thai-inspired Vegetable Curry
Since I last posted a lot of things have happened in my life. The first and most important one was my recent move from Porto to Glasgow. Between preparing and planning all the stuff that involves moving into a different country, I barely had time to cook, let alone blog. However, and now that I’ve been here for a month and got (almost) everything sorted out (housing, burocracy and the likes), I´m happy to resume blogging and do the very best I can to bring you my favourite vegan recipes.
I’ve been thinking a lot about how things will naturally change around here (in terms of photography and recipe content as well) since I’m not in my own kitchen and do not have all the kitchen tools I’m used to. This will naturally affect the kind of recipes I’ll be posting from now on – they will be simpler, and since I do not own a food scale, lack the accuracy I’d like them to have. However, I do prefer to face this as a challenge (and one that I’m happy to take) rather than a limitation. I came to Glasgow with a 20 kg suitcase. I brought mostly clothes, one book, my laptop and my camera. I left in Porto all my cookbooks and the boards, plates and cutlery that have helped me build this blog’s photography identity over time. I’m already missing my bedroom’s blue wall, the wall that was the background of most of the food pictures I posted here for the last 5 years. But I’m also a firm believer that things happen for a reason. I was probably getting too comfortable with my own style of doing things, and this an opportunity to question that and try new and fresh approaches.
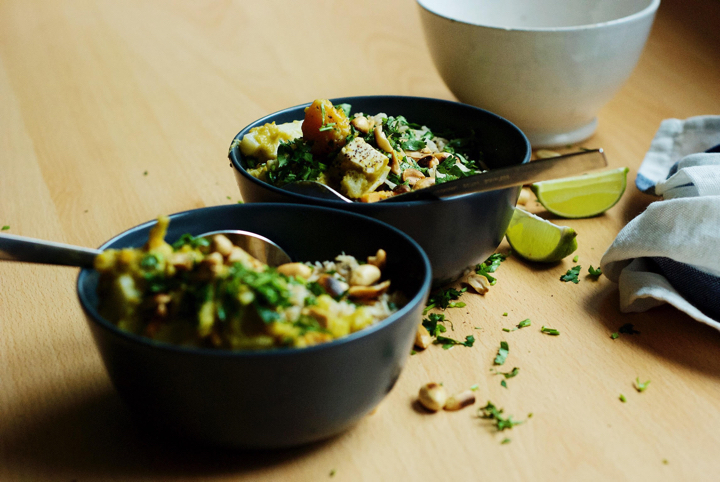

So, let’s talk curry today. I didn’t bring any of my cookbooks with me, but if I could only bring one, I’d definitely go with The Millenium Cookbook. Most of the recipes I cooked from this book were outstanding, and a great number of them have become part of my cooking repertoire. That’s the case with this curry. The original recipe is more labour intensive, and in order to make it simpler and faster I omitted some steps, trying not to compromise too much on the flavour. The recipe might still seem a bit of a project though, but I can guarantee you it’s worth making your own curry “base” from scratch, blending the sauce, and so on. In the end, you’ll have a fantastic curry that feeds a crowd and is definitely a crowd pleaser too. If you can’t come across butternut squash this time of the year, use carrots instead (4 or 5 large ones will do) – I’ve done it before and it works just as well. Also feel free to play around with the vegetables – in the past I’ve tried green beans, broccoli and asparagus and all of them have worked nicely. Hope you enjoy the curry and I’ll be back soon! In the meantime, check my instagram feed for food-related pictures and some suburb memorabilia from Glasgow.
My favourite Thai-inspired Vegetable Curry
Recipe inspired by The Millenium Cookbook
(serves 6, as a main)
*note: I usually use two green chillies with seeds, but I can handle quite a lot of heat. If you’re less tolerable than me, use only one.
For the curry sauce:
2 medium sized onions, chopped
5 large garlic cloves, chopped
1 piece of ginger the size of your thumb, peeled and grated
1 small bunch of coriander
1 teaspoon coriander powder
½ teaspoon turmeric powder
1 teaspoon cumin powder
1 teaspoon sea salt
zest of 2 limes
juice of 2 ½ limes
2 green chillies, finely chopped* (see note above)
1 medium sized butternut squash, peeled, seeded and chopped into cubes
1 can / 400 ml full fat coconut milk
For the curry:
1 Tablespoon coconut oil, melted
1 large sweet potato, peeled and chopped into cubes
1 large carrot, peepled and chopped into cubes
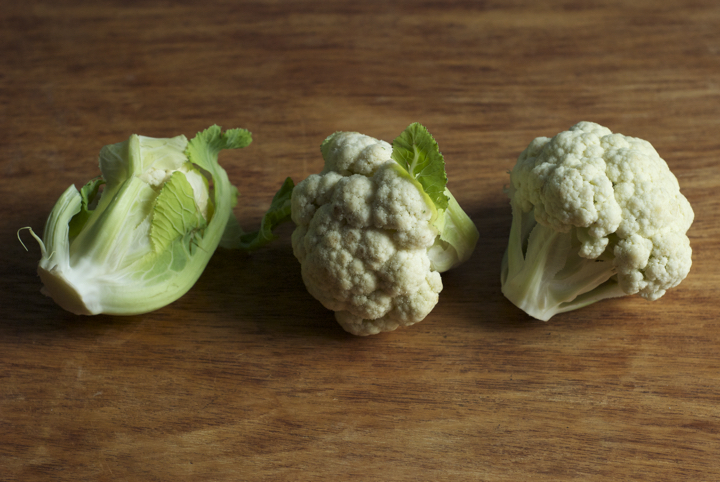
1 small head of cauliflower, cut into medium-sized florets
1 small head of cabbage, thinly sliced
1 lemongrass stalk, tough outer layer removed, bruised in a mortar and pestle (optional)
1 cup / 250 ml water
250 g / 1 package smoked tofu, cubed
For serving:
3-4 spring onions, finely chopped
1 handful of peanuts, toasted
extra coriander, finely chopped
1-2 limes, cut into quarters
For the curry sauce: In a double boiler, steam about ¾ of the butternut squash for 5 to 8 minutes, or until thoroughly cooked. In a high speed blender combine the chopped onions, garlic, ginger, fresh coriander, spices (coriander, cumin and turmeric powders), salt, lime zest and juice, chilies and the coconut milk and blitz until you have a smooth sauce. Working in batches, add the cooked butternut squash to the mixture and blitz until creamy.
For the curry: In a large pot over medium heat, add the coconut oil, the carrot, sweet potato and the remaining ¼ of butternut squash. Sautée for a few minutes or until the vegetables are golden brown. Add the curry sauce followed by the bruised lemongrass stalk (if using) and 1 cup / 250 ml of water and bring to a boil. Once boiling, decrease the heat to low-medium and simmer for 10 minutes. After that time, add the cauliflower, cabbage and smoked tofu and simmer for 5 minutes longer. If the sauce seems too thick, add a bit more water to thin it out to the consistency you like (I like mine to resemble a smooth blended soup). Season with extra salt and serve with the chopped peanuts, scallions, coriander and a good squeeze of lime juice.
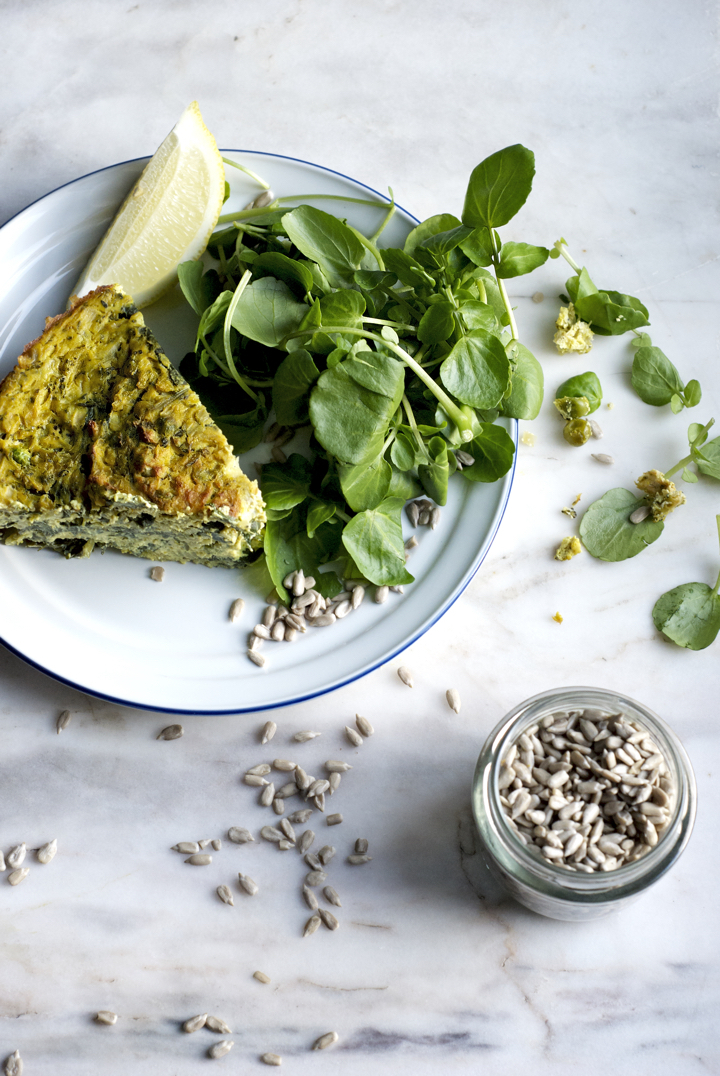
Springtime Vegan Frittata
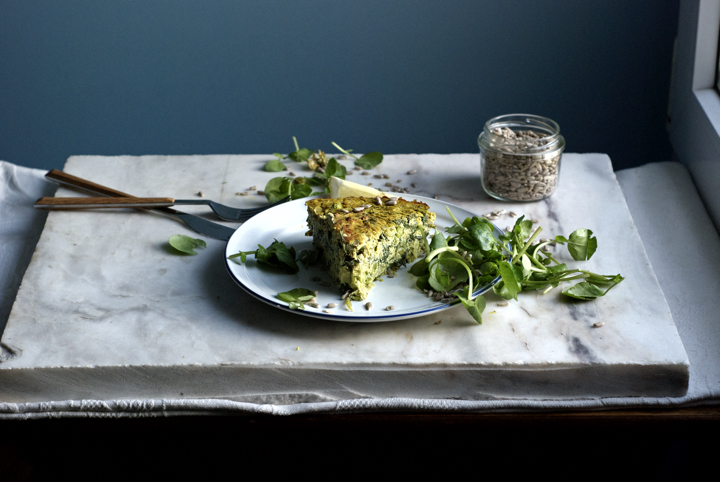
As much as I love my morning bowl of oatmeal, it feels good to have something different for breakfast every now and then. Lately, I’ve been trying different breakfast foods – from salads, to socca, and steamed vegetables with panfried tofu – and while I enjoyed them all, the recipe I’m sharing with today is one of my favourite experiments.
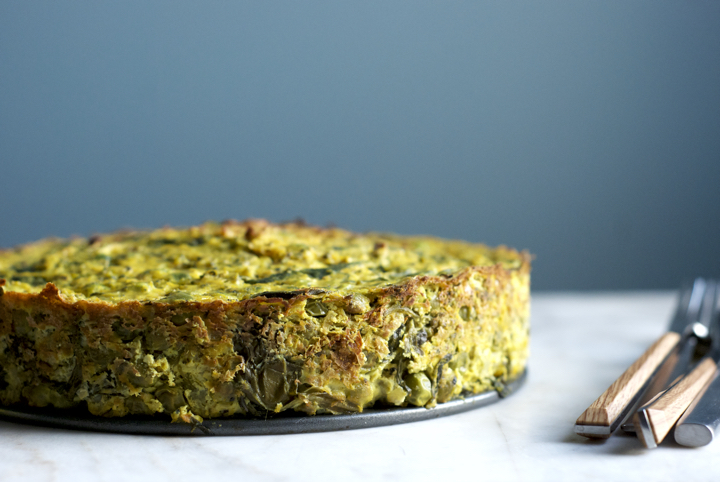
 Before I committed to making my version of a vegan frittata, I’ve searched the web for inspiration. Most of the recipes I saw called for the use of cornstarch or arrowroot to thicken the tofu “custard” and make it firmer. I have nothing against those ingredients, but since I had neither of them at home by the time I was making the frittata, I made it without them and it turned out just fine. However, if you want to be able to cut a perfect slice out of it you have to be patient and wait at least half an hour after it comes out of the oven.
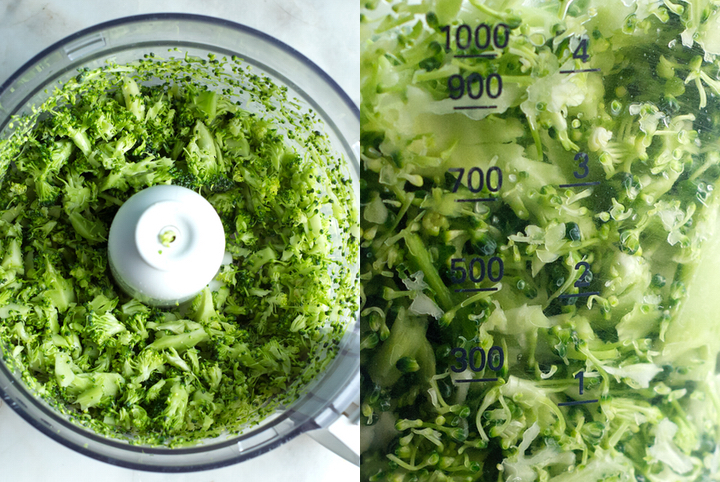
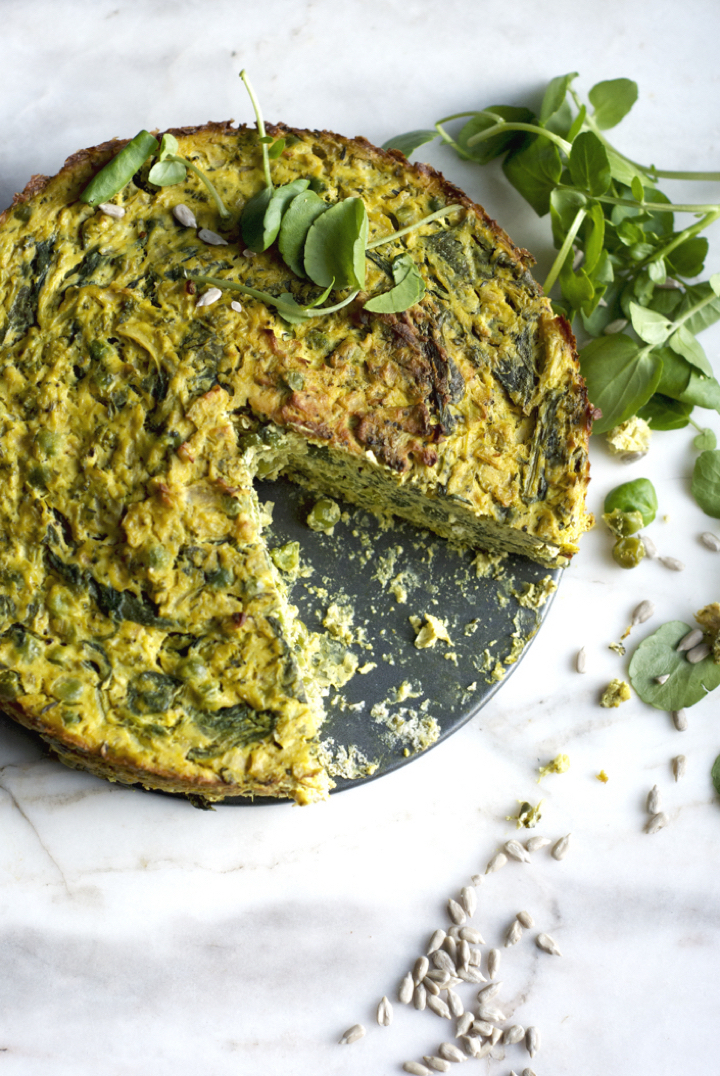
The frittata also becomes firmer the longer it stays in the fridge, and I might say I actually like it better the day after it’s baked – it’s incredible how the flavours improve and become more pronounced overnight. You don’t really need to use the vegetables I used here, and I’m sure that red peppers and/or leeks would be great additions or substitutions.
Springtime Vegan Frittata
serves 6 to 8
Ingredients
250 g / 1 large onion, finely cubed
4 garlic cloves, minced
2 Tablespoons olive oil
1 teaspoon dried thyme
2 teaspoons sea salt, divided
690 g fresh firm tofu, cubed
1 teaspoon ground turmeric
2 Tablespoons brewer’s yeast (optional)
grated zest of one lemon
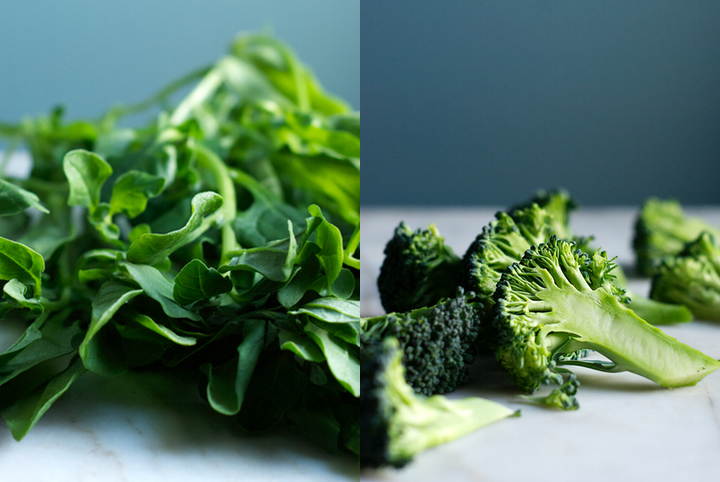
220 g / 1 small broccoli head, cut into medium sized florets
295 g / 1 large bunch spinach
240 g boiled peas (frozen is fine)
freshly ground black pepper to taste
Pre-heat the oven to 180C. Grease a springform pan with oil and set aside.
In a large skillet over medium-high heat, add the onion, garlic, olive oil and dried thyme. Cook, stirring often, for 5-8 minutes, or until the onion has softened and browned just a bit.
Add the broccoli florets to the bowl of a food processor and pulse 3 to 4 times, or until the florets are just broken down (you don’t want to fully blitz the broccoli).
Add the broccoli to the skillet with the onion and garlic mixture and cook for 3 minutes, stirring often. Next, add the spinach and 1 teaspoon of salt and cook until the spinach is wilted – no longer than 2 minutes.
Add the tofu to the bowl of the food processor, along with 1 teaspoon of salt, the turmeric, brewer’s yeast (if using) and lemon zest, and blitz until smooth.
Add the spinach and broccoli mixture to a large bowl, followed by the puréed tofu and the cooked peas. Gently mix the ingredients until everything is well incorporated. Season with freshly ground black pepper and an extra pinch of salt, if necessary.
Add the frittata mixture to the prepared springform pan. Smooth the top with the back of a spoon and bake in the oven for 40-45 minutes or until golden brown. Let it cool in the pan before unmolding and serving.
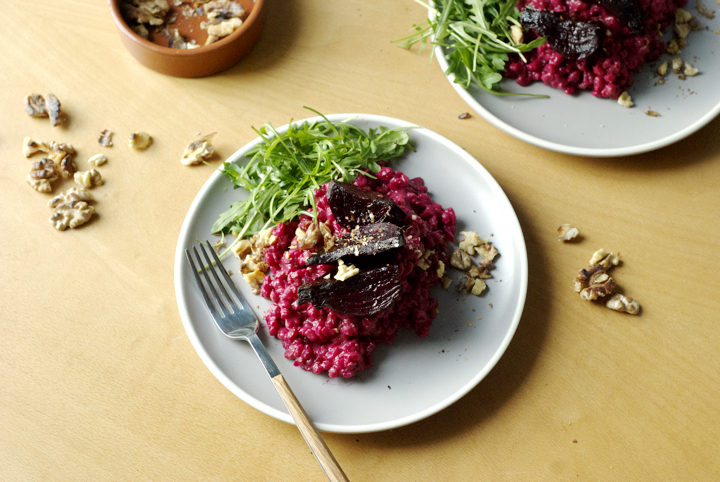
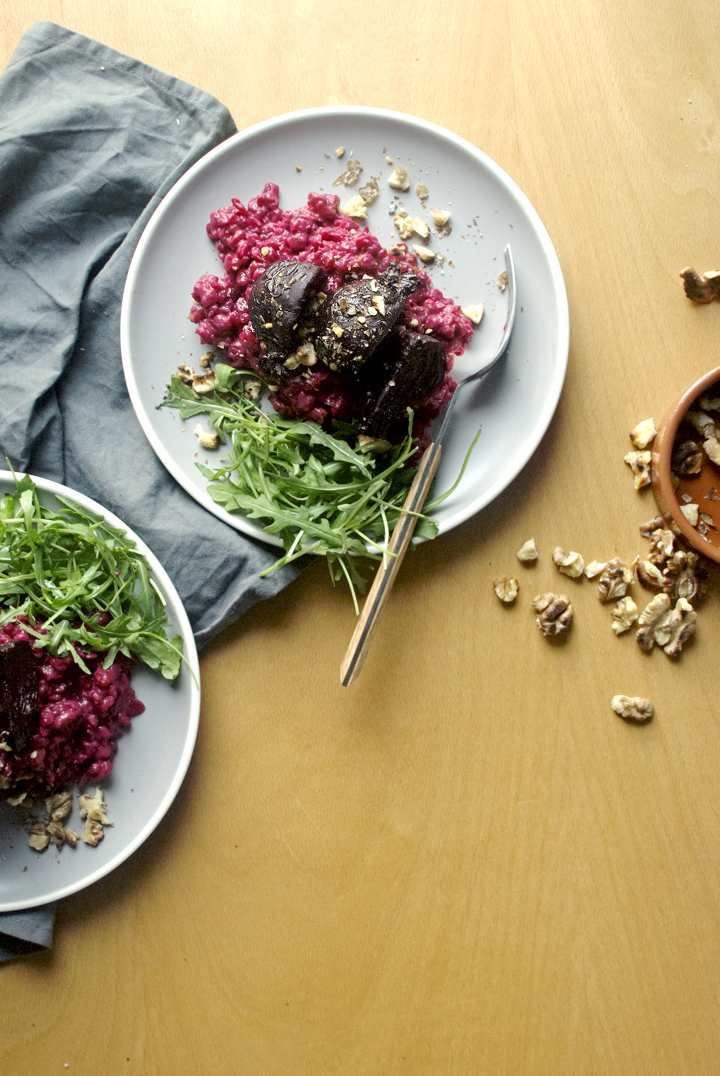
Beetroot & Barley Risotto
I have this little food and recipe notebook in which I write down ideas I have for dishes. Most of those ideas are for savoury concoctions, and that makes me realize, once again, how this blog is way more savoury than sweet-oriented. I want you guys to know that I really, really wanted to come up with a dessert recipe this week, but then I made this beet risotto and thought it was too good not to share it with you.
Barley is an ingredient I cook with often. I love it in salads and simply on its own as an accompaniment for vegetable stews and curries. I thought it was a good grain to use on a risotto because it holds its shape after being cooked, cooks in less time than brown rice, and has a beautiful nutty flavour.
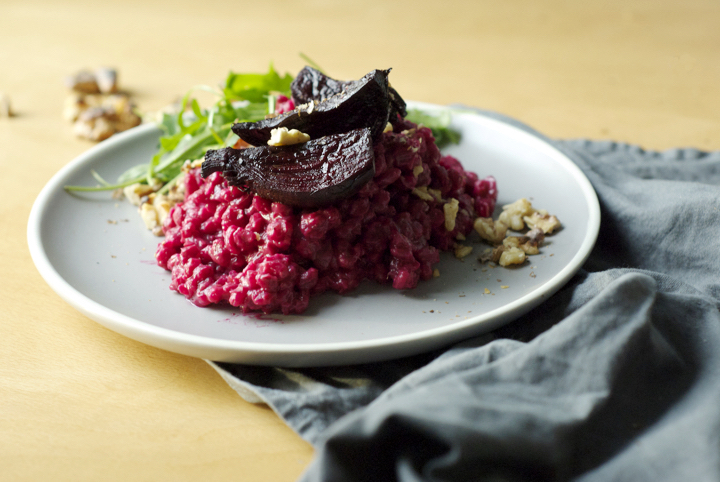
If you like beets, you’ll certainly love this dish. But if you don’t, then I’m not sure if this is the right thing for you. Thanks to them, the risotto has that distinctive earthy and sweet flavour that I personally love but know many don’t – I actually know very few people who share my enthusiasm for beets. Topped with extra roasted beets and walnuts this is a substantial dinner perfect for rainy winter nights (just don’t freak out if you wake up in the middle of the night to pee and it’s red).
Beetroot & Barley Risotto
serves 4
7 medium sized / 550 g beets, cut into quarters
2 Tablespoons olive oil, divided
1 Tablespoon balsamic vinegar
1 large / 270 g onion, thinly sliced
3 garlic cloves, minced
4 Tablespoons water
200 g / 1 cup shelled barley, soaked overnight
750 ml / 3 cups low sodium vegetable stock
185 ml / ¾ cup full fat coconut milk
salt and black pepper to taste
toasted walnuts for serving
Pre-heat the oven to 180c. Line a large tray with parchment paper. Add the quartered beets as well as 1 tablespoon of olive oil, the balsamic vinegar, and a good pinch of salt and pepper. Stir well, so that the beets are all coated with the balsamic and oil mixture. Put another piece of parchment paper on top of the beets and crimp the edges to form a packet. Roast in the oven for about one hour – the beets are cooked when you can easily pierce them with the tip of a knife.
In a large pot over medium heat, add one tablespoon of oil and cook the onion and garlic for 8 to 10 minutes, or until soft. The mixture will dry out, and to keep it from sticking to the pan add 4 tablespoons of water halfway through the cooking time. Next, add the barley and the 3 cups of stock. Cook, uncovered, on a low-medium heat for 15 minutes.
Add 125 grams of the cooked beets and the coconut milk to a blender and puree until smooth (I do not bother peeling the beets at this point, but do that if you prefer). Pour this mixture over the barley , stir well, and cook for additional 5 minutes. Have a taste and adjust the seasoning if needed – I added extra salt (about 1/2 teaspoon) and a grind of black pepper. Serve immediately with the remaining roasted beets and plenty of toasted walnuts on top.
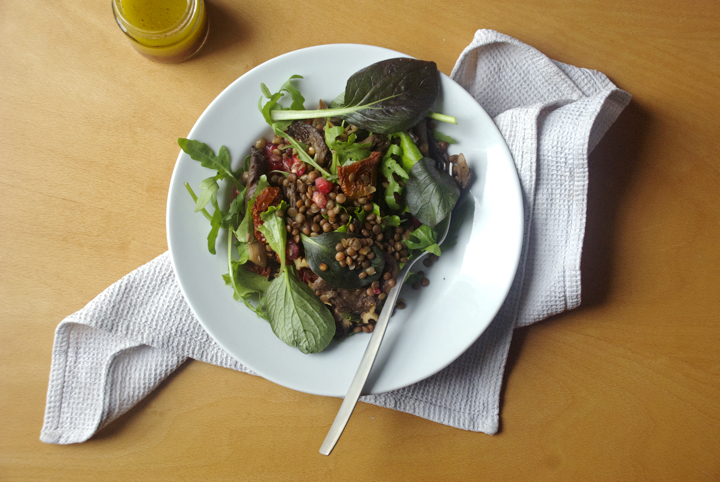
Lentil and Mushroom Salad with Sumac Lemon Dressing
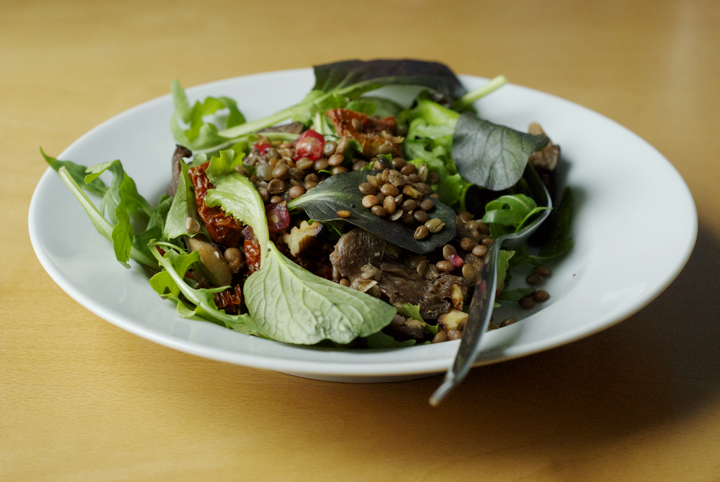 When the weather starts getting colder, I eat soups and stews for the most part of my meals. However though, salads are still welcomed, as long as they’re heartier and incorporate some cooked elements.This salad makes for a perfect, quick lunch anytime of the week. I’ve made it countless times and sometimes substitute the lentils for whole grains such as barley and bulgur and it tastes delicious as well.


One thing you should pay attention to when making this dish is not to overcook the lentils. There’s nothing worse than mushy, soft lentils. To avoid this, cook them for no longer than 15 minutes and they’ll be perfect. As far as the dressing goes, sumac is it’s key component, so please don’t skimp on that. I’ve first found out about sumac one or two years ago when I decided to make my own za’atar. It’s a hard to find and reasonably pricy spice here in Portugal (although some speciality stores sell it these days), but you don’t need to use much to feel its tangy and lemon-y flavour. I hope you enjoy the salad and the start of the new season! Have a good weekend :)

Lentil and Mushroom Salad with Sumac Lemon Dressing
(serves 4, as a starter)
105 g / ½ cup brown lentils, washed, drained and picked through
1 Tbs. olive oil
2 medium garlic cloves, crushed
300 g pleurothus mushrooms
50 g / 8 halves oil packed sundried tomatoes, roughly chopped
50 gr walnuts, toasted and roughly chopped
2 big handfuls / 40 g salad leaves such as rocket, baby spinach, etc.
105 g/ ½ cup (packed) pomegranate seeds
for the sumac lemon dressing:
1 ½ tsp. sumac
3 Tbs. lemon juice
60 ml / ¼ cup olive oil
1 small garlic clove, minced
salt and pepper to taste
In a small pan over medium-high heat, add the lentils and 2 cups of water. Bring to a boil and, once boiling, reduce the heat to low-medium and cook for 14-16 minutes or until tender but still al dente. Add ½ teaspoon of salt to the lentils, stir everything, and drain. Add the lentils to a large bowl and reserve.
Heat a large skillet over medium-high heat and add 1 tablespoon of oil. Once the oil is hot, but not smoking, add the mushrooms and garlic cloves and cook for 5-8 minutes or until golden brown. Add a pinch of salt and pepper as soon as they’re cooked, remove the garlic, and add them to the bowl with the lentils.
Add the sundried tomatoes, walnuts, salad leaves and pomegranate seeds to the bowl with the lentils and mushrooms and toss everything together gently.
For the dressing, mix all the ingredients in a small glass jar. Cover the jar with the lid and agitate vigorously until everything’s combined. Pour the dressing over the salad (not all of it – 3 to 4 tablespoons should be enough) and serve immediately.
Red Lentil and Cauliflower Stew

As I’ve mentioned here countless times, autumn is my favourite season. Unlike most people, I like cold weather and absolutely love one-pot and soul warming stews and soups. This stew in particular is the kind of dish I often cook when colder days arrive, as it’s quick to make and I most likely already have all the ingredients I need for it in the pantry.

It’s also very versatile: sometimes I use zucchini in place of the cauliflower and, even though I prefer the latter, it tastes lovely too. Other times, I substitute the water for coconut milk (or half of the amount of water) for a richer, creamier version. As with most curries and stews, this one tastes better the day after it’s made. The recipe below makes plenty of food, so I’m sure you’ll end up with leftovers for the next meal. I also really like to serve this dish with steamed brown rice (to soak up the sauce) and plenty of toasted cashews on top.

Red Lentil and Cauliflower Stew
(serves 4 to 6)
1 teaspoon cumin seeds
1 teaspoon coriander seeds
1 teaspoon mustard seeds
4 garlic cloves, minced
2 Tablespoons olive oil
1 medium red chilli, finely chopped
210 g / 1 cup red lentils
375 ml / 1 ½ cups chopped canned tomatoes
500 ml / 2 cups water
175 g / 3 medium carrots, cubed
350 g / 1 medium cauliflower, cut into florets
salt and black pepper to taste
In a dry skillet over medium heat, toast the seeds for 5-6 minutes or until fragrant and lightly toasted. Transfer the seeds to a mortar and pestle and mash them until they’re finely ground.
In a medium-sized pan over medium heat, heat the olive oil. Add the garlic, chilli, spices and carrots and fry for 1 minute or 2. Now add the lentils, canned tomatoes, water and cauliflower and bring the mixture to a boil. Once boiling, reduce the heat to low-medium, cover the pan and cook for 25-30 minutes or until the vegetables are tender. At the last minute of cooking, add the salt (start with ½ teaspoon, taste, and increase if you need) and black pepper.
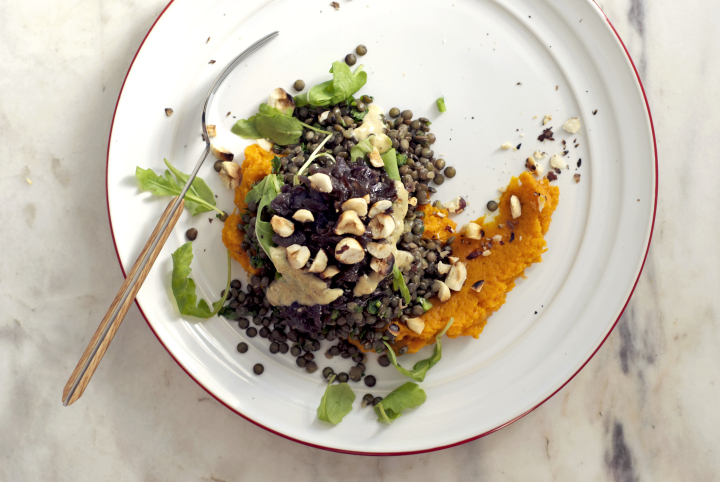
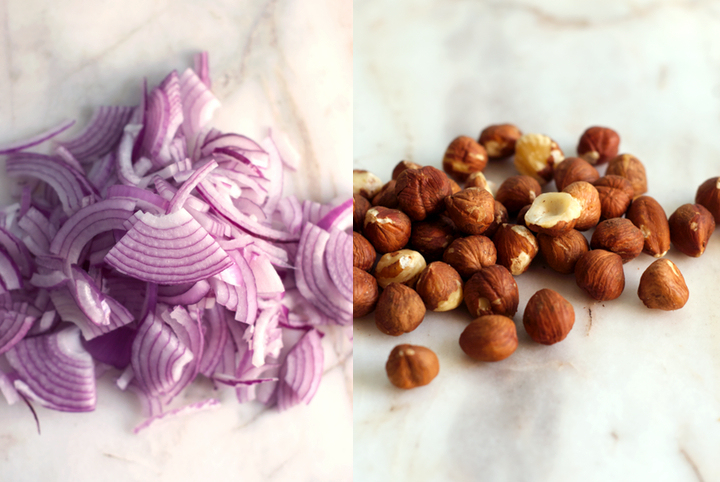
Lentils with Carrot Purée, Caramelized Onions and Hazelnut Mustard Dressing
I know a lot of people who find lentils boring and bland in flavour, and most of the time is because they’ve eaten them overcooked and without exciting accompaniments. I can eat a lot of lentils – typically 2 or 3 times a week – and the reason I’m a huge fan of them (both flavour and nutrition-wise) is because there are so many possibilities when it comes to incorporate them in a dish.
The other day I made a big batch of carrot purée because I needed some to bake a cake. I ended up eating the leftovers – properly seasoned with garlic and olive oil – for dinner along with (also leftovers) lentils and some quickly sautéed onions. I thought the three components got along pretty well, and decided to further explore the idea in order to come up with a recipe worth sharing here on the blog.

This dish might seem like it has a lot of elements but they actually come together pretty quickly and require ingredients you most likely already have in your pantry. What I like about it is that not only it tastes really good but also makes a nutritionally balance main course, which sometimes, for people new to vegan or vegetarian ventures, is hard to achieve with plant-based ingredients.
Hope you like the lentils, enjoy the last days of summer and warmth and fully embrace the next season. Fall is my favourite of all four seasons, and I love the flavours and produce that comes with it. No wonder it’s the time I’m the most inspired to cook and bake, and hopefully I’ll come up with some new creations that will delight your eyes and palate. See you all soon! (: J

Lentils with Carrot Purée, Caramelized Onions and Hazelnut Mustard Dressing
(serves4)
1 ½ cups french lentils, such as Puy
½ teaspoon salt
1 big handful parsley (22 g), finely chopped
for the carrot purée:
510 g (8 to 10) medium sized carrots, cubed
¼ teaspoon salt
1/8 teaspoon ground cinnamon
½ teaspoon freshly ground black pepper
squeeze of lemon juice
for the caramelized onions:
600 g (4 large) onions, finely sliced into rings
½ teaspoon salt
2 tablespoons olive oil
for the hazelnut-dijon dressing:
47 g / 1/3 cup hazelnuts
1 tablespoon Dijon mustard
2 teaspoons brown rice syrup
¼ teaspoon salt
4 tablespoons olive oil
4 tablespoons red wine vinegar
2 tablespoons water
arugula leaves, micro herbs etc., to serve
Carrot purée: Using a steamer, steam the carrots for 8-10 minutes or until they’re cooked through. When they’re cool enough to handle, add them to a food processor with the remaining ingredients for the purée and blend until it reaches a smooth consistency. Adjust the seasoning, adding more salt if necessary. If the mixture seems too thick and you’re having trouble mixing it all together, add up to 6 tablespoons of the water you used for steaming the carrots.
In the meantime, bring a medium sized pan filled with 4 cups of water to a boil. Add the lentils, reduce the heat to medium and cook for approximately 12-14 minutes, or until they’re cooked through but still have some bite. Add the salt, drain the lentils and rinse under cold water. Transfer the lentils to a bowl and mix in the chopped parsley.
Caramelized onions: Heat a large non stick skillet over medium heat and add the olive oil, onions and salt. Cook, stirring often, for about 15 to 20 minutes, or until the onions are really soft. In the last minutes of cooking, turn the heat up to high and cook for additional 3 to 4 minutes, or until they crisp up a little.
Hazelnut mustard dressing: In a skillet over medium-high heat, toast the hazelnuts until they’re golden brown (4 to 5 minutes). When they’re still hot, transfer to a clean kitchen towel and rub them against it to remove as much of its skin as possible. Transfer the hazelnuts to a food processor and process until smooth with the remaining dressing ingredients.
To serve, put a few tablespoons of carrot purée on 4 different plates, topping with the lentils, followed by the caramelized onions and a gentle drizzle of the hazelnut dressing. Add a few arugula leaves, if desired, and serve.
Curried Beans with Naan Bread
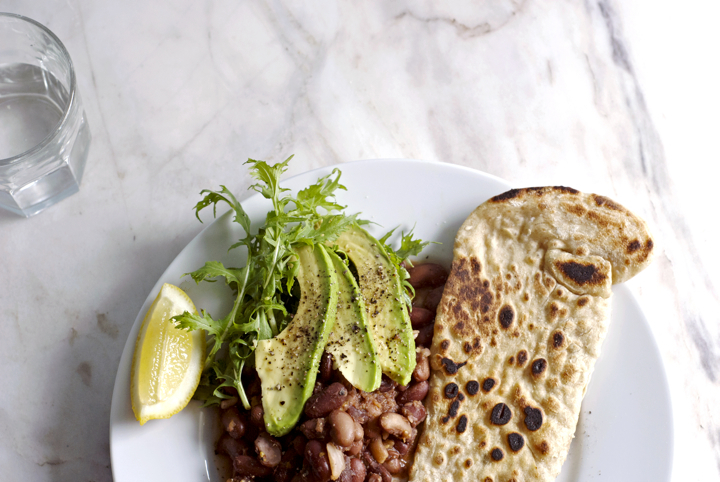
As much as I like to cook, I don’t think I could manage the demands of running a restaurant or a café. I love to cook to small groups of people, but more than ten and I start to stress out. I’m also kind of slow in the kitchen, and adding up to that, I hate to delegate tasks. Even though the idea of having a place of mine – with my food, my kind of atmosphere, and so on – sounds appealing, I’m sure it will never see the daylight because of the reasons mentioned above. However, though, that doesn’t stop me from thinking about the dishes I’d like to serve in my little imaginary café, and this one would certainly be a regular on the menu.
It’s simply beans flavored with a spicy curry paste and served with warm charred naan, to whip up the sauces – the kind of food I could eat everyday. The naan is made with both wheat and spelt flours, and you can flavor it in way you like – by adding cumin seeds, garlic, chili powder, and so on. I wanted to make a 100% spelt naan but couldn’t find white spelt flour, so had to compromise and make a wheat and whole spelt version instead. However, though, next time I find it I’ll make the bread again and update this post with how it turned out. A few words on the measurements: I always like to have all the ingredients for each recipe weighted into grams (it’s way more accurate than cups), but my scale has been having some sort of identity crisis and only gives me the weights in pounds. I was a bit lazy and didn’t want to go into the trouble of weighting things down and then make the conversions, but if the scale doesn’t change its mind soon, I’ll buy another one and reintroduce the proper metric measurements.

Curried Beans with Naan Bread
(serves 4)
for the naan bread:
1 cup wheat flour
1/2 cup whole spelt flour
1/2 cup warm water
3/4 teaspoon active dry yeast
1/4 teaspoon salt
2 teaspoons brown rice syrup
1 teaspoon olive oil
optional: cumin seeds, thyme, chili flakes, coriander…
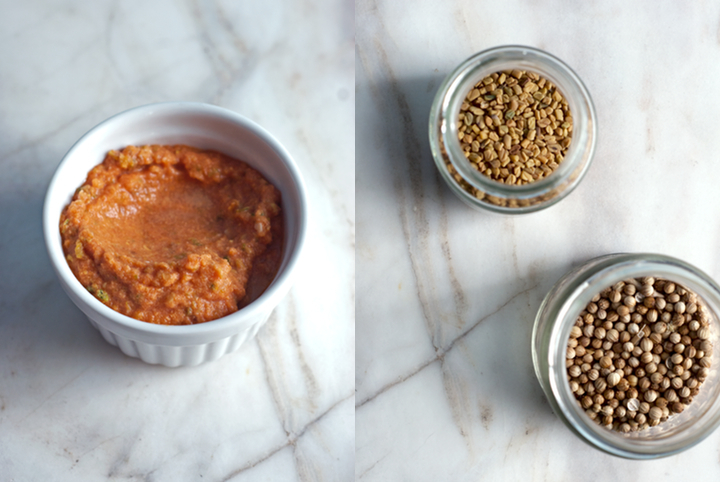
for the curried beans:
4 cups red beans (canned is fine)
3 large garlic cloves, finely chopped
2 tablespoons melted coconut oil
3 tablespoons chopped canned tomatoes
1 large fresh green chili, finely chopped
1/2 teaspoon salt
2 teaspoons coriander seeds
1 teaspoon fenugreek seeds
1 large lemon (cut into 4 wedges) and chopped avocado for serving
To make the naan bread: Add, to a medium bowl, the water, yeast, salt, brown rice syrup and olive oil, and whisk everything together. In another bowl, combine the flours. Add the yeast mixture to the bowl with the flour and knead until you have a firm, yet soft to the touch, dough. If the dough is too wet, add more flour until you reach the right consistency. Cover the bowl with a clean kitchen towel and leave it in a warm place to rise for 2 hours.
Heat a large grilling pan over medium-high heat. Dust a working surface with flour and add the proofed dough. Knead for a couple of minutes and divide it into 4 equal parts. Roll each ball of dough into a not too thin elongated shape and add the topping you want (if using) pressing it down gently into the dough. Brush the naan with water and add it to the grilling pan, water side down, and cover with a lid. Cook for 30-50 seconds, or until you start seeing some bubbles on it. Cook the other side for approximately the same time, or until lightly charred. Repeat this process with the remaining balls of dough.
To make the curried beans: Add all the ingredients for the curry, except the beans, to a food processor and pulse until it turns into a paste. Add the curry to a pot over medium heat and cook, stirring often to avoid sticking to the bottom of the pot, for 2-3 minutes. Add the beans, 3/4 cup of water (if you cooked your own beans use the cooking water), and cook for additional 5 minutes. Serve immediately.
Add a good squeeze of lemon juice to each serving, along with some chopped avocado and a drizzle of olive oil. Serve with the naans.
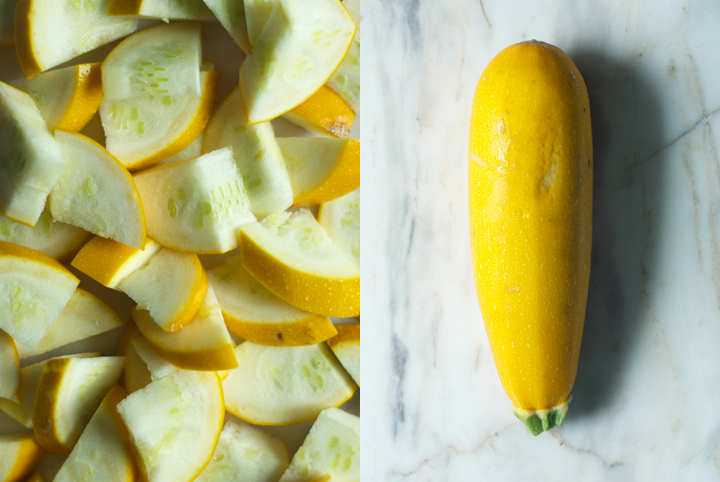
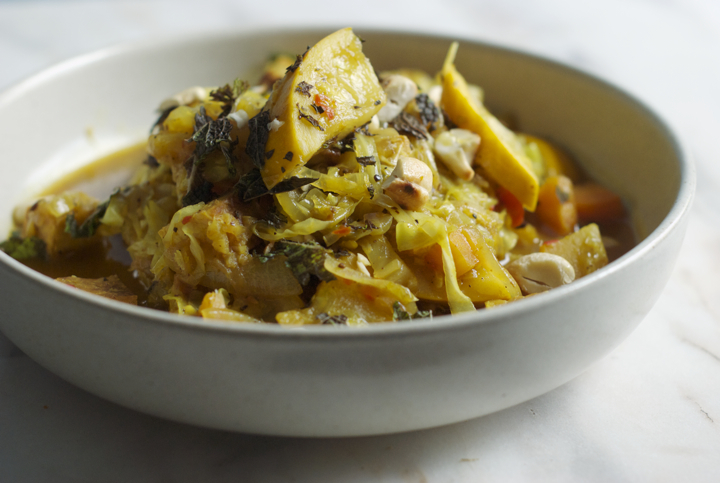
Tempeh Lemon Curry
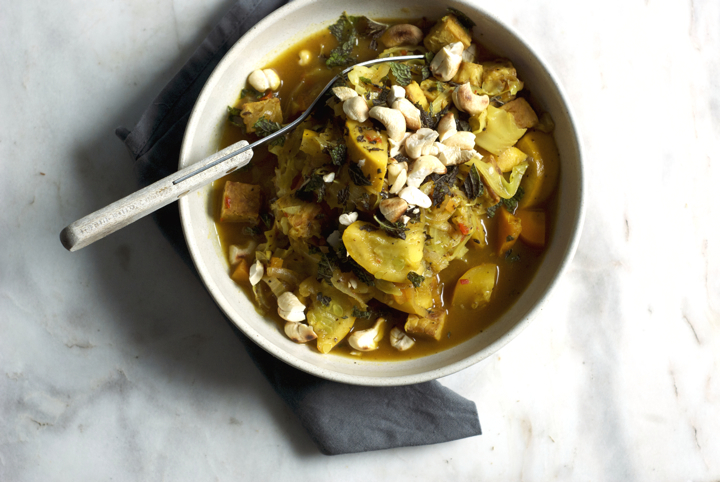
I know I haven’t been around for a while but, hey!, I’m still here, and today we’ll talk curry. I realize this is the first curry recipe I write about on the blog, and to be honest I don’t know how that happened because it’s the kind of dish I cook often. I know there are a lot of vegetable curry recipes on the internet and that you probably don’t need another one, but I’ve made this curry countless times and think it’s a good one to have on your repertoire.
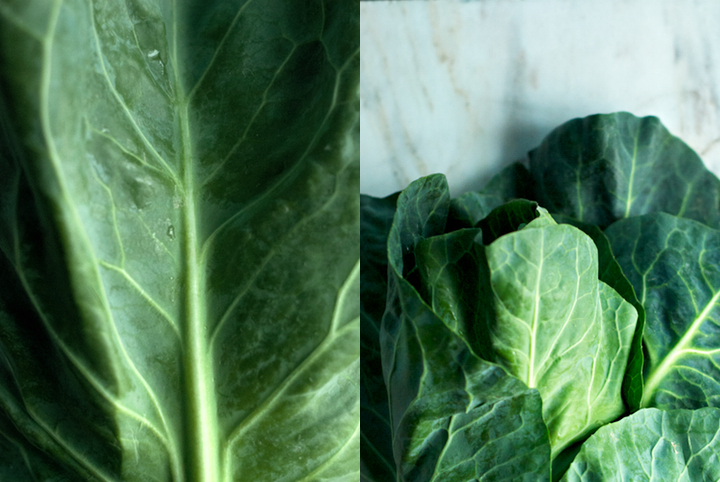
The variations in here could be endless. I’ve made it before with spinach in place of the cabbage and it turned out good, but I prefer to use the latter mainly because of the texture it brings to the whole thing. A word on tempeh: it’s well known that steaming tempeh for 15 minutes before actually cooking with it, removes its bitterness. To be honest, I don’t mind the bitterness and I think it goes practically unnoticed in here, camouflaged by the bold flavours of all the spices and the lemon. Having said this, if you want to steam it first (or even sub it for tofu), go ahead.
Enjoy the curry, have a great summer (guess what: here in Portugal has been raining) and I promise to come back soon! (:

Tempeh Lemon Curry
(serves 4)
3 Tbs. olive oil, divided
1 large onion, finely chopped
4 garlic cloves, finely chopped
1 tsp. ground coriander seeds, roughly pounded in a mortar and pestle
1 tsp. mustard seeds, roughly pounded
1 tsp. caraway seeds, roughly pounded
2 medium carrots, cut into cubes
1 Tbs. fresh ginger
1 tsp. ground turmeric
1 red chilli, finely chopped
1 large zucchini, cut into half moons
1 cup / 250 ml coconut milk
4 cups shredded cabbage
250 gr tempeh, cut into cubes
½ teaspoon
1 tsp. rice syrup
2 Tbs. mirin
zest of one lemon
1 handful toasted cashews, coarsely chopped
1 handful fresh mint, coarsely chopped
juice of ½ lemon
In a large pan over medium heat, add 2 tablespoons of olive oil, onion, garlic cloves and coriander, mustard and caraway seeds. Fry for 3-4 minutes or until the onion has softened and the spices have toasted a bit and smell fragrant.
Add the carrots, fresh ginger, turmeric, chilli and zucchini to the pan. Give everything a good stir and add the coconut milk. Cover the pan and cook for 5 minutes.
In the meantime, heat the remaining 1 tablespoon of olive oil in a frying pan over medium-high heat. When the oil is hot, but not smoking, add the tempeh cubes and fry until golden brown. Turn off the heat, sprinkle the tempeh with a pinch of salt and add it to the pan with the vegetables.
Now, add the cabbage to the pan as well, pressing it gently with the back of an wooden spoon so that it’s covered by the coconut milk. If, at this point, the curry looks as if it hasn’t enough liquid, add up to 1/3 cup of it, but keep in mind the cabbage will release a lot of water too. Cover the pan and cook for additional 5 minutes, or until the cabbage is wilted. Add the salt, rice syrup, mirin and lemon zest. Stir everything together and finish off with the lemon juice, toasted cashews and mint.
Recipe adapted from The Modern Vegetarian Kitchen, by Peter Berley, published by William Morrow Cookbooks, 2008
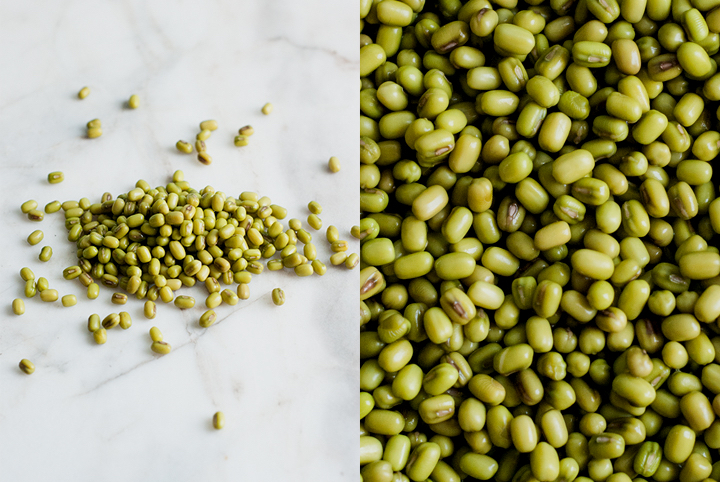
Bindaetteok (Korean Mung Bean Pancakes) with Sesame-Ginger Sauce
 I had some friends coming over for dinner last weekend to taste some of my fermentation experiments. Amongst kimchi, sauerkraut (which will be covered soon), a sour coconut chutney and other little things, these mung bean pancakes were served. They’re not fermented per se, but do call for the use of kimchi, one of my favourite live foods.
I looked up online for several bindaetteok recipes and they all used the same basic ingredients – dried mung beans, sesame oil, rice and water. The amount of rice called for in those recipes was so little that I actually decided to omit it altogether. I also realised that the mung beans they use in Korea to make these pancakes are peeled and split, whereas the ones I find in the stores are sold whole. Needless to say, I used them whole and had not issues at all. I assume the batter is probably coarser than if I had used split beans, but I do like the extra texture.
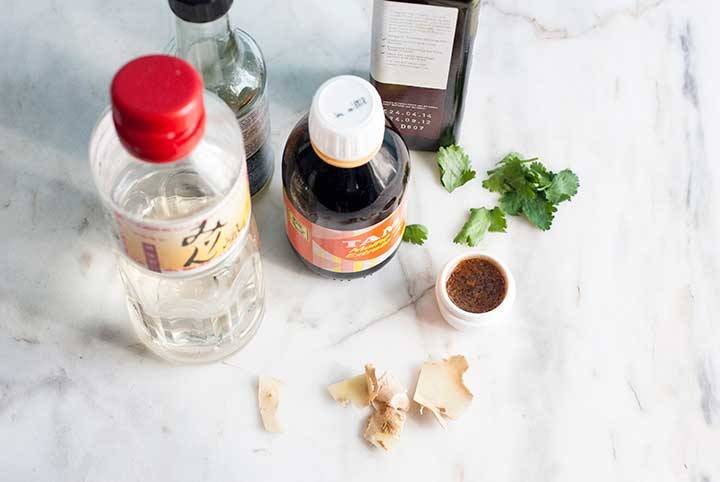 Kimchi is hard to find in Portugal and even though I prefer these pancakes with it – because of the tangy and sharp flavours it gives to the batter – it’s possible to use finely chopped spring onions instead. Just bear in mind kimchi is the ingredient that gives them character, so a kimchi-free version of the pancakes won’t certainly taste as authentic. Having said this, I highly encourage you to make your own (recipe here!) – it’s quite easy and, if you haven’t tasted if before, you’ll be in for a wonderful taste experience that’s unusual for the western palate.
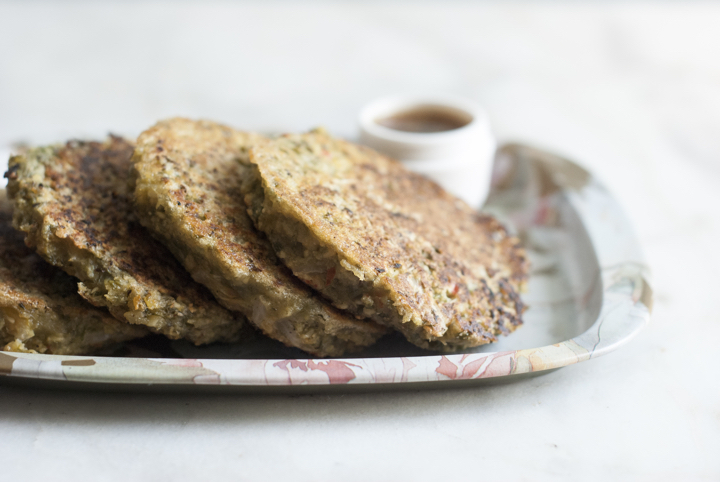
Bindaetteok (Korean Mung Bean Pancakes) with Sesame-Ginger Sauce
(makes 8-10 pancakes)
for the pancakes:
190 g / 1 cup mung beans, soaked overnight
1 teaspoon toasted sesame oil
1 teaspoon tamari sauce
½ teaspoon salt
60 ml / ¼ cup kimchi juice
60 ml / ¼ cup water
90 g / ½ cup kimchi
vegetable oil for shallow frying
for the sesame-ginger dipping sauce:
20 g fresh ginger
1 teaspoon toasted sesame oil
2 tablespoons tamari sauce
1 small garlic clove minced
1 tablespoon mirin
2 tablespoons water
1 tablespoon rice vinegar
Drain and rinse the beans. Add them to the bowl of a food processor along with the other pancake ingredients, except the kimchi. Process until a thick batter comes together – don’t worry if it doesn’t get perfectly smooth; it’s okay if it’s only coarsely pureed.
Heat a large skillet over medium high heat and add 1 to 2 tablespoons of oil, tilting the pan to ensure the oil is evenly distributed. When the oil is hot, but not smoking, drop 2 tablespoons of the batter at a time. Cook the pancakes for 2-3 minutes on each side or until golden brown.
For the sesame ginger sauce, peel and grate the ginger. Squeeze the ginger over a bowl to extract its juices and discard the pulp. Add the remaining sauce ingredients to the bowl and whisk everything together.

leave a comment