Pea, Apple and Ginger Soup
When I was a kid, sundays were the days I used to dislike. I didn’t really adapt well to the kindergarten, and in the late afternoon of every sunday, I’d feel quite sad about the fact that Monday morning I had to go there. As a child, I was indeed a pretty unsocial human being: I didn’t speak much, and I’d most likely run away when other children would come to talk/play with me – fortunately, I’d overcome this extreme shyness as I was growing up, even though some of it has remained throughtout the years and I’m afraid to assume it still remains as part of my adult personality.
It might sound weird, but I do think my photographic obsession with still lifes has a lot to do with my childhood and those distressed sunday afternoons. Still lifes are always melancholic, quiet, and perhaps also a bit enigmatic. On the same hand, their classical concept involves the presence of food and some other elements (such as sheets of paper, hardcover books, feather pens, and so on) that, when combined together, almost always make for bucolic, serene scenes.
It’s also surprising that usually, in still lifes, food and writing tools are placed together. It’s as if the first couldn’t live with the latter. Food isn’t dissociated from writing, and that’s also the reason why I find, in the still life, the basis of food writing.
So today is Sunday, seven o’clock in this part of the world – unlike some years ago, there’s no drama involved as I don’t have to go to school tomorrow. My afternoon, as many of my sunday afternoons, was spent in the kitchen, making a big pot of pea soup and a couple other things to be enjoyed throughout the week. It’s not a traditional pea soup the one I’ve prepared today: sweet apples were used as well as a good amount of freshly grated ginger. The end result: you have sweetness from the peas and apples, freshness from a couple leaves of mint, and a light heat from the ginger. Both flavor and texture are well balanced – almost as every still life composition seems to so effortlessly be - contributing for a subtle, yet tasty, outcome.
Pea, Apple and Ginger Soup
(makes 4 servings)
1 large onion (180 grams), finely cut
2 tablespoons olive oil
¼ cup freshly grated ginger
2 medium-sized sweet apples, such as Starking and/or Red Delicious, peeled, cored, and cubed (about 230 grams)
400 grams frozen peas
1 teaspoon fleur de sel
4 cups (1 liter) light stock
1 small handful (10 grams) fresh mint, finely chopped, plus a few leaves, for garnishing
100 ml oat cream (optional)
1. In a large pot over medium heat, heat 2 tablespoons of olive oil. Add the onion and cook for 2 to 3 minutes, or until it starts to soften. Add the ginger, fleur de sel and apples and cook for additional 2 minutes.
2. Add the stock and bring to a boil. Once boiling, add the peas and let the mixture boil for 2 to 3 minutes, after which you should reduce the heat and let the soup simmer for 10 minutes, or until the peas and apples are cooked.
3. Remove the pot from the stove. Transfer the soup to a food processor (you can also use an hand blender) and process for 2 minutes or until the soup is creamy and totally smooth. Serve immediately, garnished with a few mint leaves and a couple tablespoons of oat cream, if desired.
Recipe remotely inspired by The Millenium Cookbook
Note: The still life pictures shown here were taken by me and are part of personal projects.
Herbed Tofu Cakes with Curried Apple
Lately, I’ve been eating lots of roasted vegetables and bakes, mostly because they are comfort food at their best and have that sort of magical effect of keeping me warm. Also, these are usually dishes that are made in one single pan, meaning there’s minimal work involved in dish washing after dinner, which is also a great advantage. I tell you what I do: often, I make a lentil/vegetable pie and make sure there are enough leftovers for me to enjoy for a couple more meals. Not having that much time to cook lately, this is a method that allows me to have homemade food at hand almost everyday. Anyway, there are also times when I manage to prepare dishes that are done in less than twenty minutes, require minimal effort, are packed with proteins, and taste good. These Herbed Tofu Cakes are one of those no-recipes that I tend to prepare when I don’t feel that much like cooking.
I grab the herbs I have on the refrigerator – this time around, lemon thyme, rosemary and chives were what I had on hand, but you could use any others of your liking -, some tofu and a couple other ingredients, and the cakes are done in no time. The curried apples are a great topping for these protein-packed patties, but you could replace it for some chutney or a simple salsa made with fresh vegetables – they’d be equally good options. To finish things off, serve the dish along with some cooked grains (I can’t get enough of basmati rice cooked with a couple spices such as cinnamon, cloves and cardamom), and there you go.
Herbed Tofu Cakes with Curried Apple
(makes 5 cakes)
for the tofu cakes:
370 grams firm tofu, drained, pat dry and crumbled
1 ½ tablespoons shoyu
1 tablespoon vegan mayo
2 teaspoons dijon mustard
2 tablespoons flaxseed meal
1 ½ tablespoons lemon thyme, finely chopped
1 ½ tablespoons chives, finely chopped
2 teaspoons rosemary, finely chopped
zest of one lemon
2 tablespoons olive oil
for the curried apple:
1 large apple, peeled, cored and thinly sliced
½ teaspoon curry powder
¼ teaspoon sugar
a pinch of salt
a good squeeze of lemon juice
1 tablespoon olive oil
chopped coriander, for garnishing
1. In a large bowl, mix all the ingredients for the tofu cakes, except the olive oil. Mix well until thoroughly combined.
2. Divide the mixture into 4 to 5 equal portions. With your hands, shape each portion into patties.
3. Heat 2 tablespoons of olive oil in a large frying pan, over medium-heat. Shallow-fry the patties for 2 to 3 minutes on each side, or until golden brown.
4. Once the tofu cakes are done, transfer them to a plate and keep them warm in the oven. Heat 1 tablespoon of olive oil in the same frying pan you used for cooking the cakes and, once hot - but not smoking - add the apple slices, sugar, salt and curry powder.
5. Cook for 5 minutes or until the apple slices are tender and slightly caramelized. Turn off the heat and add a good squeeze of lemon juice to the pan.
6. Serve the tofu cakes with the curried apple slices on top, and garnish each serving with plenty chopped coriander. Serve with basmati rice or any other grain of your liking.
Tangerine Cups with Almond Cream
I’m finally on vacation. I’ve been having lots of time to sleep (and, quite frankly, I can sleep a lot these days), getting some vitamin-D from the sun that has been unexpectadly shining every single day since February – well-known for its rainy days – started, and reading and cooking lots. And today, I thought we could chat a bit about desserts. I think I’ve already shared with you that I’m not a sweet tooth, which makes me a particular picky person when it comes to make/eat desserts. Cakes and such always seem to me to be a bad option: after a great first or second course, all I want to have is a refreshing, fruity dessert, and not particularly a slice of cake, which usually makes me feel heavy and ready to nap the all afternoon. Don’t get me wrong, I do like cakes, but I always prefer to have them with a cup a tea in the late afternoon or in the morning, along with a cup of dark, hot coffee. So, the kind of desserts I’ve been trying to make lately are those that privilege fresh fruits and bright, light flavors: gelatins, panna cottas, steamed fruits (such as pears and apples) and fruit puddings tend to be my favorite options.
The recipe I’m sharing with you today is not that much different, in terms of method, from that Vegan Panna Cotta I’ve posted a while ago. The fresh juice of sweet, in-season tangerines, is combined with agar agar to make an animal-free kind of gelatine, accompanied by a mildly sweet nut cream and topped with some shaved dark chocolate. Working with agar-agar flakes is not always easy, but once you get the right ratios, you’re good to go. From my experience so far with this fabolous seaweed, I can tell you that it’s always a good option to use few amounts of it: 2 teaspoons, not heaped, are enough for 600 ml of liquid. More than that, and you’re gelatin you’ll be too hard and have a weird, kind of artificial texture. I’ve been making a couple of notes on other ideas for quick, simple, and fruit-based vegan desserts, so expect some more to show up here in the upcoming days/weeks.
Tangerine Cups with Almond Cream
(for 5 servings)
for the tangerine gelatin:
600 ml freshly squeezed tangerine juice
2 teaspoons agar-agar flakes
3 tablespoons regular sugar
a couple tangerine wedges, pitted
for the nut cream:
100 grams cashews or almonds (I used the latter), soaked overnight
175 ml (¾ cups) almond milk
3 tablespoons powdered sugar
1 teaspoon vanilla extract
shaved dark chocolate, for garnishing
1. In a medium saucepan, add the tangerine juice and the agar-agar flakes. Whisk well and bring the mixture to a boil. Once boiling, decrease the heat to a minimum and, whisking constantly, let it simmer for 10 to 15 minutes, or until the agar-agar flakes are totally dissolved. Let cool the mixture for 3 to 4 minutes.
2. Distribute the gelatin equally among 5 glass cups and place 2 to 3 tangerine wedges over each individual serving. Let the gelatine cool completely to room temperature and, once cooled, refrigerate it for at least 2 hours before serving.
3. Drain the almonds. Process all the ingredients for the nut cream in a food processor, until smooth and well blended. Add a bit more almond milk if you want your cream a bit more runny.
4. To serve, scatter a generous tablespoon of the cream over each gelatin cup, and top it up with shaved dark chocolate. Serve immediately or keep it refrigerated until you plan to serve it.
recipe inspired by Jamie Oliver. Jamie’s original recipe can be found here
Adzuki Bean and Sun-Dried Tomato Burgers
Today, I have some apologies to make. Firstly, I apologize for not being around here in the last couple of days: in fact, my semester ended yesterday and, to cure the tireness of a pretty hectic week, I had a twelve-hour sleep (yes, you read well) and now I feel really refreshed and brand new. The second apology has to due with the fact that I have another burger recipe to share with you.
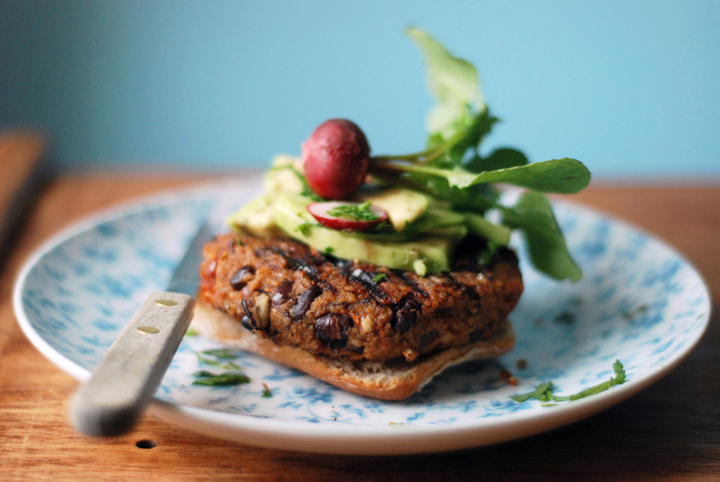
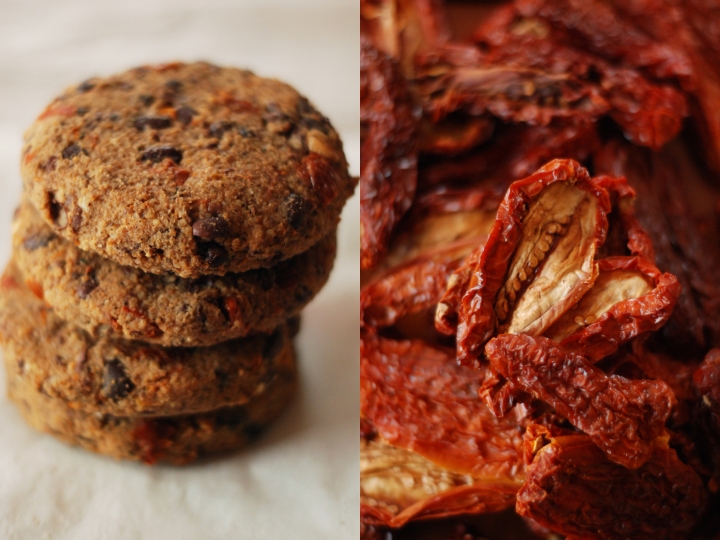
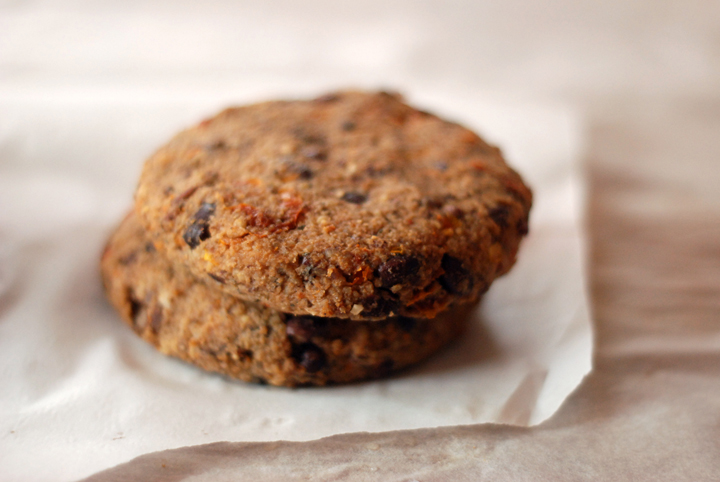
I’ve made these burgers last week and was quite surprised with how they came out: the burgers were tasty, had a great texture and after being pan-fried they really got a nice crispy outside and a chewy inside. As far their taste goes, it’s toasty and grainy (thanks to the millet), as well as salty and tangy because of the sun-dried tomatoes. I suspect you could replace the adzuki beans for black beans, but on the other hand, canned ones won’t probably work out in here: canned beans tend to be to soft and mushy, and you really want your beans not to be overcooked. On the other hand, you could play a bit with the herbs in here: thyme and chives were what I had on hand, but using fresh basil instead would be a great substitution. Wish you all a great weekend, and I promise I’ll come back very soon with some more veggie love to share. ; )
Adzuki Bean and Sun-Dried Tomato Burgers
(makes 6 burgers)
195 grams (1 cup) millet
750 ml (3 cups) water
½ teaspoon salt
60 grams (about 12 halves) dry-packed sun-dried tomatoes
½ teaspoon salt
400 grams (1 ¾ cups) cooked adzuki beans
4 large garlic cloves, peeled
5 tablespoons plus 3 olive oil
freshly grated black pepper
½ teaspoon dried thyme
½ teaspoon dried chives
1. In a dry skillet over medium-heat, toast the millet for about 3 to 4 minutes, stirring often, until it turns golden brown and starts smelling toasty.
2. Transfer the toasted millet to a pan filled with 750 ml (3 cups) water and bring to a boil. Once boiling, decrease the heat to low-medium, add ½ teaspoon salt and cook, covered, for 30 minutes, or until all the water has been absorved and the millet is cooked through. Remove from the heat and let it cool down a bit at room temperature.
3. In the meantine, put the sun-dried tomatoes in a bowl filled with hot water (1 cup - 250 ml – should be enough). Cover, and let the sun-dried tomatoes rehydrate for 15 minutes. Drain them and coarsely chop them. Set aside.
4. Using a mortar and pestle, crush the garlic cloves with a pinch of salt. In a frying pan over medium heat, warm 5 tablespoons of olive oil. When hot, but not smoking, add the crushed garlic and salt mixture and fry until golden brown – 4 to 5 minutes. Let the garlic cool to room temperature.
5. In a food processor, process 2 cups of the cooked millet, ½ cup of the cooked adzuki beans, the fried garlic and the oil, the dried thyme and chives, black pepper, and half of the chopped sun-dried tomatoes. Process for 2 minutes, or until a thick purée comes together. Have a taste and season with a little more salt if needed.
6. Add the remaining adzuki beans and sun-dried tomatoes to the purée and pulse no more than 2 or 3 times – you want the burgers to have some texture, so these ingredients only need to be broken down a bit. The mixture should now be thick and easy enough to handle and shape.
7. Lightly oil your hands and divide the mixture into 6 equal portions. Shape into patties the size of your hand palm.
8. In a large frying pan, heat 3 tablespoons of olive oil. Add the burgers when the oil is hot, and pan fry them for 5 to 6 minutes on each side, only turning them once. Serve hot with your favorite ingredients or as shown in the picture bellow.


2 comments