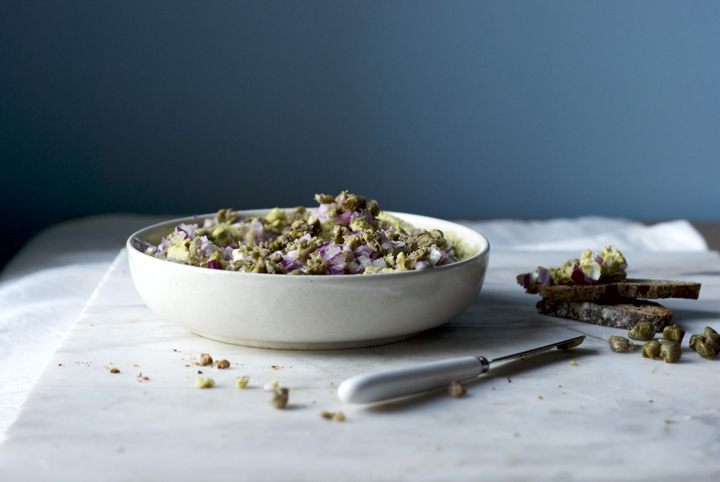
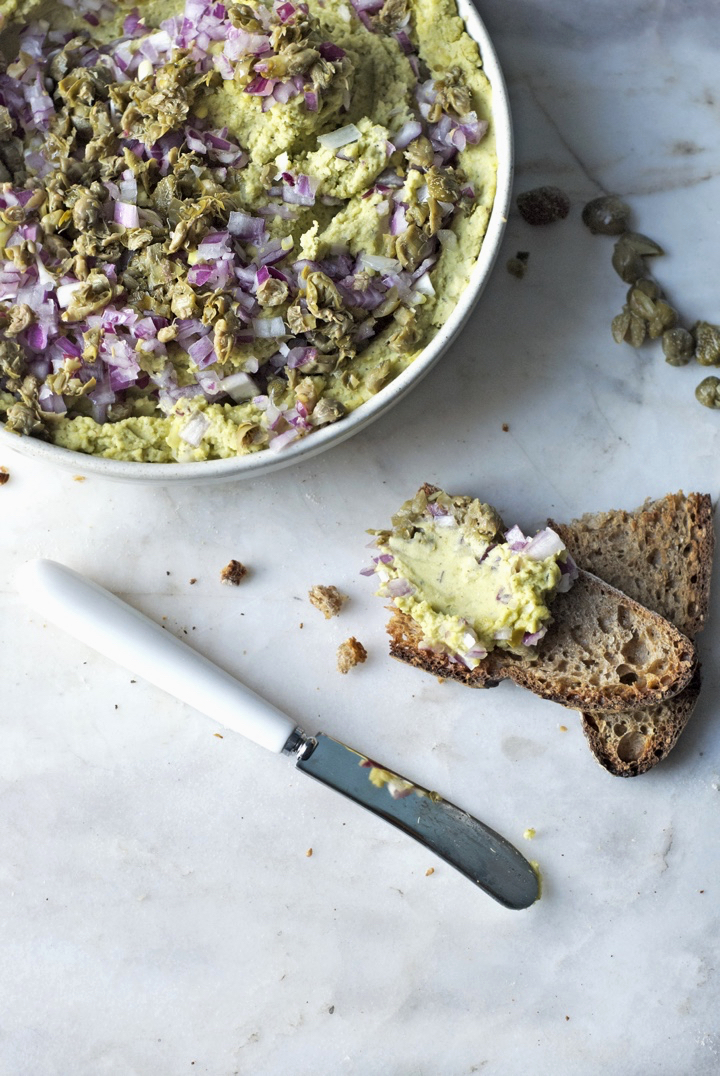
Split Pea Hummus with Capers & Red Onion
Every time I have guests for dinner, I typically serve some sort of homemade hummus or vegetable spread as an entrée. Most of the time I end up making the good old chickpea hummus because it’s one of favourite spreads and everyone loves it. But if I’m pressed for time (because yes, I’m in that tiny group of crazy people who actually thinks that removing the chickpeas’ skins is the secret to making the perfect hummus), I use split peas instead.
This is an incredibly easy, yet really tasty bean spread that’s perfect served on top of toasted bread or used as a dip for raw vegetables. I love to dip carrots and turnips into this hummus, but peppers (cut into strips), raw broccoli florets and/or parsnips are also excellent options.
I always have this thing going on with the blog where I try to balance more complex recipes with everyday, casual ones. That balance is hard to strive because people who aren’t familiar with vegan cooking tend to prefer simple and straightforward recipes, whereas long time vegans and/or foodies appreciate bold and unusual combination of ingredients and techniques.
At the end of the day, I always try to stay true to myself and my cooking “style”. However, I hope that recipes like this one – that do not involve a long list of ingredients but deliver on flavour – inspire people to venture into cooking more vegan food and, most importantly, help break the misconception that eating vegan is all about pricy superfoods and green smoothies (nothing against both, it just totally annoys me when I hear people saying that – and I do, all the time).
Split Pea Hummus with Capers & Red Onion
serves a crowd
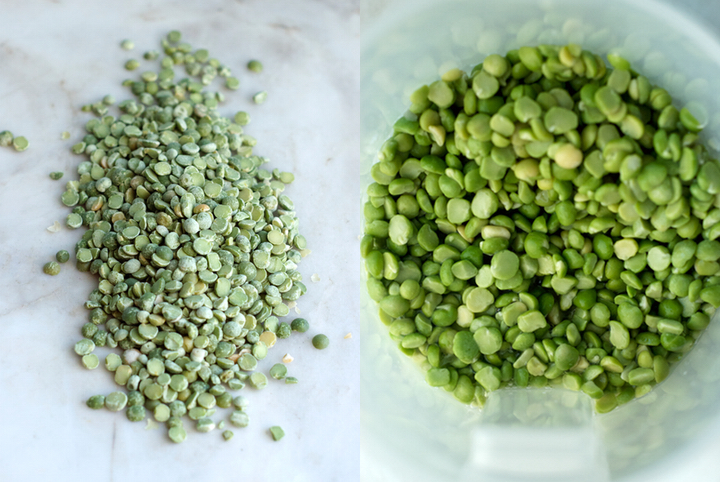
195 g / 1 cup green split peas, soaked overnight, drained and rinsed
¾ teaspoon sea salt
¼ teaspoon freshly ground black pepper
1 teaspoon za’atar
1 garlic clove, minced
2 Tablespoons extra-virgin olive oil, plus a little more for serving
3 Tablespoons lemon juice
2 Tablespoon warm water
65 g / half a medium sized red onion, finely chopped
27 g / 2 Tablespoons brined capers, rinsed, dried and chopped
Add the split peas to a large pot over medium-high heat. Add enough water to cover the peas by 2 cm (0.8 inches). Bring to a boil and, once boiling, reduce the heat to low-medium and cook for 20 minutes or until soft. Some foam might naturally form on top of the cooking liquid – in that case, just take it out with a slotted spoon.
Drain the peas once they are cooked and cooled. Add them to the bowl of a food processor along with the sea salt, black pepper, za’atar, garlic clove, olive oil, lemon juice and water. Run the machine until you get a very smooth hummus. If the mixture seems too dry, add 1 or 2 additional tablespoons of water.
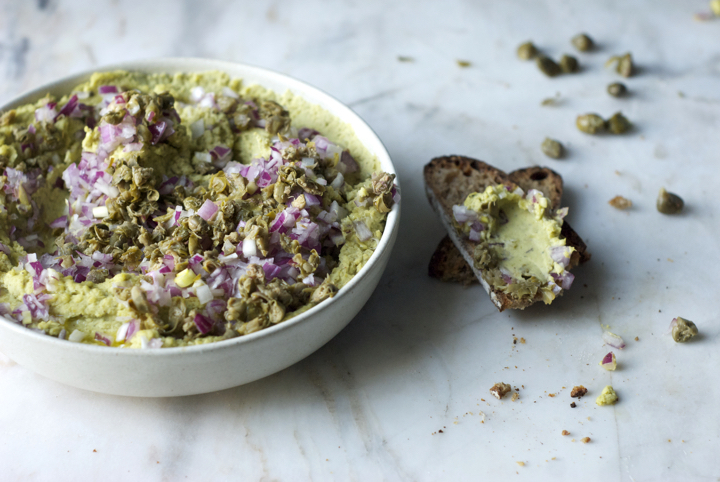
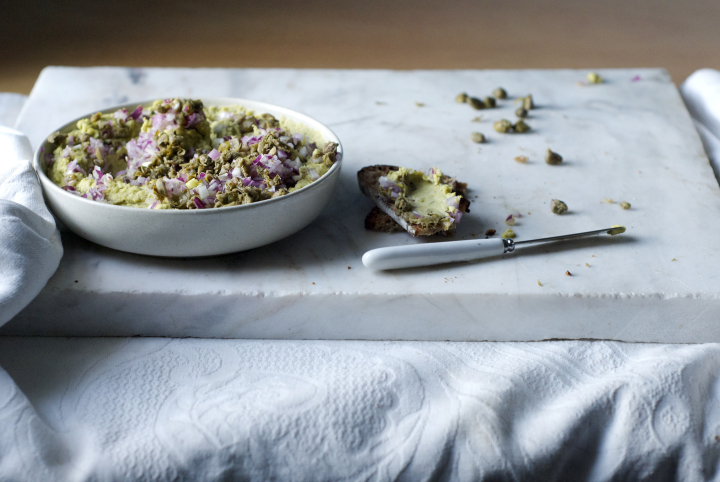
Put the split pea hummus in a medium sized deep plate. Add the red onion and capers on top and finish with a generous drizzle of olive oil.
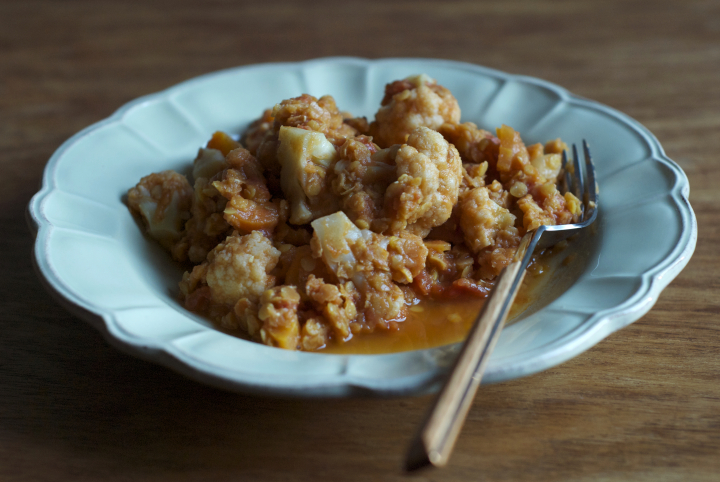
Red Lentil and Cauliflower Stew
As I’ve mentioned here countless times, autumn is my favourite season. Unlike most people, I like cold weather and absolutely love one-pot and soul warming stews and soups. This stew in particular is the kind of dish I often cook when colder days arrive, as it’s quick to make and I most likely already have all the ingredients I need for it in the pantry.
It’s also very versatile: sometimes I use zucchini in place of the cauliflower and, even though I prefer the latter, it tastes lovely too. Other times, I substitute the water for coconut milk (or half of the amount of water) for a richer, creamier version. As with most curries and stews, this one tastes better the day after it’s made. The recipe below makes plenty of food, so I’m sure you’ll end up with leftovers for the next meal. I also really like to serve this dish with steamed brown rice (to soak up the sauce) and plenty of toasted cashews on top.

Red Lentil and Cauliflower Stew
(serves 4 to 6)
1 teaspoon cumin seeds
1 teaspoon coriander seeds
1 teaspoon mustard seeds
4 garlic cloves, minced
2 Tablespoons olive oil
1 medium red chilli, finely chopped
210 g / 1 cup red lentils
375 ml / 1 ½ cups chopped canned tomatoes
500 ml / 2 cups water
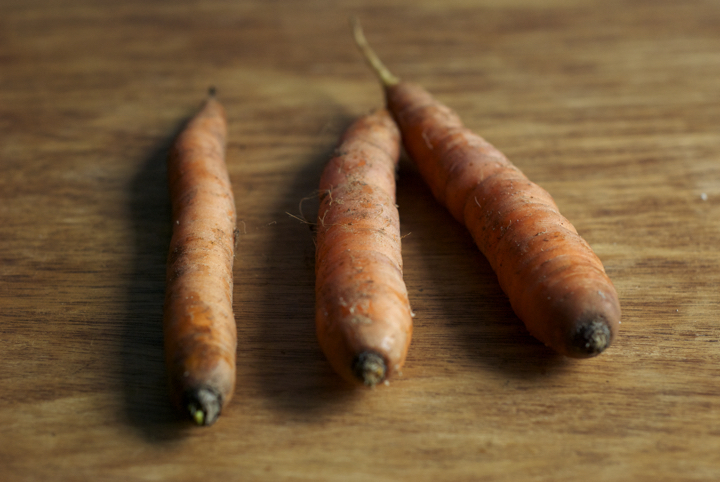
175 g / 3 medium carrots, cubed
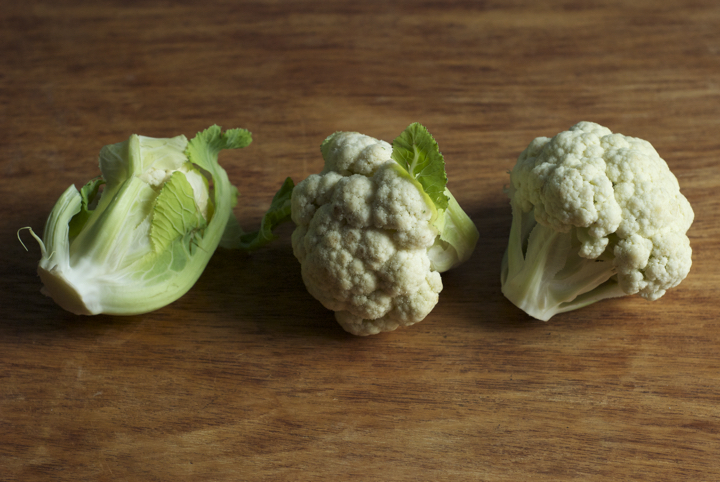
350 g / 1 medium cauliflower, cut into florets
salt and black pepper to taste
In a dry skillet over medium heat, toast the seeds for 5-6 minutes or until fragrant and lightly toasted. Transfer the seeds to a mortar and pestle and mash them until they’re finely ground.
In a medium-sized pan over medium heat, heat the olive oil. Add the garlic, chilli, spices and carrots and fry for 1 minute or 2. Now add the lentils, canned tomatoes, water and cauliflower and bring the mixture to a boil. Once boiling, reduce the heat to low-medium, cover the pan and cook for 25-30 minutes or until the vegetables are tender. At the last minute of cooking, add the salt (start with ½ teaspoon, taste, and increase if you need) and black pepper.
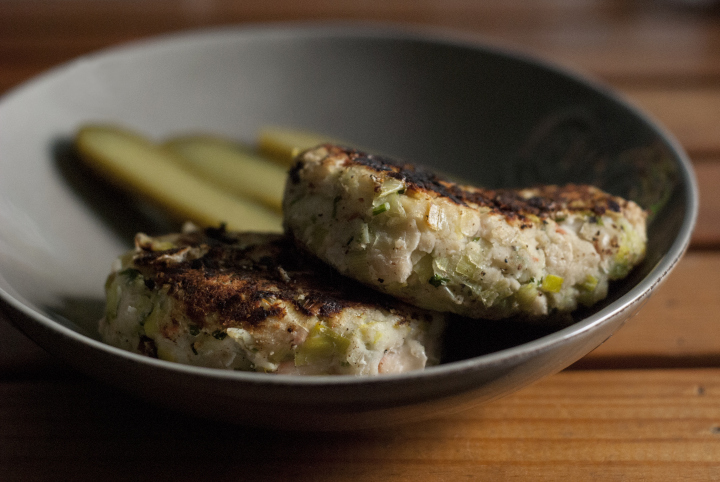
White Bean and Leek Cakes
You know the phrase “Don’t judge a book by its cover”. The same principle can be applied to food – there are dishes that don’t necessarily look good (like black bean soup or chilli, for instance) but do taste amazing.
On my laptop, there’s a folder with all the recipes from the blog, organized by categories. Inside that folder, there’s one titled “?” where I keep the recipes I’m not exactly sure if I should post up here. More often than not, those recipes fit into the “ugly-but-oh-so-tasty” category that I mentioned above. There’s the tempeh and mushroom loaf, a version of greek baked beans, and a couple others. They were a nightmare to shoot and I always think they deserve a second chance (photography wise) but, for that to happen, I have to make them again.
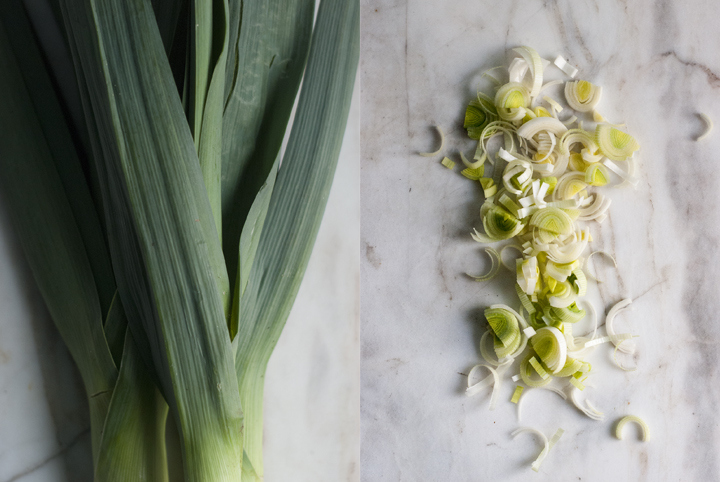
The recipe I’m about to share was just an inch away from going into the “?” folder. I took lots of pictures of it, from different angles and with different plates, but only managed to get two or three that I think are just ok. Part of the reason for that is because this is a recipe that has its roots on the british classic bubble and squeak, a dish well known for its lack of sexiness. In this version, white beans replace the potatoes for a kick of protein, and leeks are used instead of greens just because it was what I had around. The patties come together almost effortlessly and do deliver a lot on the tasting front. Don’t sweat trying to make them look perfectly shaped, though – this is meant to be a simple, uncomplicated dish, where the hearty and rustic flavours are all that matters.
White Bean and Leek Cakes
(makes 4 to 6 patties, depending on the size)
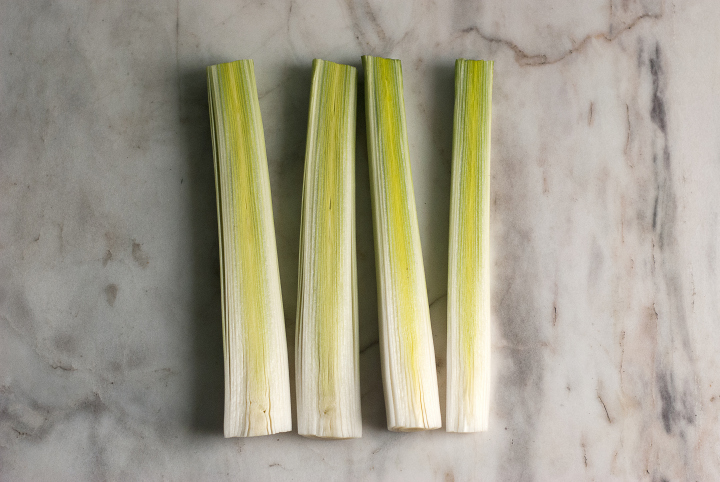
2 large / 250 g leeks, white parts only
450 g cooked white beans (canned is fine)
3 large garlic cloves, finely chopped
1 small bunch / 15 g parsley, finely chopped
salt and black pepper to taste
1 tablespoon olive oil plus more for seasoning the pan
Cut the leeks in half and wash the halves thoroughly to remove any dirt. Cut each half into thin half moons.
In a frying pan over medium heat, add 1 tablespoon of olive oil, the leeks, garlic and parsley. Cook for 5 minutes or until the leeks are soft.
Transfer the leeks to a large bowl. Add the white beans and mash everything together with a potato masher (don’t overdo it and leave some parts just barely broken down for a bit of texture). Season the mixture with a bit of salt and lots of freshly cracked black pepper.
Clean the pan in which you have cooked the leeks with kitchen paper towels. Add a generous glug of olive oil to the pan, making sure it covers its surface, and turn the heat on medium. Shape the white bean and leek mixture into patties and add them to the pan. Season each cake with a bit more salt and cook for 5 to 7 minutes on each side, or until golden brown (I like mine almost on the verge of being burnt). Serve with pickled cucumber, mustard, fried capers or whatever you fancy.
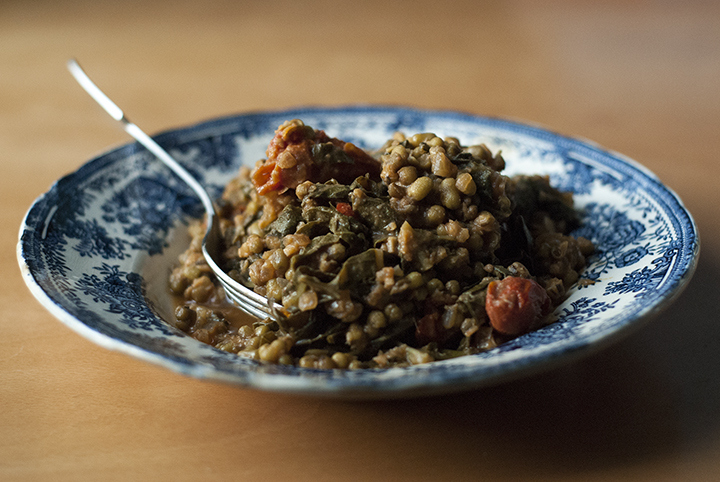
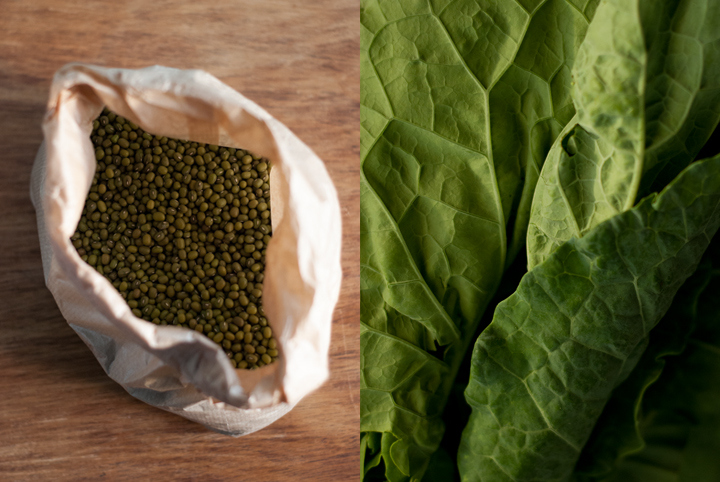
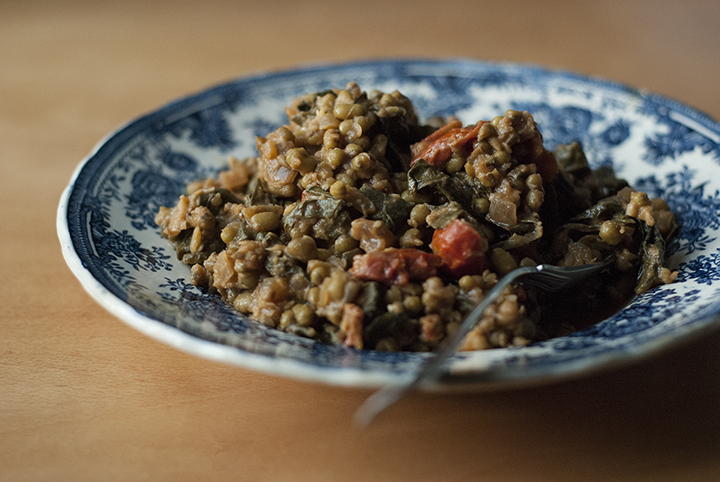
Mung Bean and Kale Stew with Miso
Miso is the kind of ingredient you either love or hate. There’s no middle ground. I strongly believe that those who don’t like it should give it a second chance, as it can be used in a lot of savory dishes and sauces (don’t restrict its use only to soups, please). It sure has a great deal of health properties too – as with all fermented foods, it’s loaded with enzymes and beneficial bacteria – and I’d like to think that a stew like this is one is a wonderful way of eating (and enjoying) this beautiful live ingredient.
I had high hopes of trying to make my own, following the recipes provided by this book, but after getting acquainted with the whole process, I easily gave up. It’s a slow process – miso should ferment from six months to a year –, which has made gain a whole new respect for the art of fermenting foods. There are a lot of types of miso. I’m not going to go deep into that – I also don’t have the knowledge to – but, basically, what you want for this dish is a mild variety, savory but with tiny hints of sweetness. The longer the miso is fermented the stronger and saltier it will taste, so you want to choose a type that’s light brown in color. I used mugi miso in here, a variety made of barley and soya beans – it’s the one I find the most versatile and not overpowering in flavor.
This stew came to live a few weeks ago as an attempt to clean the fridge – I get constantly surprised by how dishes like that seem to be the ones I’m more satisfied with – and it’s easy to put together as there isn’t a lot of prep work to do. I really loved how it came out and have made it twice since then. The recipe makes a lot, and I dare say the stew tastes even better the next day, when the ingredients have meld together and the sauce has thickened for an even yummier flavour.

Mung Bean and Kale Stew with Miso
(serves 4-6 as a main)
1 tablespoon olive oil
1 medium sized onion, finely chopped
4 garlic cloves, finely chopped
1 big piece of ginger / 50 g, peeled and finely grated
260 g kale, coarsely chopped
270 g cherry tomatoes, cut the larger ones in half but leave the smaller whole
1 cup / 200 g mung beans
3 bay leaves
4 cups / 1 litre stock or water
4 tablespoons mugi miso
In a large sauce pan, heat the olive oil, onion and garlic over medium heat. Sautée for 5 minutes or until the onion has softened.
Add the cherry tomatoes to the pan and crush them lightly with the help of a wooden spoon, so that they release their juices. Add the bay leaves, kale and mung beans, followed by the stock. Raise the heat to high and bring the mixture to a boil. Once boiling, decrease the heat to low, cover the pan, and let the stew cook for 30 to 35 minutes, or until the beans are thoroughly cooked and the kale is tender.
After that time, take out the lid and let the stew cool down for 5 minutes – you’re going to add the miso to the pan and you don’t want to ruin its health properties by heating it up excessively.
In a medium sized bowl, add the 4 tablespoons of miso. Then, gently pour ½ cup of the stew’s liquid over the miso and whisk everything together until you get a sauce-like mixture with a smooth consistency. Add the miso mixture back to the pan and mix well to incorporate. Serve with cooked quinoa, crunchy bread, or simply topped up with plenty of roasted almonds.
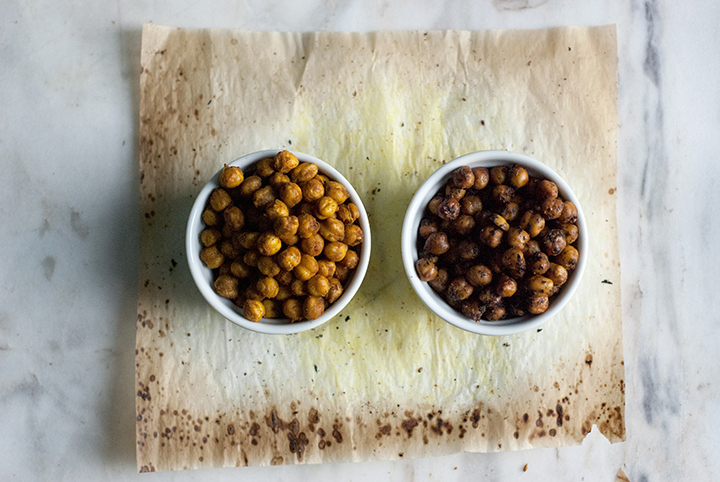
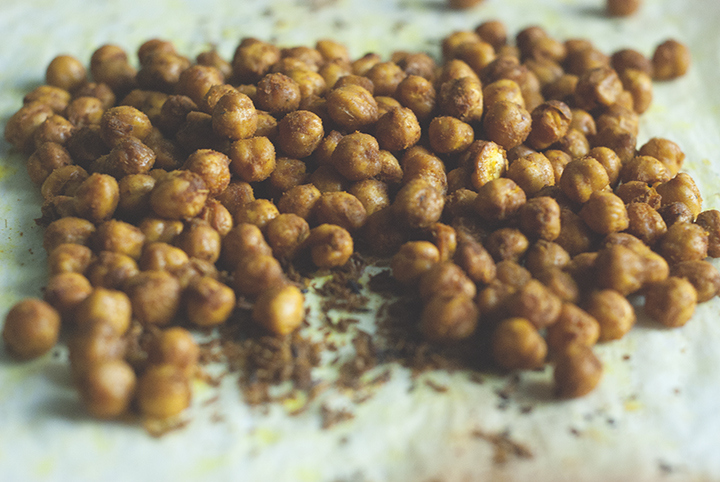
Roasted Chickpeas – Two Ways
I had never been much into sports. As a kid, I tried swimming and gymnastics and, even though I liked the later way more than the former, it wasn’t something I was passionate about. In my teen years, I was introduced to fencing and started to realise that the kind of physical activity I liked had to be in the form of individual, not collective, sports.
In the recent years, and after a very long time – way too much time – of not exercising at all, I started to run. It wasn’t love at first sight – I had many bad runs where I practically ran out of breath and ended up giving up – but, over the time, I started to really enjoy it. These days, I can’t imagine myself not running on a regular basis. I don’t have the right emotional vocabulary to describe how good running makes me feel, but I love every aspect of it – the fresh breeze stroking my cheeks, the feeling of freedom, that sort of alienation from reality by being able to not think about anything… I’m sure most of you guys who run can relate.
Over the last 2/3 months, I’ve been training for my first half-marathon. As the date of the race approaches – it will be in two weeks – I’ve been increasing my running distance. That means that, even though I have the music to keep me distracted, I also have plenty of time to elaborate ideas and projects in my head. Sometimes, I find myself thinking about recipes and ingredient combinations to try. I had the intention to make roasted chickpeas in the back of my head for a while, but it was only while running, the other day, that I thought about the particular flavour combinations I’m now sharing with you.
I’ve never thought roasted chickpeas would be so good. You’ll end up with tasty crunchy bits, packed with flavour, that not only make perfect protein-packed snacks, but are also a great addition to salads. This one’s a very straight-forward recipe, but I’d advise you not to skip the step where you have to take the chickpeas from the oven for a couple of minutes and then pop them back in again. It really makes them crunchier. I also think that home-cooked chickpeas work best for this recipe instead of canned. Canned chickpeas tend to be too soft and mushy, whereas with the dried variety, you’re in control and will likely avoid over-cooking. However, if cooking beans from scratch isn’t your thing, just make sure you really dry the chickpeas well before putting them into the oven.
Roasted Chickpeas – Two Ways
(serves 6, as an appetizer)
475 g / 2 ½ cups cooked chickpeas
for the turmeric/cumin version:
½ teaspoon turmeric
2 teaspoons cumin seeds, crushed in a mortar and pestle
a pinch of dried chilli flakes
1 ½ teaspoon olive oil
salt to taste
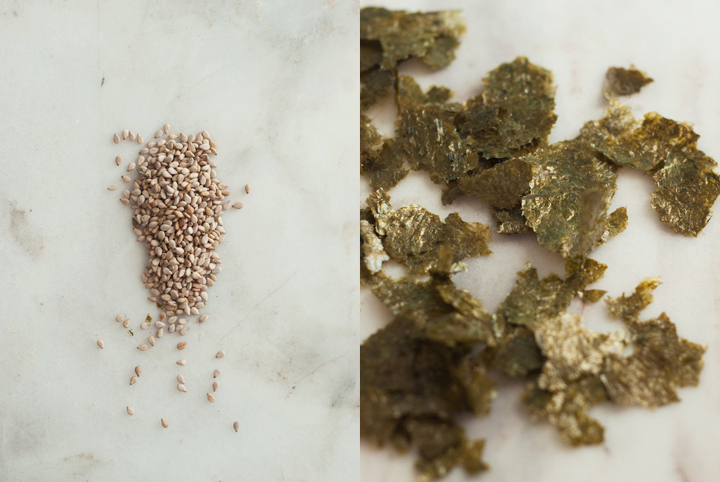
for the nori/sesame version:
1 nori sheet
2 teaspoons toasted sesame seeds
1 ½ teaspoons olive oil
salt to taste
tamari sauce to taste
Pre-heat the oven to 200C.
Spread the chickpeas over a large clean kitchen towel. Grab another towel and put it on top, gently pressing down in order for the moisture to be absorbed. Add half of the chickpeas to a bowl, and the other half to a different bowl.
For the turmeric/cumin version: Combine half of the chickpeas with the oil, followed by the spices and salt. Toss well to evenly coat them.
For the nori/sesame version: Place the nori sheet in a small baking dish. Toast it, in the pre-heated oven, for 10 minutes. Remove it from the oven and let it cool a bit until it crisps up. Now, tear the nori into pieces and add it to the bowl of a food processor, pulsing until you get a fine powder. At this stage, add the sesame seeds and pulse a few times, just to break them down a bit.
Mix the other half of chickpeas with the olive oil. Add the nori/sesame mixture, a pinch of salt, and toss everything together.
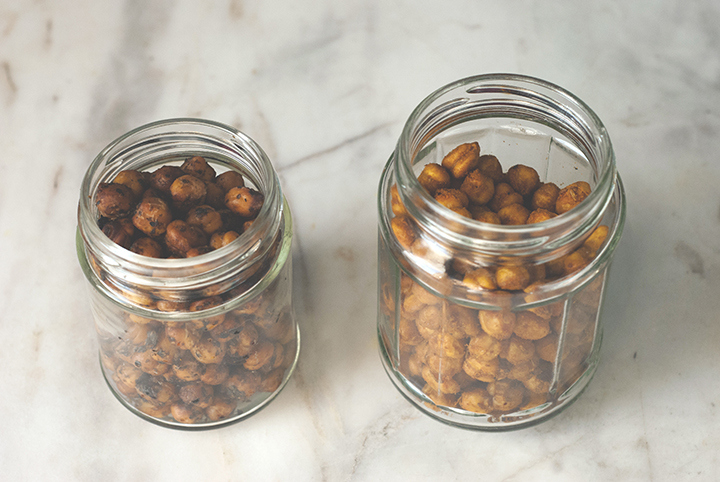
Place both chickpeas’ mixtures in two separate baking tray and roast, in the top and middle thirds of the oven, for 30 minutes, rotating halfway through. After that time, take the trays out of the oven and let them cool, at room temperature, for at least 5 minutes. Return the chickpeas to the oven for additional 10 minutes or until golden brown. Once ready and cooled, coat the nori/sesame chickpeas with a splash or two of tamari sauce. Store the chickpeas in glass jars or tightly sealed containers — they’ll keep well for a week.
Herbed Tofu Cakes with Curried Apple

Lately, I’ve been eating lots of roasted vegetables and bakes, mostly because they are comfort food at their best and have that sort of magical effect of keeping me warm. Also, these are usually dishes that are made in one single pan, meaning there’s minimal work involved in dish washing after dinner, which is also a great advantage. I tell you what I do: often, I make a lentil/vegetable pie and make sure there are enough leftovers for me to enjoy for a couple more meals. Not having that much time to cook lately, this is a method that allows me to have homemade food at hand almost everyday. Anyway, there are also times when I manage to prepare dishes that are done in less than twenty minutes, require minimal effort, are packed with proteins, and taste good. These Herbed Tofu Cakes are one of those no-recipes that I tend to prepare when I don’t feel that much like cooking.
I grab the herbs I have on the refrigerator – this time around, lemon thyme, rosemary and chives were what I had on hand, but you could use any others of your liking -, some tofu and a couple other ingredients, and the cakes are done in no time. The curried apples are a great topping for these protein-packed patties, but you could replace it for some chutney or a simple salsa made with fresh vegetables – they’d be equally good options. To finish things off, serve the dish along with some cooked grains (I can’t get enough of basmati rice cooked with a couple spices such as cinnamon, cloves and cardamom), and there you go.
Herbed Tofu Cakes with Curried Apple
(makes 5 cakes)
for the tofu cakes:
370 grams firm tofu, drained, pat dry and crumbled
1 ½ tablespoons shoyu
1 tablespoon vegan mayo
2 teaspoons dijon mustard
2 tablespoons flaxseed meal
1 ½ tablespoons lemon thyme, finely chopped
1 ½ tablespoons chives, finely chopped
2 teaspoons rosemary, finely chopped
zest of one lemon
2 tablespoons olive oil
for the curried apple:
1 large apple, peeled, cored and thinly sliced
½ teaspoon curry powder
¼ teaspoon sugar
a pinch of salt
a good squeeze of lemon juice
1 tablespoon olive oil
chopped coriander, for garnishing
1. In a large bowl, mix all the ingredients for the tofu cakes, except the olive oil. Mix well until thoroughly combined.
2. Divide the mixture into 4 to 5 equal portions. With your hands, shape each portion into patties.
3. Heat 2 tablespoons of olive oil in a large frying pan, over medium-heat. Shallow-fry the patties for 2 to 3 minutes on each side, or until golden brown.
4. Once the tofu cakes are done, transfer them to a plate and keep them warm in the oven. Heat 1 tablespoon of olive oil in the same frying pan you used for cooking the cakes and, once hot - but not smoking - add the apple slices, sugar, salt and curry powder.
5. Cook for 5 minutes or until the apple slices are tender and slightly caramelized. Turn off the heat and add a good squeeze of lemon juice to the pan.
6. Serve the tofu cakes with the curried apple slices on top, and garnish each serving with plenty chopped coriander. Serve with basmati rice or any other grain of your liking.

1 comment