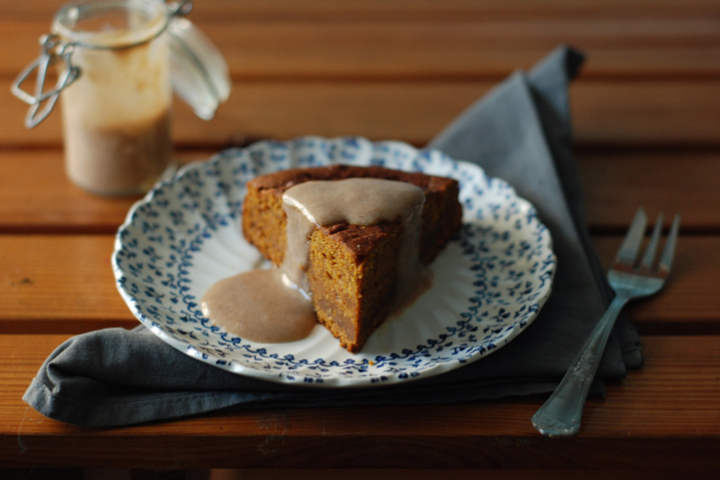
Carrot Orange Cake with Cinnamon Sauce
When I was a kid, the cake I enjoyed the most was an apple cake my grandmother used to make. It was a rustic, unassuming cake, and even when so many years have passed since the last time I ate it, I can still feel its taste and smell with my eyes closed. Actually, my grandmother’s cakes used to be my favorites: the apple cake was the one I’d prefer over any other, although I’d be quite content with a few slices of the orange or the cinnamon cakes too.
As far as carrot cakes go, I don’t exactly remember the last time (before last Saturday) I ate one. I’m almost sure my grandmother has baked it some time in the past, but I can’t exactly recall when or even how good it was (I’m sure it was good anyway). The other day I came over to her place for a visit, and she told me about a carrot cupcake she used to eat in a bakery downtown. I feel that “cupcake” isn’t a fair translation for the kind of sweet treat she was talking about… it’s like a cake made with very little flour, moist, rich, and with an intense carrot flavor. As you can imagine, that left me with a big craving for something similar. I was digging on the internet trying to find recipes for the actual cake my grandmother described (as a kid, I used to eat it very often too), but the ones I’ve found mainly relied on eggs for structure. It’s not that I gave up on trying to find a vegan version for this particular kind of cake, but in the meantime, and in order to satisfy my cravings, I baked a simple, sort of traditional, carrot cake instead. And shared it with my grandmother.
The cake, we thought, was very good, but I tell you straight away: if carrots aren’t your thing, this cake is not for you. The carrot flavor is quite present, and the addition of orange zest and juice gives this baked good a fresh, citrus tang. As far as the preparation goes, it is really easy to make - with all the ingredients on hand, the batter will only take you a few minutes to prepare -, and the cinnamon sauce is a great complement to the whole thing, although I think the cake could also be enjoyed plain. And as a last note: do let the cake sit for a while (preferably overnight) before enjoying it, as it really makes a difference (the flavors will mature and be way more pronounced).
Carrot Orange Cake
(makes 8-10 slices)
dry mixture:
1 cup (125 grams) bleached all-purpose flour
1 cup (125 grams) rye flour
1 teaspoon baking soda
¾ teaspoon baking powder
¼ teaspoon nutmeg
1 teaspoon ground cinnamon
1 teaspoon ground ginger
2 teaspoons orange zest
wet mixture:
1 and ½ cups (255 grams) cooked carrots (from about 5 carrots)
1 cup (125 grams) finely grated carrots (from about 1 large carrot)
1 cup (250 ml) agave nectar
½ cup (125 ml) olive oil
1/3 cup (80 ml) freshly squeezed orange juice
1 heaped tablespoon flax seed
¼ cup (60 ml) warm water
for the cinnamon sauce:
1 and ½ cups (375 ml) soy milk
2 heaped teaspoons cornstarch
3 tablespoons muscavado sugar
2 cinnamon sticks
1 teaspoon ground cinnamon
1. Preheat the oven to 180ºC. Lightly oil a 20 cm round baking pan. Coat the pan with flour, shaking out the excess.
2. In a bowl, sift together the flours, baking soda, baking powder, the ground spices and the orange zest.
3. In the bowl of a food processor, add the flax seed and the water. Process until smooth. Now, add the cooked and raw carrots, as well as the agave nectar, olive oil, and orange juice. Process until totally smoth. Transfer the mixture to a large bowl.
4. Using a spatula, gradually add the dry mixture to the wet mixture, blending well.
5. Pour the batter into the prepared pan. Bake for 1 to 1 and ¼ hours, or until a toothpick inserted in the center of the cake comes out clean.
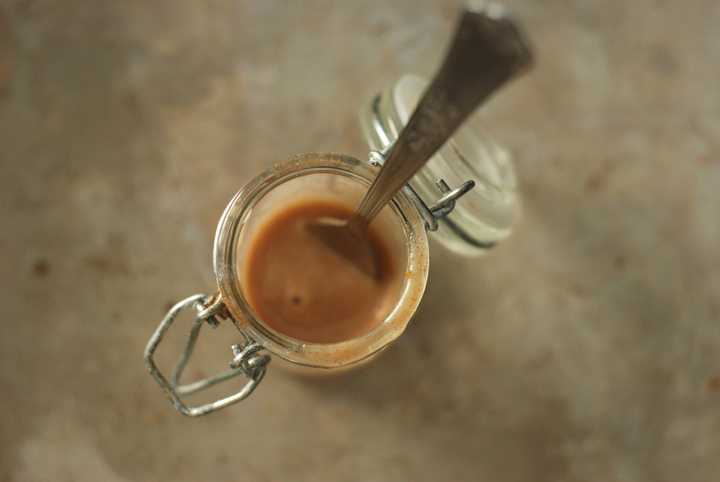
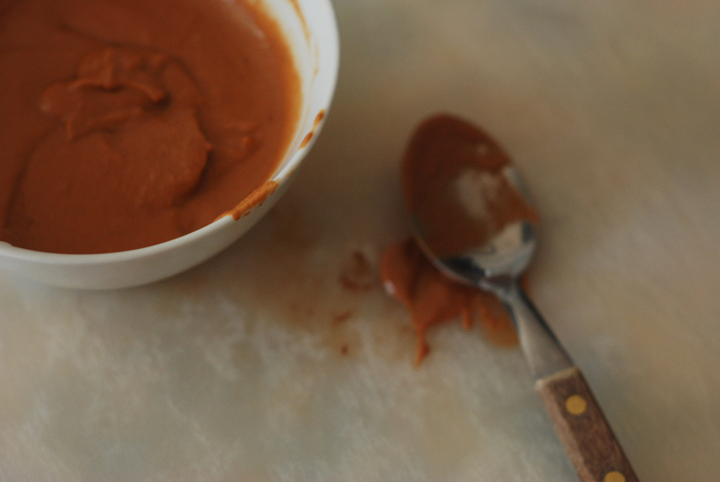
6. In the meantime, prepare the cinnamon sauce: in a saucepan over medium heat, add the soy milk, cornstarch, sugar, cinnamon sticks, and ground cinnamon, and bring to a boil, whisking constantly. Once boiling, immediately reduce the heat to low and simmer for 10 to 15 minutes (don’t stop whisking), or until the sauce has thickened. Serve over each slice of the cake.
Pasta with Sun Dried Tomato Sauce
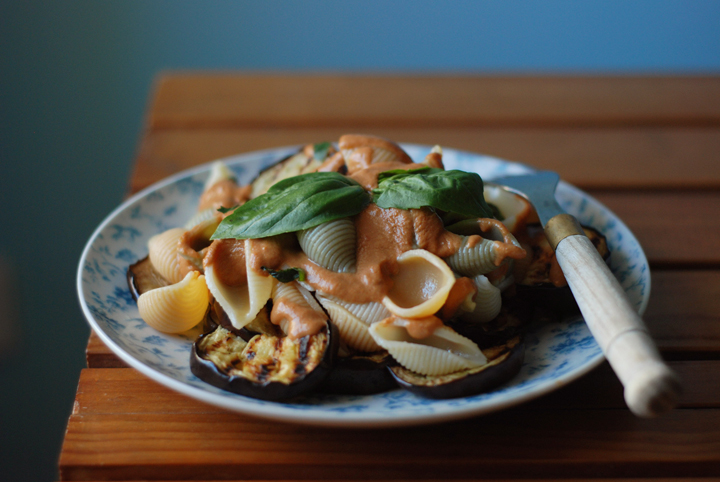
The good thing about this pasta dish, is that you can make the sauce ahead of time, and then all you have to do a couple of minutes before lunchtime, is to cook the pasta and grill the aubergine. It’s a quick and very yummy dish, one of those recipes I make specially when I have guests around, because it’s easy to put together and people generally enjoy it very much.
I’ve done it to death around here, with a few varitions though: for instance, sometimes I use slightly cooked vegetables (such as broccoli and cauliflower), while on other occasions I use grilled ones (onions, aubergines, zucchini). Quite frankly, adding grilled vegetables is what I prefer the most, although that is just for the sake of my personal taste. Regarding the sauce, I think it’s one of those sauces you want to eat by the spoonful: salty and slightly tangy, it can also be a nice addition to savory crêpes or used as a dipping sauce for steamed veggies.
It’s funny that I haven’t thought of this recipe to post to the blog before. These days, I’ve been thinking a lot about when I started cooking vegan food, and the recipes that by then I used to enjoy the most. This one was definitely one of those. Actually, some years ago, I wasn’t that much of a cook. Any recipe that would take more than 10 minutes to be prepared, would most likely be ignored by myself. But on the other hand, I feel that that attitude towards cooking really led me to create some quick and tasty meals, and those are the ones I’m focusing on right now. But before we seriously embrace the everyday vegan cooking topic, I must tell you: there’s going to be a cake showing up here in an upcoming post… ; )
Pasta with Sun Dried Tomato Sauce
(serves 4)
450 grams pasta, such as fusilli or conchiglie (I used the latter)
1 large aubergine
olive oil
salt to taste
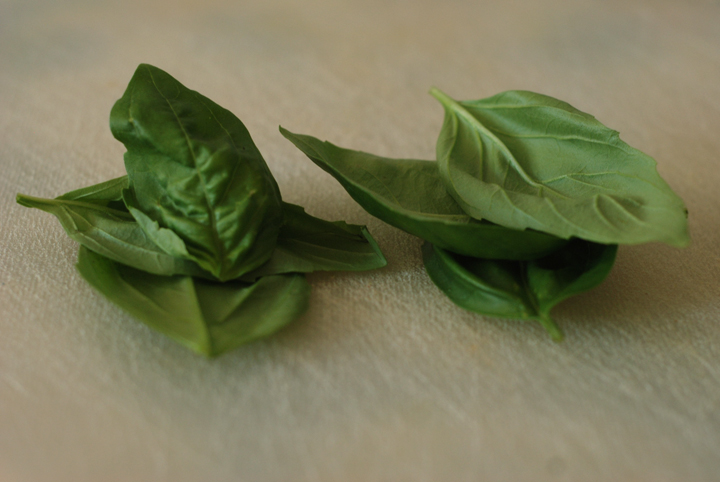
fresh basil leaves, for garnish
For the Sun Dried Tomato Sauce:
½ cup (40 grams) dry packed sun dried tomatoes
¼ cup sun dried tomatoes soaking water
¼ cup olive oil
3 tablespoons rice vinegar
3 tablespoons lime juice
90 grams natural unsweetened soy yoghurt
½ teaspoon salt
1. In a small saucepan, bring about 2 cups (500 ml) of water to a boil. Turn off the heat and add the sun dried tomatoes. Cover, and let them re-hydrate for 15 to 20 minutes, or until soft and plump. Drain, and save the water.
2. In a large pan, bring plenty of salted water to a boil and add the pasta. Cook for 8 to 10 minutes or until al dente. Drain and chill under cold running water. Drain again.
3. Heat a large grilling pan over high heat. Slice the aubergine into rings of about 0,7 cm thick, and brush each side of the rings with olive oil. Lay down as many pieces of aubergine as the pan will hold in a single layer, and sprinkle with salt. Cook each side for 5 to 6 minutes, or until the aubergine has good grilling marks and has almost started to blacken.
4. To make the sauce, put all the ingredients in the bowl of a food processor and process until creamy. Have a taste and adjust the seasonings if needed.
5. In a large bowl, combine the pasta, grilled aubergine and sauce. Mix well and serve immediately, garnishing each individual serving with a few leaves of fresh basil.
Hazelnut and Banana Bread
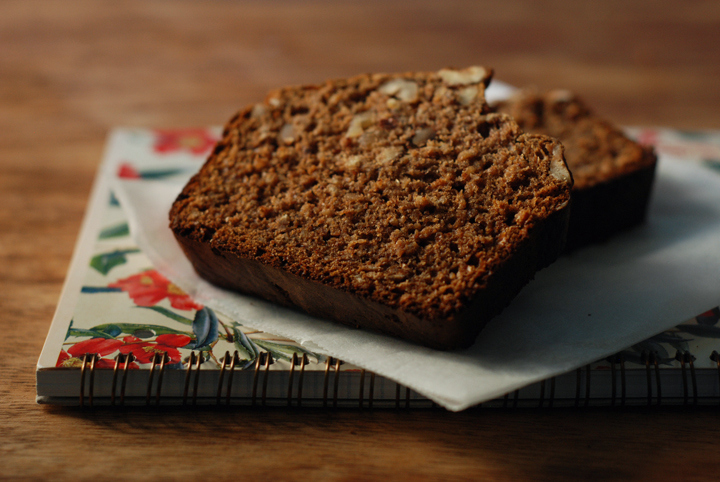
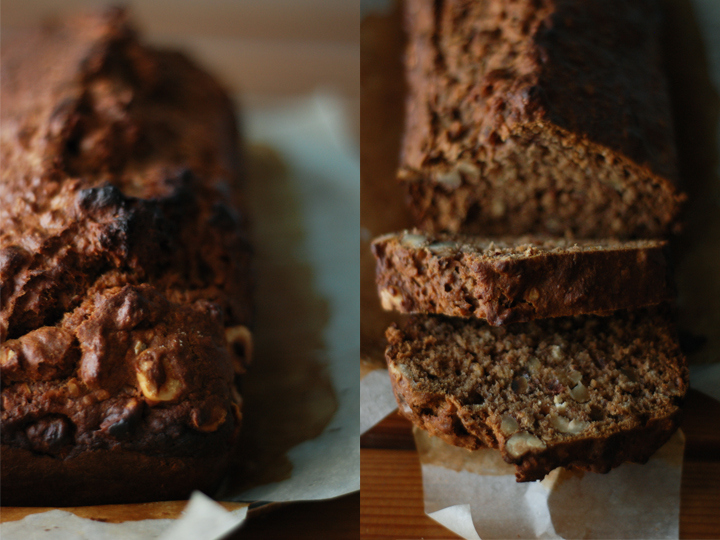
I’ve baked a lot this week: there was a birthday cake for my boyfriend, a spice cake to bring to a picnic, and this hazelnut and banana bread, that I made yesterday. I’ve told you before that I’m not that much of a baker. Actually, baking cakes always scared me a bit, since so far I had way too many unsuccessful experiences to count. But, anyway, it seems I’m mastering the art of vegan baking, as those three cakes that I baked this week turned out quite yummy. The hazelnut and banana bread is the one I decided to share with you, since it’s almost 100% created by myselft.
To be fair, I first started to follow a recipe from an old cookbook that my mom bought a long time ago, but things weren’t working out (the recipe didn’t call for enough wet ingredients, and the batter ended up not coming together at all), so I started things over with a whole new approach. I might have been on a lucky day, as the bread turned out quite good: it’s definitely moist, and as far as the flavor goes, it’s delicate and slightly sweet, which makes it perfect for breakfast. First things first: use very, very, ripe bananas, as it makes all the difference. Baking them will enhance even more their sweet flavor, so make sure not to skip that step. A final note: I used hazelnuts in here, but feel free to substitute them for walnuts or pecans, as they work out very well too.
Hazelnut and Banana Bread
(makes one loaf)
4 very ripe bananas, unpeeled
½ cup (125 ml) olive oil
½ cup (55 grams) muscavado sugar
1 and ½ tablespons ground flax seed, mixed with 8 tablespoons water
1 non dairy, unsweetened, yogurt (100 grams)
½ cup (125 ml) soy milk
1/3 cup (80 ml) agave nectar
1 teaspoon baking soda
1 teaspoon baking powder
2 teaspoons cinnamon
1/8 teaspoon salt
¾ cup rolling oats
1 cup (135 grams) unbleached all purpose flour
1 cup (135 grams) bleached all purpose flour
¾ cup (120 grams) hazelnuts, toasted and coarsly chopped
1. Preheat the oven to 180ºc. Line a (25 by 12 by 7 cm) metal loaf pan with non stick parchment paper. Set aside.
2. Put the bananas, unpeeled, in a large baking dish and bake them for 15 minutes or until their skins are totally black. Remove from the oven and let cool. When they’re cool enough to be handled, take the flesh out of the bananas and put it into a bowl. Set aside.
3. In a large bowl, sift together the flours, baking soda, baking powder, salt and cinnamon. Mix in the rolling oats.
4. Beat together the olive oil, agave nectar and muscavado sugar in the bowl of an electric mixer at medium-high speed, until well incorporated. Reduce the speed to low and add the yogurt, soy milk and flax seed mixture. Finally, mix in the bananas.
5. Remove the bowl from the mixer and fold in the flour mixture and hazelnuts.
6. Pour the batter into the loaf pan, spreading evenly, and bake in the middle of the oven for 50 to 60 minutes, until golden brown and a toothpick inserted in the center comes out clean. Mine was done after 50 minutes, but after 35 minutes of the baking time, I covered the top of the pan loosely with aluminium foil, to prevent the top crust of the bread from browning too much.
7. Cool the loaf in the pan for 10 minutes, then turn it out onto a rack to cool completely. I think this bread is at its best the day after it’s baked.
Brown Rice and Lentil Bake with Caramelized Onions
Usually, when it comes to cooking, I rarely plan ahead. That’s not a thing I’m proud of, as planning your meals ahead is the best way to save time and extra effort in the kitchen. The only thing I do that fits into the plan ahead sort of thing, is that everytime I cook beans or brown rice, I make sure I have leftovers. That way, I can throw the cooked beans and/or rice in the freezer and use it for another meals, or refrigerate them and use it that very same week in other preparations.
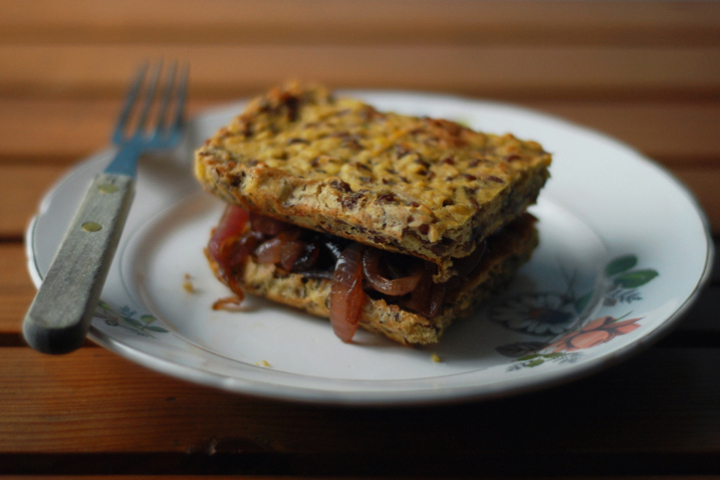
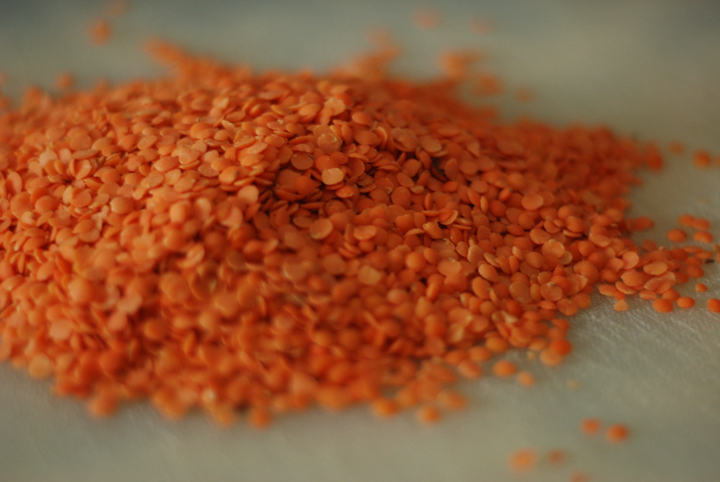
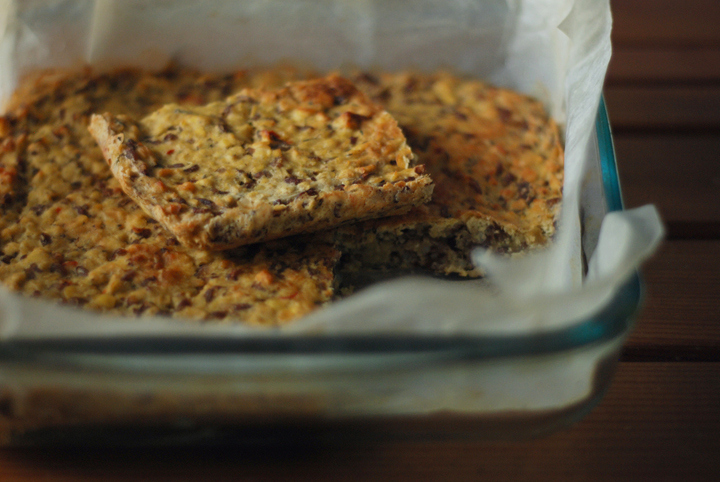
Last weekend, I’ve made a beetroot and brown rice salad (I’ll be soon posting the recipe), and got more leftovers of brown rice than I thought. Since then, I’ve used them in two different preparations and still have leftovers. One of those preparations wasn’t well succeeded: it was an attempt to make brown rice and spinach burgers, that although have turned ok in terms of structure, didn’t deliver in the taste department. Apart from this not very well succeeded burgers, I’ve made a brown rice and lentil bake, and that’s what I thought sharing today. It’s an easy, tasty and very versatile recipe: if you don’t have brown rice on hand, I’m almost sure you can substitute it for regular rice. On the other hand, and although I served this more as a sandwich, with caramelized onions in between two slices of the bake, I’m sure you can come up with more ideas. For instance, next time around I’m thinking of serving this alongside some stewed or pan fried veggies with a spoonful of tapenade on top, to make it more of a complete, nutritionally balanced main course.
Brown Rice and Lentil Bake
(serves 4)
1 cup ( 170 grams) red lentils
2 garlic cloves
½ teaspoon dried thyme
1 tablespoon olive oil
2 cups (400 ml) light stock
½ finely cut red chili pepper
½ teaspoon salt
¼ teaspoon black pepper
1 and 1/3 cups (190 grams) cooked brown rice
for the caramelized onions:
2 large white or red onions, thinly sliced into rounds
2 tablespoons olive oil
2 tablespoons balsamic vinegar
a pinch of salt
1. Preheat the oven to 180ºC. Line a 20 x 20 centimeters baking dish with parchment paper, and brush it with olive oil.
2. Heat a pan over medium heat. Add the olive oil, red chili and thyme and fry for 1 to 2 minutes.
3. Wash the lentils under cold running water. Add the lentils to the pan, as well as the stock, and cook, covered, for 15 to 20 minutes. Season with the salt and black pepper.
4. Mix the brown rice with the lentils and put everything on the prepared baking pan. Bake for 40 to 50 minutes, or until golden brown around the edges.
5. For the caramelized onions, heat a large frying pan over medium-high heat, add the olive oil and sliced onions, and cook for 15 minutes, or until the onion starts caramelizing and browning a bit. On the last minute of cooking, add the balsamic vinegar and salt and stir well to incorporate.
6. Serve the caramelized onions in between two slices of the brown rice and lentil bake.
Curried Zucchini and Apple
This recipe is what I had for lunch today, alongside some grilled tofu and toasted bread slices. It’s one of those recipes that you can put together in a matter of minutes, and is really tasty. What is important in here is to slice both apple and zucchini as stated in the directions, so that they cook thoroughly in the amount of time I’ve specified. The point is to just slightly overcook the zucchini, while the apples retain some of their crunchiness (one of the reasons why I haven’t peeled them). Also, you don’t to use tart apples such as, for instance, Granny Smith, but sweet and crisp ones, as a way of balancing the addition of lemon and ginger juices to the dish. For me, Starking apples work the best in here, but if you can’t find them, I bet Red Delicious would make it as well. For some of you who don’t really know what else to do with zucchini, give this recipe a shot – I’m almost sure it won’t disappoint.
Curried Zucchini and Apple
(serves 4, as a side)
540 grams zucchini (3 medium ones)
200 grams Starking apples (2 small ones)
2 garlic cloves, minced
2 tablespoons olive oil
1 teaspoon curry powder
2 tablespoons water
1 tablespoon freshly squeezed ginger juice
1 and ½ tablespoons freshly squeezed lemon juice, plus a bit more
1 tablespoon lemon zest
¼ cup toasted almonds, coarsly chopped
1 small handful of chopped coriander
salt and pepper to taste
1. Quarter the zucchini lengthwise. Then, cut each quarter into two halves. Finally, cut each half crosswise into sticks about 8 centimeters long. Set aside.
2. Quarter the apples and remove their core. Slice each quarter into 3 equal pieces, about 0,5 centimeters thick. Transfer the apples to a bowl, and add a squeeze of lemon juice to them, to prevent oxidation.
3. In a large sautée pan over medium heat, add the olive oil, garlic cloves, and curry powder, and fry for 1 minute. Add the zucchini and the 2 tablespoons of water, cover, and cook for 8 to 10 minutes, stirring occasionally.
4. Add the apples to the pan and cook for additional 5 minutes. In the last minute of cooking, add the lemon and ginger juices, the lemon zest, and season well with salt and pepper.
5. Remove from heat and divide among 4 deep plates. Add the almonds and chopped coriander on top of each serving and serve immediately.
inspired by Vegetarian Cookery, published by Dorling Kindersley, 1991 (I believe the book is now out of print)
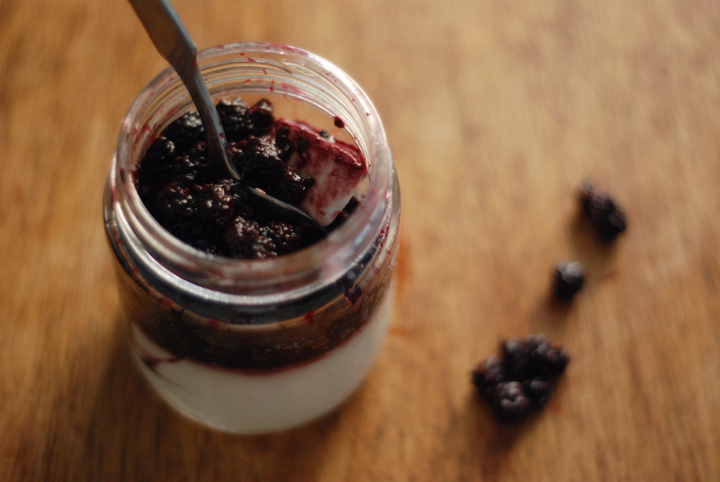
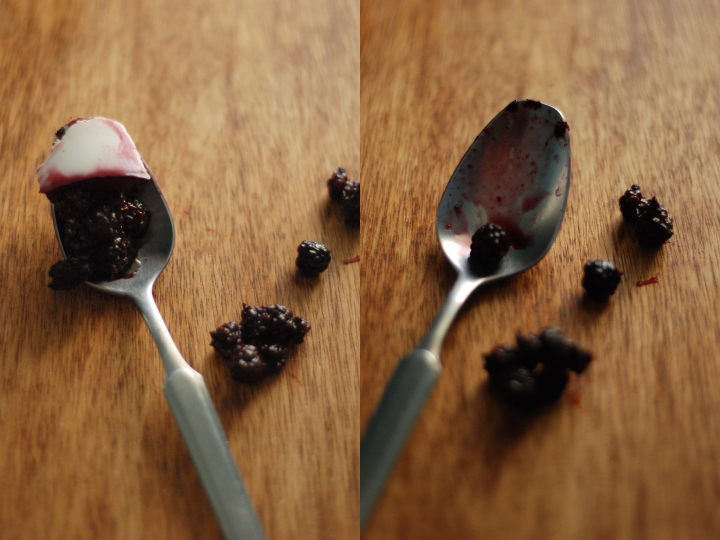
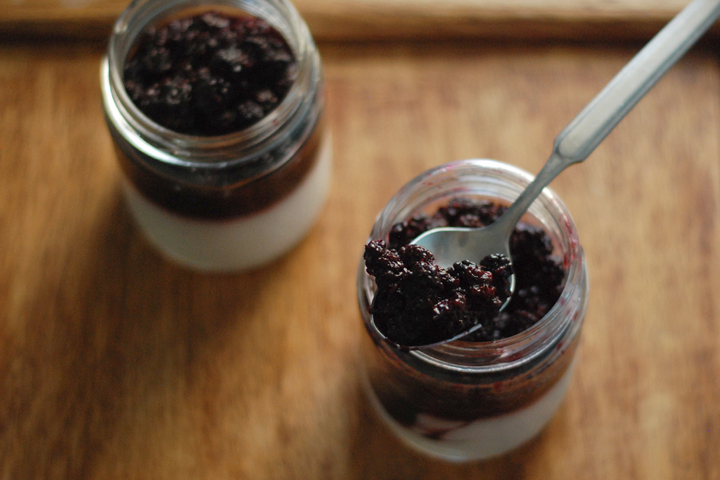
Vegan Panna Cotta with Stewed Blackberries
The other day, my mom went to the park to pick up some blackberries. She came home with a bag full of them, and asked me to use them as part of a dessert. I couldn’t help myselft but thinking of a delicious, simple, spoon dessert, made of coconut milk, agar agar, and stewed fruit. You may have heard about agar agar before: it’s a gelatinous substance derived from an algae, mostly used in asian cuisine. It’s all natural, 100% vegan, and doesn’t have the artificial ingredients gelatin generally does have (I’m not even mentioning the part that gelatin is derived from animals’ bones…).
I’ve been working with agar agar powder as a substitute for gelatin for quite some time now, but it took me a while to get the best out of it. The main problem I’ve found while using it in various spoon desserts, is that it tended to harden way more than I wanted it to. The consistency I’d get, although reminding that of gelatin, wasn’t as soft as the latter. But after some experiments, I think I came up with the right ratio: for each 300 mililiters of liquid, add 1 and ½ teaspoons of agar agar flakes. Less than that, you’ll get a runny consistency; and adding just a bit more for the said amount of liquid, will make your dessert a bit on the hard side.
Now, this recipe for Vegan Panna Cotta is a favorite around here; it’s dead easy to make and really tasty. Not only adding the right amount of agar agar powder but also using coconut milk, are really important things in here, so do not try to substitute any of those ingredients. The coconut milk with its rich and subtle flavor really complements well the sweetness of the stewed berries. As far the fruit goes, you don’t really need to use blackberries in here; others, such as blueberries or even strawberries, will work out. I even tried once to make this dessert using stewed figs – delicious. Just bare in mind you want a fruit that is delicate and soft, but still firm enough to hold part of its structure after being cooked.
Vegan Panna Cotta with Stewed Blackberries
(serves 3)
¼ cup regular sugar
¼ cup water
300 grams blackberries
1 vanilla bean, split lengthwise
400 ml coconut milk
5 tablespoons agave nectar
1 and ¾ teaspoons agar agar flakes
1. Heat a saucepan over low-medium heat, add the blackberries, vanilla bean, sugar, and water. Cook, covered, for 10 to 15 minutes, or until the liquid has thickened a bit but hasn’t all evaporated. Let it cool and discard the vanilla bean.
2. In another pan over low-medium heat, add the coconut milk, agar agar flakes and agave nectar. Bring the mixture to a simmer (do not let the coconut milk boil) and stir constantly, for 15 minutes. When it’s done, remove the pan from the heat and let cool for 10 minutes.
3. Divide the coconut mixture equally among 3 cups. Refrigerate the cups for at least 2 hours, or until the mixture has harden to the consistency of gelatin.
4. Now, add the blackberries as well as the liquid that has been realeased while stewing them, on top of each cup. Cover the cups with cling film and refrigerate for additional 1 or 2 hours before serving.
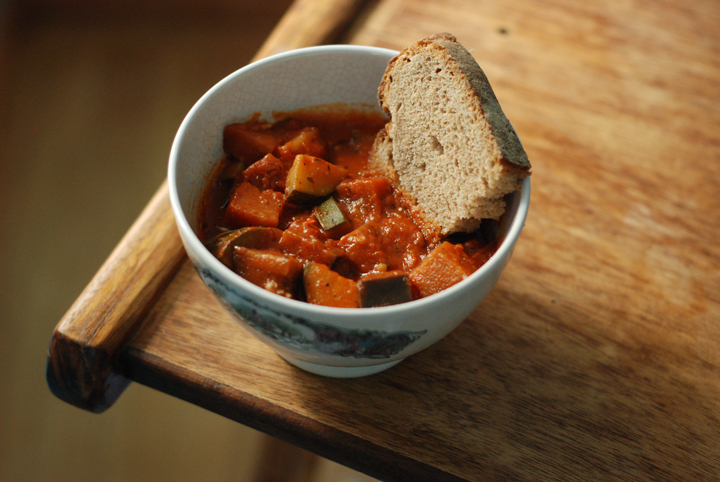
Ratatouille Soup
When it comes to food, I’m not a purist. That being said, I have no problems eating canned beans or store bought cookies, as long as they’re vegan and taste good (although, quite frankly, I often cook my beans and bake my cookies). I generally don’t have “prejudices” against canned stuff, and if there are canned produces I use on a regular basis, they are tomato sauce and roasted peppers. They’re vegan, taste good, and although it’s often said there’s nothing as homemade tomato sauce, I’m totally sold to the canned one.
When it comes to recipes, specially traditional and local ones, I’m also not a purist. I do believe moussaka is not the same without meat in it, but I do really enjoy my dairy-free version of the greek classic; the same goes for pizzas and lasagnas, foods that usually call for cheese, and that I most of the times make cheese-less. Actually, both vegans and vegetarians end up, most of the time, tweaking recipes to get them to fit their diets, and that often means to make a traditional dish the unconventional way. This whole process of tweaking recipes fascinates me, as that doesn’t mean they’ll loose their former character just because they’re made a little different by some vegans and vegetarians out there. For me, respecting the identity of a certain local recipe (I’m thinking of portuguese traditional foods by the way), doesn’t mean you have to make it exactly as people did a hundred years ago. Time has passed, dietary needs have changed thanks to our growing knowledge on nutrition and health issues; and I feel it’s by tweaking and experimenting with flavors, textures and so on, that you keep the spirit of traditional foods alive nowadays, more than sticking to the way they’re – traditionally speaking - supposed to be made.
I found myself thinking about all this because of today’s recipe. Ironically, a recipe inspired by a french dish that is already vegan. There is much debate on how to make traditional ratatouille, but I don’t really want to contribute to the discussion. My version of it calls for canned tomato sauce and canned roasted bell peppers, as it saves up some time, being therefore more user-friendly, but if you want to make everything from scratch, just go ahead. Also, by adding far more liquid than it’s usually added on a stew, I make more of a soup, rather than a side dish. This ratatouille soup, alongside with a good slice of toasted wholegrain bread, makes for an excellent comforting meal, perfect for the autumn days to come.
Ratatouille Soup
(serves 6)
300 grams aubergine
300 grams zucchini
3 medium size tomatos, coarsly chopped
2 roasted bell peppers, coarsly chopped
3 garlic cloves, minced
2 tablespoons olive oil
½ red chili pepper, finely cut
½ teaspoon dried thyme
½ teaspoon dried oregano
1 cup plain tomato sauce
½ cup red wine
1 1/2 cups light stock
1 bay leave
salt and pepper to taste
1. Start by preparing the aubergine and zucchini: slice both vegetables into 0,8 cm thick rounds, and then cut each round into 4 equal pieces. Set aside.
2. In a large pan over medium heat, add the olive oil, garlic, chili, dried thyme, oregano and bay leaf, and sautée for 2 minutes. Add the tomatos and roasted bell peppers and cook for 5 minutes, stirring occasionally.
3. Now, add the stock, red wine, and tomato sauce to the pan, and cook for 10 to 15 minutes, or until the tomatos start breaking down and you get the consistency of a thick, hearty sauce.
4. Discard the bay leaf. Transfer the pan to your counter or kitchen table, and with the help of an immersion blender, blend the mixture until smooth.
5. Return the pan back to the stove, add the zucchini and aubergine, and cook, over low-medium heat, for at least 25 minutes, maybe a bit a longer – the point here is to slightly overcook the vegetables. Add salt and pepper to taste.
6. Serve the soup hot or at room temperature – it’s particularly good alongside a slice of wholegrain bread - bearing in mind it will thicken in the hours to follow the end of the preparation.
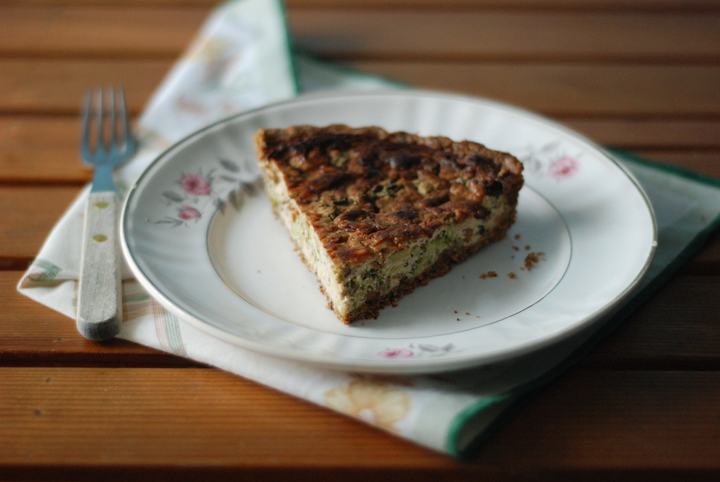
Broccoli and Pine Nut Tart
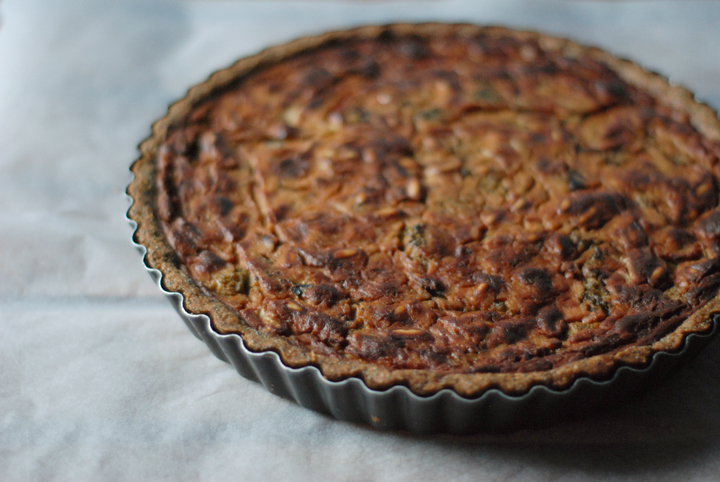
On sunday afternoons, I like to give myself plenty of time to do whatever I want. Usually, that involves napping right after lunch. But yesterday, after some failed attempts at napping, I’ve decided to go to the kitchen and focus on a culinary project, one that would take some time, to keep me occupied until dinner time. And so I’ve made a tart. A delicious one. Perhaps one of the best vegan tarts I’ve ever had. Usually, savory tarts call for buttery crusts and rich custards made out of eggs and cream, but this one, not having any of those ingredients, packed a lot of flavor and didn’t fall apart at all through slicing.
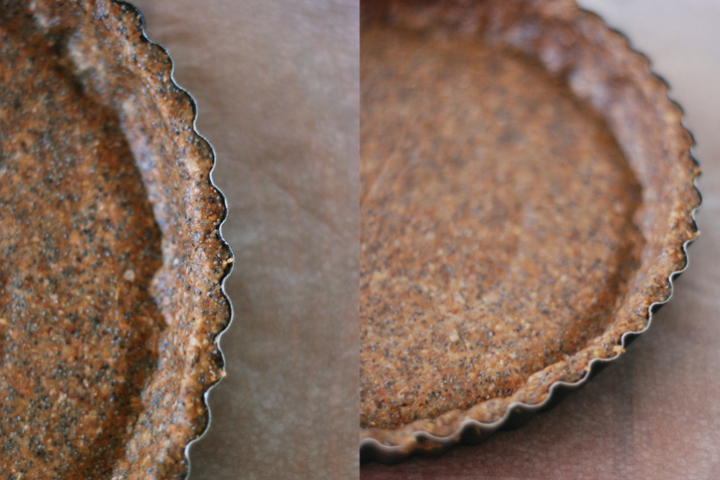
For some reason, I was never happy with my attempts at making tart crusts. Usually, they would shrink a lot and get soggy after being cooked, and also had a bland and not interesting flavor. But since I’ve tried the recipe for this pie crust , I’ve never gone back: the toasted oats and the addition of sesame oil really complement each other well and give such a dense and nutty flavor to the crust. The poppy seeds (which in the original recipe, by Peter Berley, are replaced by sesame seeds) contribute for the crunchiness.
As far as the custard goes, I’m sure no one would say it doesn’t have eggs or cream in it. First, it really firms up after cooking, and as I said, it keeps its structure beautifully through slicing. On the other hand, it’s just delicious on its own: using pureed tofu as the main component of a vegan custard was referred not only in Peter’s book, The Modern Vegetarian Kitchen , but also in Rose Elliot’s Vegan Feasts . So my version is a bit of a mix between the suggestions given by both books (and cooks).
The counterpart of all this, is that the tart will take some time to make. There are some ideas you can put in practice to save some time for the next time you want to make it, such as, for instance, doubling the recipe for the crust and make two instead of one tart shells. All you have to do is to roll the dough and freeze it in the tart pan for one hour or two, to keep its shape, after which you can take out the pan and leave the frozen crust on the freezer for up to a month. The filling could also be doubled and frozen too. Just don’t let yourelf down by the long preparation time and the extensive list of directions for this recipe. In the end, I’m sure you won’t regret.
Broccoli and Pine Nut Tart
(makes one, 20-22 cm tart)
For the tart crust:
½ cup (45 grams) rolled oats
3 tablespoons poppy seeds
¼ teaspoon table salt
1 cup (110 grams) whole wheat flour
½ teaspoon baking soda
1/3 cup (80 ml) unsweetened soy milk
1/3 cup (80 ml) olive or sesame oil (I used the latter)
For the filling:
400 grams firm tofu
200 grams broccoli, chopped into tiny florets
2 medium-large white onions (280 grams), finely chopped
2 fat garlic cloves, minced
2 tablespoons olive oil
½ teaspoon dried thyme
½ teaspoon dried oregano
½ teaspoon dried chives
1/2 cup (125 ml) light stock
1 tablespoon apple cider vinegar
1 tablespoon mugi miso
60 grams pine nuts
1. Preheat the oven to 180ºC.
2. Start with the tart crust: Sift the flour into a large bowl. Add the baking soda, salt and poppy seeds to the same bowl.
3. Heat a large pan over medium heat, add the oats and toast them for 6 to 8 minutes, or until fragant and slightly brown. Stir the oats as they toast to prevent them from burning.
4. Transfer the toasted oats to a food processor and process until finely ground. Add them to the bowl with the flour and the other dry ingredients.
5. Now, add the soy milk and olive oil to the dry ingredients and mix until a dough comes together.
6. Lightly brush a 20-22 cm tart pan with olive oil. Roll ou the dough in between two sheets of parchment paper, just thin enough to fit the pan. Press the pastry down into the pan and trim the edges. Refrigerate while you make the filling.
7. To make the filling, heat a large sautee pan over medium heat, add the olive oil, minced garlic and onion, and cook for 10 minutes or until the onion is golden brown. Then, add the dried herbs (thyme, oregano and chives), and the stock, and cook, uncovered, for at least 10 to 15 minutes, or until the liquid has almost all evaporated.
8. Crumble the tofu into the bowl of a food processor. Add the onion mixture, vinegar, and miso, and puree until smooth.
9. Heat a pan over medium-high heat, add the pine nuts, and toast them for 5 minutes or until they’re slightly brown. Give the pan a good shake every minute or so, to evenly toast the nuts.
10. In a medium sauce pan over high heat, bring 2 cups of water to a boil. Then add the broccoli florets, and cook for no longer than 1 minute. Drain and wash the broccoli under running cold water, to stop cooking. Drain again, and set aside.
11. Mix the broccoli and pine nuts with the rest of the filling.
12. Fill the tart shell with the tofu and vegetable mixture, and level the top with the help of a rubber spatula. Place the tart into the preheated oven and cook for 45 to 50 minutes, or until the tart has firmed up and is golden brown.
13. Let the tart cool on the pan for at least 15 minutes before slicing. The tart is good eaten lukewarm or at room temperature.
recipe inspired by The Modern Vegetarian Kitchen, by Peter Berley
Seasonal Minestrone
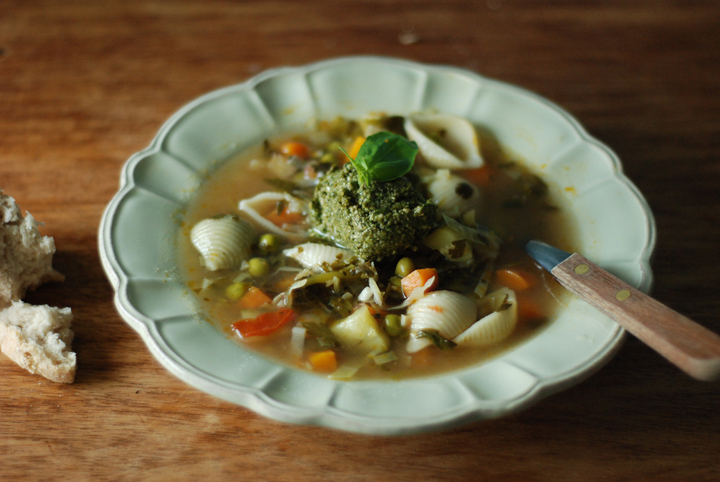
Surprisingly enough, yesterday - with an outside temperature of 35 degrees -, I found myself sneezing and coughing all the time. I knew I was about to get sick, and started craving a comforting soup and toasted bread, no matter how hot was outside and how sweaty I’d get right after eating those foods. I had some seasonal veggies sitting on the fridge that would make for a good pot of soup, and it didn’t take me long to get my hands at preparing them (peeling, slicing and all), although I must confess I was about to give up a few times during the process and go for a nap. I’m usually very determined when it comes to satisfy my cravings, and the idea that, in the end, I’d get a huge pot of soup that would make my lunches and dinners for the rest of the week, worked out as the main motivation factor.
I ended up following (although not stricktly) Jamie Oliver’s recipe for a Spring and Summer Minestrone, that I’ve bookmarked from his book Jamie Does. I adapted the recipe to fit what I had on hand, and I guess that’s the spirit of minestrone anyway – use whatever vegetables are in season and that would go well together for a hearty, filling soup. The original recipe for the pesto calls for Parmesan, but as I don’t do cheese, I’ve just ommited this ingredient and had not problems at all. Just bare in mind Parmeasan is quite salty, so use a good pinch of salt in the pesto to work as a substitute and to balance things out.
Seasonal Minestrone
(serves 6)
200 grams carrots
300 grams zucchini
3 garlic cloves
1 large leek
1 large tomato
a bunch of parsley
2 handfuls watercress
1 cup frozen peas
150 grams short pasta
1 small cabbage
2 liters good tasting stock
salt and pepper
olive oil
for the pesto:
a bunch of basil
60 grams pinenuts
3 tablespoons olive oil
2 small garlic cloves, peeled and thinly sliced
a pinch of salt
1. Start by preparing the carrots and zucchini: slice each vegetable into quarters, and then slice each quarter into cubes of aproximadetely 0,8 to 1 centimeter thick.
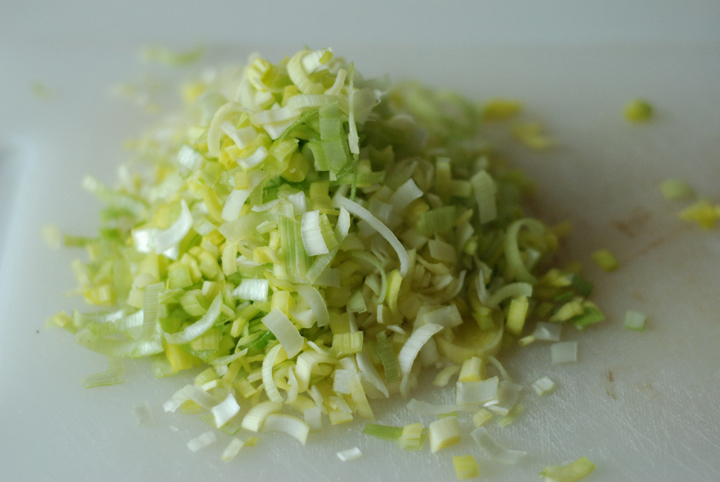
2. Then, thinly slice the leek and garlic cloves.
3. Heat your largest pan on medium heat, add a few glugs of olive oil, the leek, garlic, carrots and zucchini. Stir and cook for about 5 minutes.
4. Roughly chop the tomato, parsley, and watercress. Slice the cabbage into halves, remove the hard core, and finely shred each half. Add the veggies to the pan.
4. Now, add the peas, pour in the stock, and bring to a boil. Once boiling, add the pasta and salt and pepper to taste. Lower the heat to low-medium, and let the soup simmer for about 10 minutes, or until the pasta is cooked. Taste and adjust the seasonings if needed.
5. To make the pesto, add the basil, pinenuts, garlic cloves, a pinch of salt and the olive oil to a food processor, and pulse everything for 1 minute, or until the mixture starts coming together into a paste, but isn’t totally smooth. Have a taste and adjust the flavors (adding a bit more of one or another) if needed, bearing in mind you want to find a balance between all the ingredients.
6. Divide the soup among deep plates and top each serving with a good tablespoon of pesto. Drizzle over a little olive oil and add some fresh basil leaves.
recipe inspired by Jamie Does, published by Penguin Books




1 comment