Gluten-Free Corn and Broccoli Muffins

I’ve decided, a couple weeks ago, to start experimenting with gluten-free recipes, specially baked goods. I’ve been reading a lot on how to work with different gluten-free flours, and started having fun experimenting with them. Vegan baking is, by itself, a challenge; but baking vegan and gluten-free goodies can be even more challenging, specially when you realize, after some reading, that even rye and spelt flours have gluten on them (until a few days ago, I was convinced they didn’t). But the thing is: once you get succeeded at baking vegan and gluten-free, you know that everybody – vegans, non vegans, and people with food allergies - can happily enjoy what you’ve prepared, and that’s the great thing about it.
So, on saturday, I’ve spent the whole afternoon in the kitchen baking gluten-free muffins and cakes, and was really surprised on how good everything has turned out. These corn and broccoli muffins is the very first gluten-free baked good I’m posting on Veggies on the Counter (and many others will come in the future), and they are/were surprisingly fluffly and tasty - give me them toasted with a little butter, along with a steamy soup, and I’m in heaven. The recipe can be easily adapted too: you can substitute the broccoli for corn kernels, or simply ommit those add-ons, for a simpler, but not less tasty, version. And if you’re not concerned with gluten-free baking at all, just substitute the white rice flour for unbleached all-purpose.

Gluten Free Corn and Broccoli Muffins
(Makes 6 muffins)
100 grams broccoli, cut very finely, plus 6 medium-sized broccoli florets
130 grams (1 cup) white rice flour
140 grams (1 cup) fine cornmeal
3 tablespoons melted vegan butter
2 teaspoons baking powder
¾ teaspoon salt
1 cup (250 ml) soy milk, plus 5 tablespoons
80 grams tofu, crumbled
1 tablespoon agave nectar
1. Pre-heat the oven to 180º. Oil 6 muffins cups or a 6 muffin pan.
2. In a large bowl, combine the flour, cornmeal, baking powder and salt.
3. In the bowl of a food processor, add the crumbled tofu and 5 tablespoons of soy milk. Process until smooth and transfer the mixture to another bowl.
4. Add the butter, soy milk, agave nectar, and the finely cut broccoli to the tofu mixture. Mix well to incorporate.
5. Slowly fold the wet ingredients over the dry, being careful not to overmix. The batter will be thick, but that’s how it’s supposed to be.
6. Divide the batter among the muffin cups. When you’re done, insert one medium-sized broccoli floret in the center of each muffin (see pictures above).
7. Bake the muffins for 20 minutes, or until golden brown. Let them cool on the pan/cups for 10 minutes before unmolding and serving.
Simple and (almost) Fat Free Apple Cake

I always love to watch people cooking, specially to see how their process is – not only in terms of what ingredients they choose to cook with, but also in terms of how they organize things and manage the time they spend preparing a meal. I’m not sure if I’ve told you this before, but I’m not (really) an organized cook. Firstly, I spend way too much time preparing things, and secondly, I tend to be messy. I know some people who are always cleaning up and arranging the ingredients they’re working with on the kitchen counter, and even though I try to be like them, it seems I can’t achieve such level of method. Pans, plates and bowls are left on the kitchen sink, waiting for the meal to be done to get washed; ingredients remain on the counter even though I might have already used them; t-shirts and sweaters get stained with tomato sauce, cake batter, and so on, because most of the time I forget to put the apron on. I don’t mean to scare you – in fact, if you’d come over for dinner, I’d do my best to hide the evidences of my messiness.
Things tend to get worse when I bake – flour all over the place, packages of sugar and margarine clearly out of their natural environment, dirty bowls and cups pilled up on the sink. You get the scenario. As I was thinking about this the other day, I thought it’d be great if I could come up with a cake recipe that would require minimal effort and the use of only a few kitchen utensils.

The recipe for the Apple Cake I’m sharing with you today, even though requiring the use of a food processor, can be pretty much considered a clean-up-friendly type of cake. It’s also gluten-free and (almost) fat free, meaning that a second or third slice won’t hurt. The fact that it’s a fat free cake doesn’t compromise its flavor, which is delicate, yet full of warmth, for which the addition of a generous amount of ground cinnamon definitely contributes.
And finally last, but definitely not the least: I’m really (really!) excited to be a contributor for Honest Cooking, a brand new online food magazine that has launched just yesterday. My very first article can be found here, but please do check out the website, it’s really well worth it!
Simple and (almost) Fat Free Apple Cake
(for one 20 cm - 8 inches - round pan)
1/2 cup (73 grams) buckwheat flour
½ cup (80 grams) brown rice flour
1/3 cup (35 grams) oat flour
1 teaspoon baking powder
½ teaspoon baking soda
a pinch of salt
1 teaspoon ground cinnamon
wet mixture:
6 tablespoons agave nectar
½ cup (65 grams) light muscavado sugar
½ cup (125 ml) apple juice
½ cup (125 ml) soy milk
100 grams (one medium sized) banana, peeled
topping:
250 grams (2 medium sized units) sweet apples (such as Starking or Red Delicious)
1 tablespoon light muscavado sugar
1 tablespoon cold vegan margarine, cut into very small pieces
a good pinch of ground cinnamon
1. Pre-heat the oven to 180º.
2. Grease a 20 cm (8 inches) round baking pan with melted vegan margarine and dust it lightly with flour.
3. In a large bowl, combine all the ingredients for the dry mixture. Set aside.
4. In a bowl of a food processor, combine the agave nectar with the muscavado sugar. Process, at medium speed, until creamy. Add the apple juice, soy milk and the banana and process for additional 2 minutes, or until totatlly smooth.
5. Slowly pour the wet mixture into the bowl with the dry ingredients, mixing everything with a spatula. Even though you shouldn’t overmix the batter, make sure it doesn’t have any lumps.
6. Transfer the cake batter to the prepared pan.
7. In the meantime, peel and core the apples and cut them into thin slices. Then, arrange the apple slices evenly on top of the cake. Sprinkle it with the remaining tablespoon of muscavado sugar and a pinch of ground cinnamon. To finish things off, evenly distribute the margarine pieces on top of the cake.
8. Bake the cake in the preheat oven for 30 to 35 minutes, or until the top is golden brown. Let it cool for 10 to 15 minutes in the pan, after which you should transfer it to a wire rack or large plate to cool down completely. To do this, carefully flip the cake onto a large plate (it will be upside down), and then use another plate to flip it again. Serve warm or at room temperature.
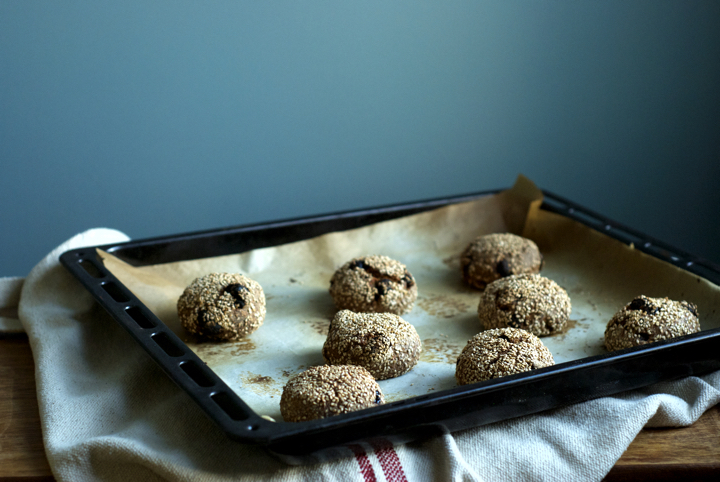
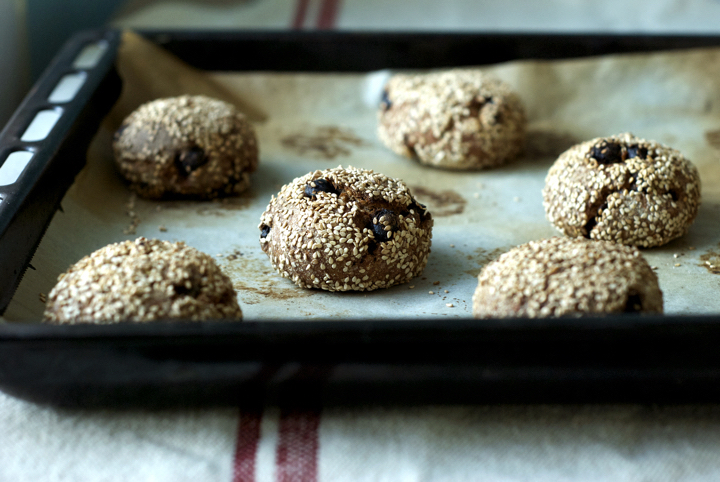
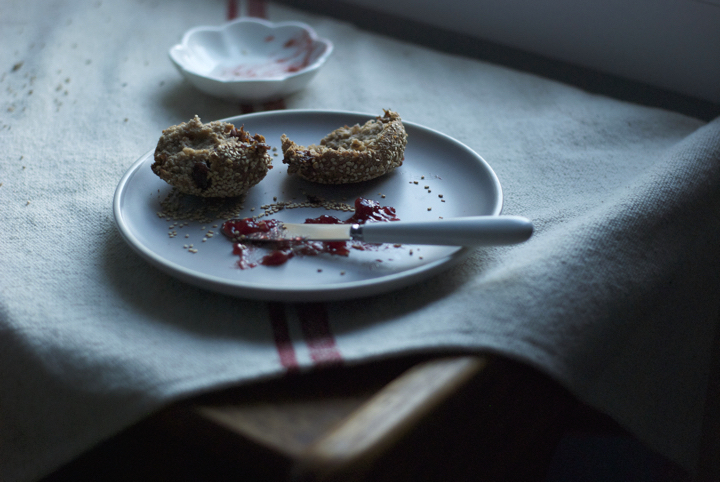
Sourdough Rye Buns with Raisins and Sesame Seeds
Bread. Such a hot topic these days isn’t it? Since the gluten free craze has started, bread seems to be the number one food to be avoided. I take food intolerances very seriously, but with all due respect to those who have allergic reactions to to gluten, I think we’ve gone way too far with this issue.
I love bread, I really do. I don’t eat bread everyday but I eat it very often. And since this whole discussion around gluten has begun, I decided that instead of cutting it out from my diet (which, quite honestly, wouldn’t work), I would make more sensible choices towards the bread I eat. And that’s when I learnt about sourdough. I’ve had sourdough bread during my time in Holland and I’ve always loved its tangy and characteristic taste.
Unfortunately, here in Portugal we don’t have a tradition of sourdough bread, which left me with the only decision of trying to make my own. I’ve made a starter following this guide, and for the last 6 months I’ve been baking my own bread. Sourdough bread is more easily digested than loaves made with commercial yeast, tastes incredibly good, and also keeps longer.
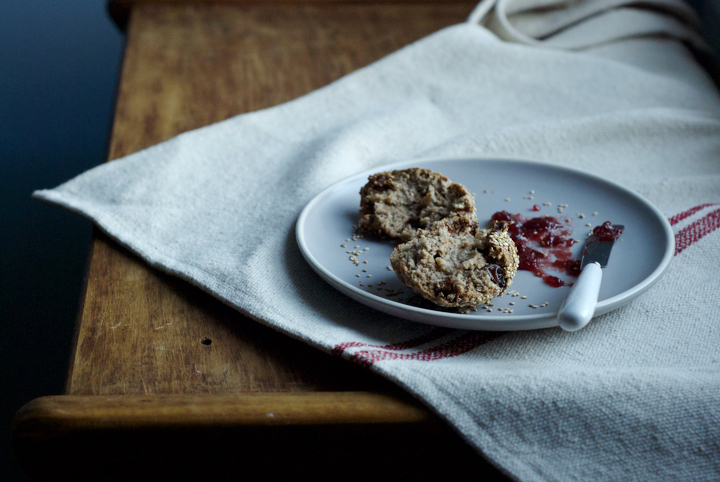
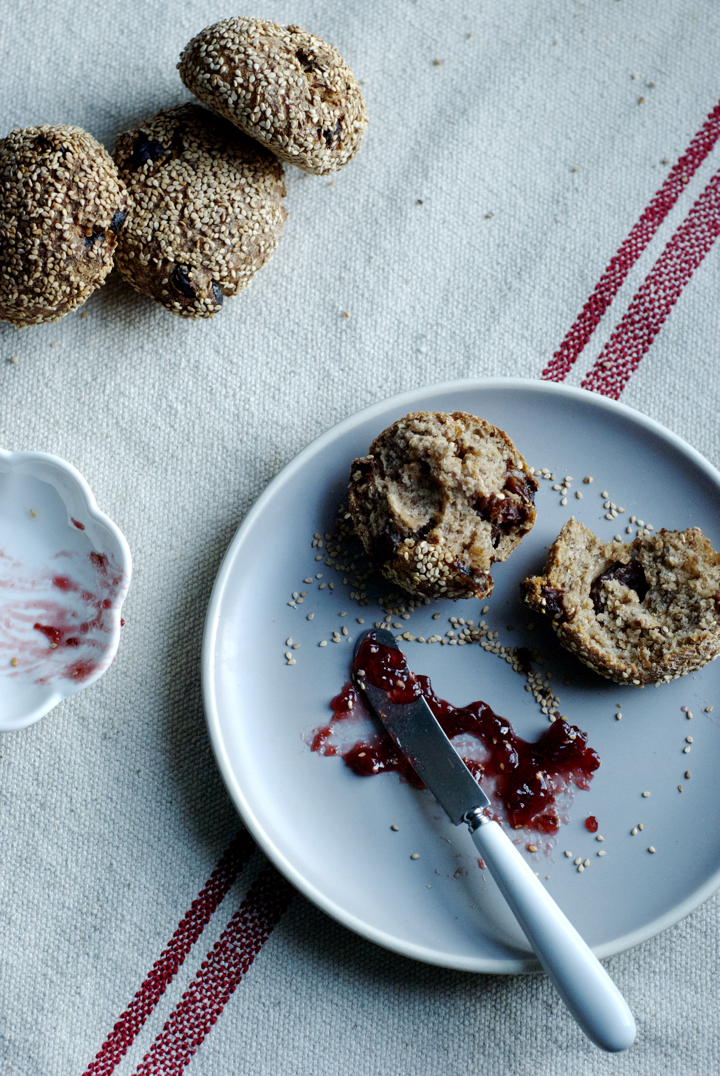
Back to when I was in Holland, I used to go to a whole foods store close to where I lived almost every day to buy their delicious raisin and sesame sourdough buns. Now, I’ve finally found a way to make my own version and, modesty aside, I think they taste pretty close to the original. If you’re intimidated by the idea of making your own sourdough bread, fear not and give it a try. If I knew it was that easy, I would have made it a long time ago. You can make your own starter like I did, or ask a friend who has one to give you some of it. Dear readers from Porto who want to venture into sourdough bread baking: I’ll happily give away some of my starter if you want to. (:
Sourdough Rye Buns with Raisins and Sesame Seeds
Recipe inspired by How to Make Bread, by Emmanuel Hadjiandreou, published in 2011 by Ryland Peters & Small
makes 12 buns
210 g rye flour
90 g whole wheat flour
5 g salt
150 g sourdough starter
240 g warm water
80 g toasted sesame seeds, plus more to coat the buns
150 g raisins
Put the raisins in a medium sized bowl and pour enough boiling water to cover them. Let it sit for ten minutes. After that time, drain the raisins, squeeze them to release the extra moisture and set aside.
In a large bowl, combine the rye and whole wheat flours, the salt and toasted sesame seeds.
In another large bowl, dissolve the sourdough starter in the water. Add the flour mixture to the bowl with the (dissolved) starter and mix until a dough comes together. Cover the bowl with plastic wrap and let it sit in the fridge overnight.
The next day, take the dough out of the fridge and divide it into 12 portions. Put a reasonable amount of sesame seeds in a large plate. Shape each portion into a bun, brush the buns with a little water, and roll them into the sesame seeds.
Put the buns in a large tray lined with parchment paper, cover with a clean towel and let rise in a warm place for 1 ½ hours. In the meantime, pre heat the oven to 240c and place a baking tray in its lowest third. As soon as the oven reaches the right temperature, place the tray with the buns in the middle third of it. Add a few ice cubes to the baking tray in the lowest part of the oven and close the door. Bake for 25-30 minutes.
Cool the buns on a wire rack for at least one hour before eating.
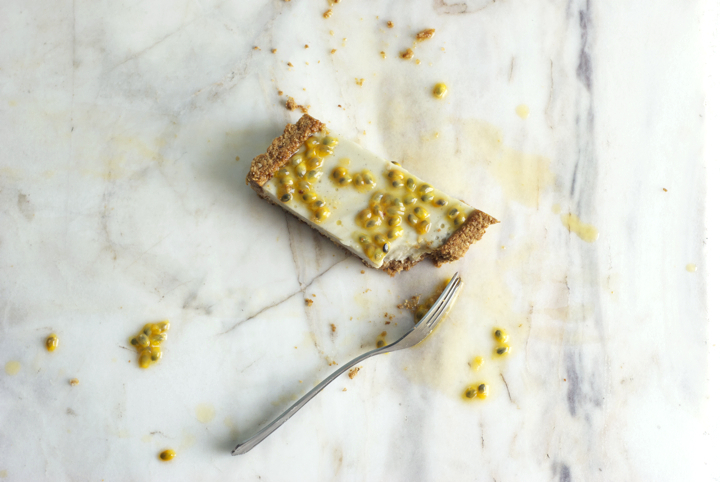
Coconut, Roasted Banana and Passion Fruit Tart
I live in an apartment and therefore do not have any available outdoor space to grow vegetables and fruit (the balcony doesn’t count). However, though, I’m lucky enough to have friends who, knowing my obsession with food and natural produce, occasionally bring me goodies from their gardens. This time around, my dear friend Filipa has brought me tons of thyme, an extra large zucchini (they’re everywhere around this time of the year, aren’t they?) and a bag full of passion fruit.

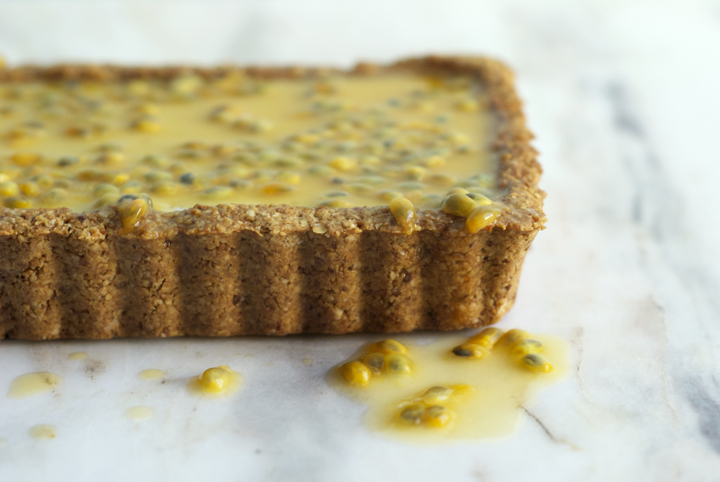
I knew straight way what to do with the first two ingredients (a huge batch of za’atar with the thyme, and a simple zucchini and apple soup), but I struggled with the latter. I’ve never been a huge fan of passion fruit, but knowing how outstanding it looks on desserts, specially cheesecakes and the like, I decided to make a tart with it. I approached it the way I usually do with vegan cheesecake-y desserts – I’m not a fan of using tofu, so the filling was coconut and banana based, firmed up with the help of Mr. Agar. I was very happy with how it turned out, specially because the filling had just the right texture – not too firm, but not too jiggly either. Eaten cold, I dare say it was probably the best dessert I’ve made this year.
Coconut, Roasted Banana and Passion Fruit Tart
(serves 8)
for the crust:
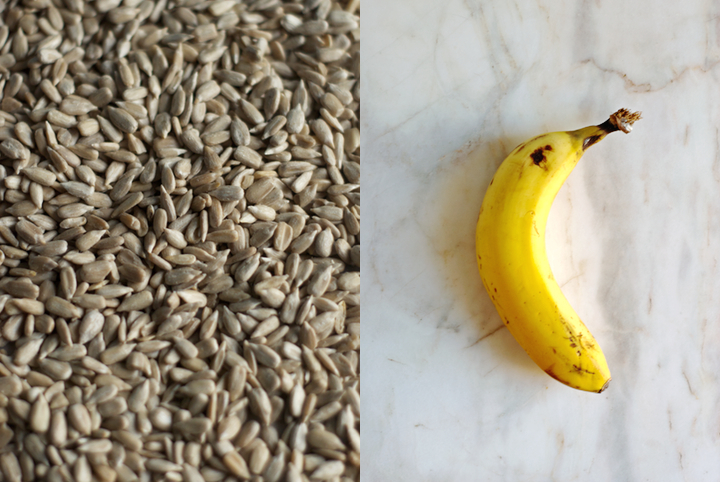
1 cup sunflower seeds
1 1/2 cups oat flour (gluten free or not)
2 Tbs. flaxseed meal + 1/4 cup water
1/3 cup brown rice syrup
1/4 tsp. fine grain sea salt
1/4 cup coconut oil, melted
for the filling:
400 ml /2 cans full fat coconut milk
2 tsp. agar agar flakes
1/3 cup brown rice syrup
1 vanilla bean, split lengthwise, and seeds scraped
2 Tbs. tapioca starch
5 Tbs. water
for the passion fruit sauce:
6 medium sized passion fruit
3 Tbs. brown rice syrup
1. Pre-heat the oven to 180ºC/350F. Line two small trays with parchment paper. Add the banana, unpeeled, to one of the trays, and the sunflower seeds to the other. Put the trays in the oven and roast the seeds for 10-15 minutes (redistribute them halfway through, so they’re evenly toasted), and the banana for 5 minutes longer. Take the trays out of the oven and let the seeds and banana cool down.
2. When the toasted seeds are cool enough to handle, add them to a food processor and process until finely ground. In a large bowl, add the seeds, oat flour and salt. In another bowl, add the flaxseed meal along with 1/4 cup of water. Mix well and add the coconut oil and brown rice syrup, stirring everything together until thoroughly combined. Add the wet mixture to the dry one and mix until a firm dough comes together. If the dough seems wet, add a little more flour. Basically, it’s perfect as long as it doesn’t stick to your hands or the bowl.
3. Lightly oil a 33 x 9 cm non stick pie pan and, with your fingers, press the dough into it. Cover it with parchment paper, add some beans or pie weights and blind bake for 20-25 minutes, or until the edges of the tart are golden brown.
4. While the crust is baking, make the filling. In a small bowl, whisk together the tapioca starch and 5 Tbs. of water until well combined. In a small pot over low-medium heat, add the coconut milk, agar agar flakes, vanilla seeds and brown rice syrup. Whisk the mixture constantly for about 8 minutes. Now, add the tapioca mixture to the pot and whisk for additional 2 minutes, or until the liquid has thickened.
5. Unpeel the banana and add it to a blender or food processor. Add the coconut milk mixture and blend until smooth. Add the filling to the previously baked crust. Let it cool to room temperature and refrigerate for at least 2 hours before serving.
6. Right before serving, cut the passion fruit in half and extract their pulp with a spoon to a bowl. Add the brown rice syrup and stir to incorporate. Drizzle the sauce over the tart and serve.
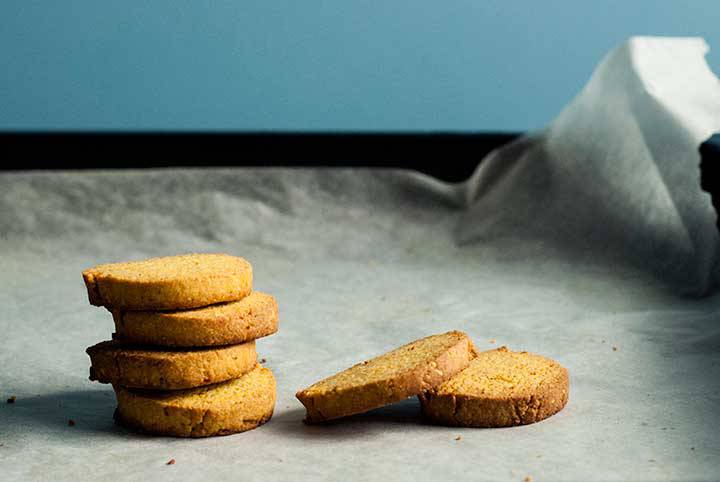
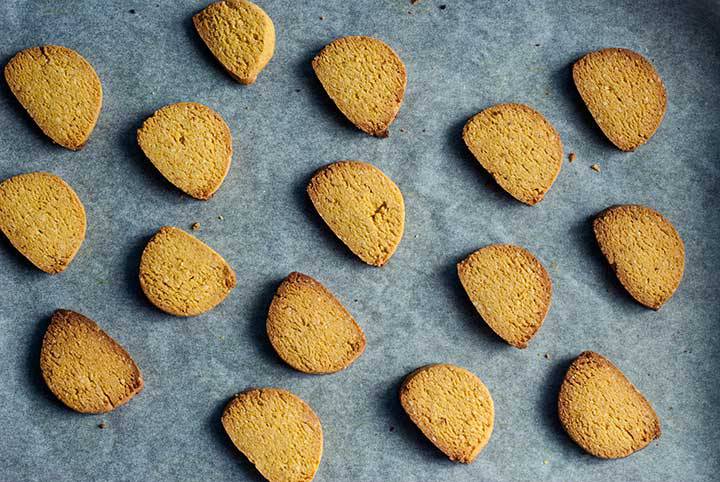
Turmeric & Almond Cookies
My oven is mostly used to roast vegetables (during the last couple of weeks, it roasted an obscene amount of beets and onions) and to make bean casseroles and kale chips. The occasional loaf of bread also comes out of it but cakes and cookies really are a from-time-to-time affair. I have way more ideas for savory dishes than I have for desserts so, whenever I have an idea for a sweet treat, I put my hands to work.
 These gluten free turmeric-almond cookies are dead simple to make. The dough comes together in a breeze and you don’t even have to roll it. They aren’t overly sweet and I like to eat them plain, but you can definitely slather them with a fruit compote or marmalade if you wish. As I’m writing this, it comes to my mind that you could add some caraway seeds to the dough or use orange zest instead of lemon. Turmeric is a spice with a mild earthy taste, so a few additional flavours are always welcomed.
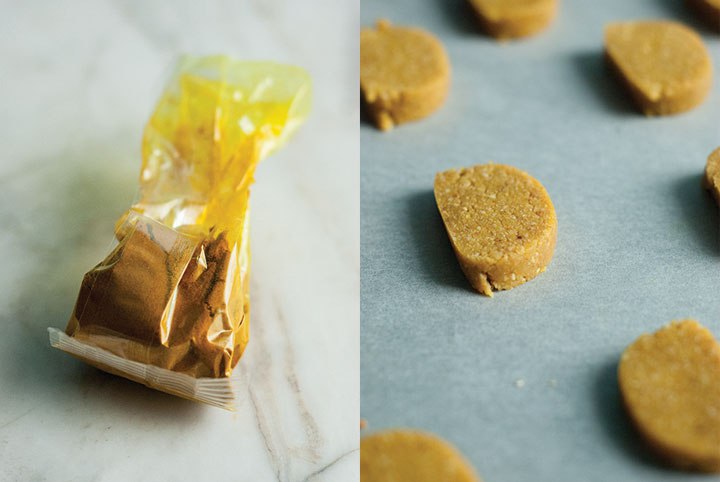
 Turmeric & Almond Cookies
(makes about 30 cookies)
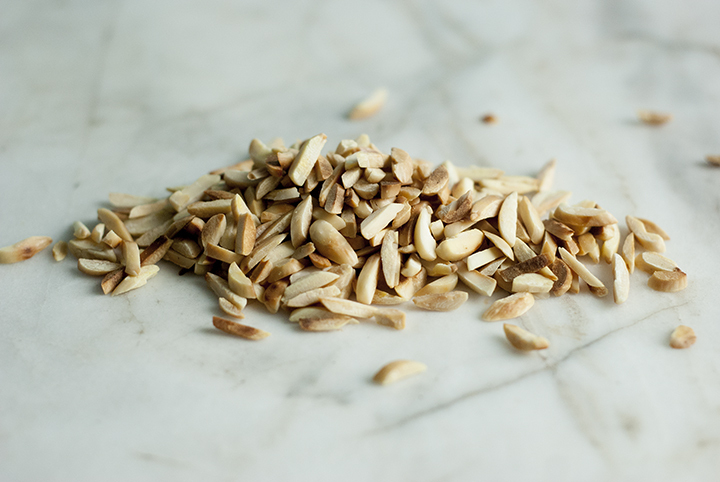
90 g / ¾ cup peeled almonds
105 g / 3/4 cup brown rice flour
60 g / ½ cup corn flour
60 g / ½ cup quinoa flour
½ teaspoon salt
2 teaspoons ground turmeric
zest of one lemon
125ml / ½ brown rice syrup
80 ml / 1/3 cup olive oil
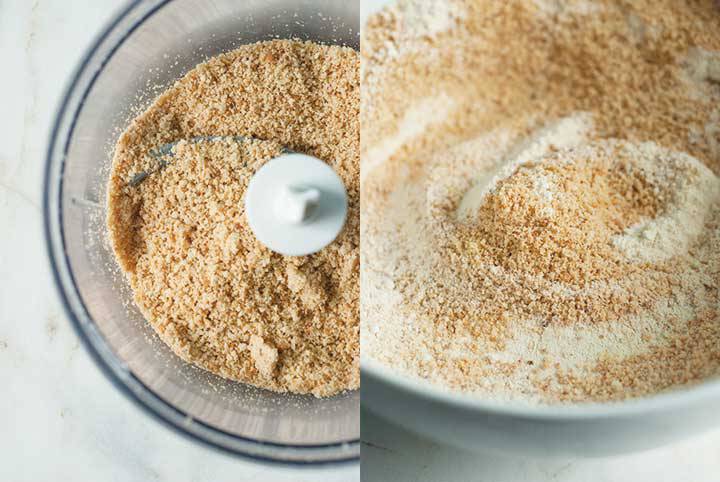
In a dry skillet over medium heat, toast the almonds for 4 to 5 minutes, or until they’re golden brown. Let them cool and, once cooled, grind them in a food processor until you a fine meal.
Add the almond meal, brown rice, corn and quinoa flours, salt, turmeric and lemon zest to a large bowl. Mix everything together. In a separate bowl, combine the brown rice syrup with the olive oil.
Add the wet mixture to the dry one and mix, forming a dough. Cut the dough into two equal pieces. In a lightly floured surface, roll each piece of dough into a log with roughly 4 cm in diameter. Wrap the logs tightly with cling film and seal the ends with kitchen twine. Put the logs in the freezer for 45 minutes to an hour, to firm up. In the meantime, Pre-heat the oven to 180C /350F.
Once the logs have chilled, cut them into 0.7-1 cm disks. Place the disks in a large baking tray lined with parchment paper. Since the cookies won’t rise much while baking, you can put them close together. Bake for 10-12 minutes or until golden brown.
Tahini Cookies

These tahini cookies might be one of my favorite cookies right now. As I’ve told in a previous post, I like my cookies with not too much added fat and sugar, and I guess these ones fit the bill just right. They have tahini in there, which is their main source of fat, but at least it’s that of a good and healthy type. The taste of these cookies is quite nutty and dense, and the fact that they are coated in muscavado sugar and sesame seeds, adds crunchiness and extra flavor to them. I encourage you to use organic, dark tahini in here, as it is the variety that packs more flavor - the white one is usually a bit mild and bitter. An extra bonus: the cookies are also gluten free.


Tahini Cookies
(makes about 18)
1 and ¼ cups (125 grams) spelt flour
½ teaspoon baking soda
¼ teaspoon salt
½ cup (60 grams) plus 1/3 cup light muscavado sugar
1/3 cup sesame seeds
½ cup (115 grams) dark organic tahini
1/3 cup (75 grams) apple purée
2 tablespoons sesame oil
1. In a large bowl, and with the help of an electric mixer, combine the tahini, apple purée, ½ cup of muscavado sugar and the sesame oil, until you have a smooth batter.
2. Sift the flour into another large bowl. Add the baking soda and salt and mix well.
3. Slowly pour the wet mixture over the dry mixture, mixing everything with a spatula as you go, until you have a soft dough. Shape the dough into a ball, wrap it tightly in plastic, and refrigerate it for at least 1 hour.
4. Preheat the oven to 180ºC – racks in the top and bottom third of the oven. Line two baking sheets with parchment paper.
5. In a bowl, mix the sesame seeds with the remaining 1/3 cup of sugar.
6. Cut two rectangles of parchment paper. Place one of the sheets of paper on a clean surface and evenly spread half of the sesame seeds and sugar mixture over it.
7. Unwrap the dough and place it in the center of the sheet of parchement paper in which you’ve spread out the sesame seeds and sugar. Now, you want to use the other sheet of parchment paper, and roll out the dough between the two sheets, to a rough circle 24 centimeters in diameter.
8. Spread the remaining sesame seeds and sugar over the circle of dough, and gently press it down with your hands to make them stick to the dough.
9. With a cookie cutter, stamp out rounds of dough and place them in the prepared baking sheets. The cookies won’t spread out that much while baking, so you can put them close together.
10. Bake the cookies for 10 to 11 minutes. Don’t overbake them, or they’ll get dry.
11. Let them cool for 10 minutes on the baking sheets, then transfer to a rack to cool completely. The cookies will keep, stored in an airtight container, for up to 5 days.
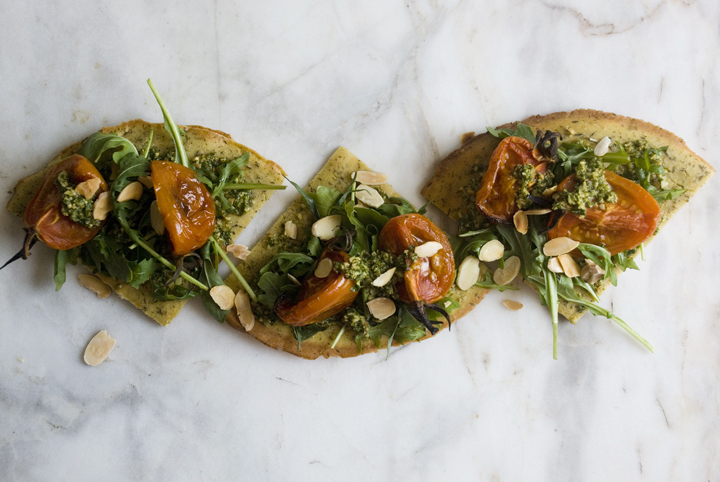
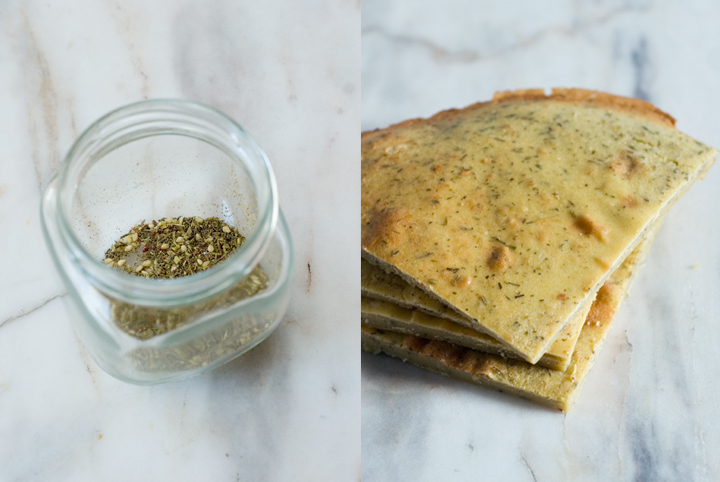
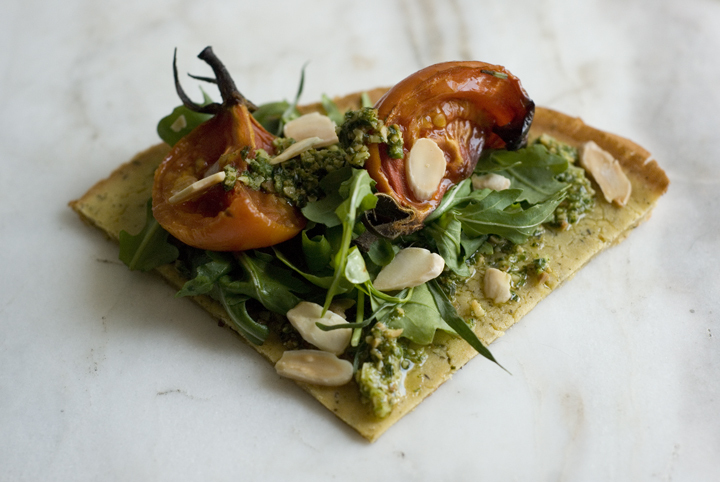
Slow Roasted Tomatoes + Arugula-Tarragon Pesto over Socca
Chickpea flour has to be one of my favourite gluten-free flours out there. It has a lot of character (don’t even try tasting it raw, by the way) but it is, at the same time, very versatile. I make crêpes with it, savoury pancakes, use it in small amounts in cake batters (its high protein content mimics that of eggs, making it the perfect egg replacer) and many other preparations.
It wasn’t long ago that I’ve heard of socca, a chickpea flatbread typical of Nice, France. I came across a recipe for it in Ottolenghi’s Plenty, but haven’t tried it out as it called for egg whites. However, and after some research on the internet, I found out that most socca’s recipes don’t use eggs at all, requiring only three basic ingredients (chickpea flour, water and salt) and, optionally, a few dried herbs and olive oil. In this recipe, I used za’atar to flavour the batter because it goes well with the pesto and all, but you could definitely build different flavour profiles by adding different spices and herbs.
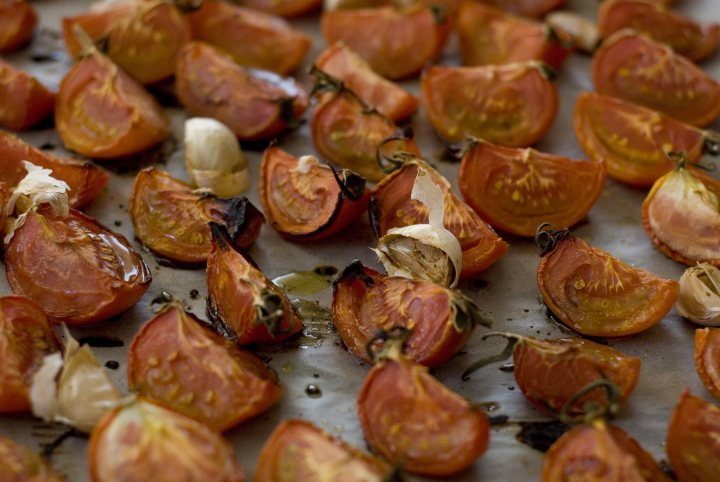
Regarding the slow roasted tomatoes: I quite like raw tomatoes, but I like them even more when slow roasted. They’re sweet and tangy at the same time and can totally transform an otherwise boring leafy salad into something out of this world.
The recipe(s) for the slow roasted tomatoes and the pesto make way more than what you will need for this particular dish but that’s the point, really, so that you have plenty to play around and use in different meals (salads, sandwiches, and so on).
Slow Roasted Tomatoes + Arugula-Tarragon Pesto over Socca
(serves 4 to 6)
slow roasted tomatoes:
1 kg / 15 medium sized vine ripened tomatoes, quartered
2 teaspoons salt
1 tablespoon olive oil
1 tablespoon balsamic vinegar
4 garlic cloves, lightly crushed
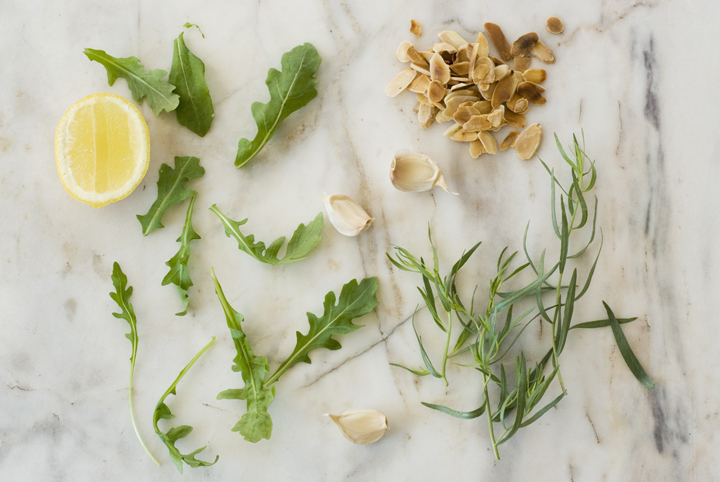
arugula-tarragon pesto:
40 g / 1/3 cup laminated almonds, preferably toasted
30 g / ½ cup packed arugula
6 g / ¼ cup packed tarragon
1 teaspoon salt
1 garlic clove, minced
2 tablespoons lemon juice
60 ml / 1/3 cup olive oil
socca:
130 g / 1 cup chickpea flour
1/2 teaspoon salt
1 ½ teaspoons za’atar
250 ml / 1 cup water
1 teaspoon olive oil, to grease the pan
extra arugula and silvered almonds, to assemble
Pre-heat the oven to 140 C / 284 F. Line a large baking tray with greaseproof paper. Add the tomatoes, salt, olive oil, balsamic vinegar and garlic to a bowl and mix to combine. Arrange the tomatoes, cut side up, on the baking tray and slow roast for 1 ½ to 2 hours. They’re done when wilted and lightly brown around the edges.
For the pesto, finely chop, separately, the almonds, arugula and tarragon. Mix everything together in a bowl and add the salt, garlic clove, lemon juice and olive oil. Mix well to combine. Have a taste and adjust the seasonings if needed be. Alternatively, and instead of chopping up the ingredients by hand, you can use a food processor to blend them up.
Raise the oven temperature to 200 C / 390 F.
Sift the chickpea flour, salt and za’atar to a bowl. Slowly pour in the water, whisking vigorously to avoid any lumps. Let the batter sit, covered, for 30 minutes to 1 hour at room temperature.
In the meantime, grease one 25 cm / 10 inch round baking dish with olive oil and put it in the middle third of the oven for at least 10 minutes. After that time take, very carefully, the pan out of the oven and pour the batter into it. Return the pan to the oven for 20-25 minutes, or until the chickpea pancake is golden brown on top. You can finish it (as I did) on the broiler for the last 5 minutes of cooking to encourage even browning.
To assemble, cut the socca into 4 or 6 equal slices. Spread the pesto on each of the slices, add a generous amount of arugula on top as well as 2 to 3 tomato quarters. Drizzle a bit more pesto on top of the tomatoes and finish off with plenty of toasted silvered almonds.
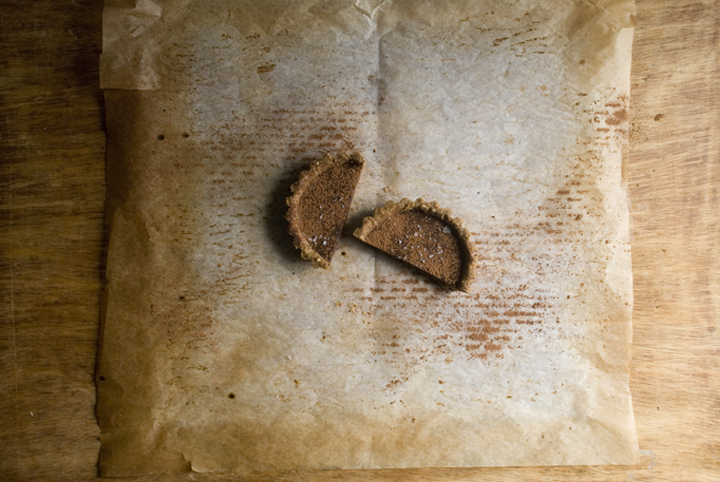
Chocolate Cardamom Tarts

I had the idea for this recipe on my mind for a few weeks now, but was holding back to try it out because sweet goods “don’t really suit my style”. Chocolate desserts, in particular, are far from being my forte. Don’t get me wrong though, I think this one is a great dessert. For chocolate fans. I mean, not the milk-chocolate-candy-bar ones, but for those who appreciate chocolate’s bitterness and more authentic flavour. Let’s say the hardcore fans.
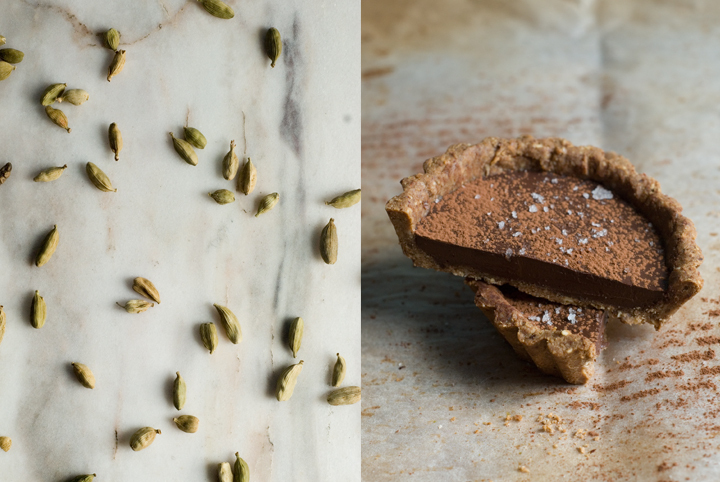
Cardamom is one my favourite spices (followed by cinnamon) and I recently found out it pairs incredibly well with chocolate. These two, coupled together as a filling for a nutty crust, give the little tarts a lot of depth and intensity in flavour. Having said that, and even though this recipe only makes four small tarts, you’ll probably be fine, as I was, with only half of one. A couple specifics: the crust used in here is gluten-free, and because gluten-free doughs tend to be temperamental and hard to work with, you won’t need to roll it, but to press it directly into the tart shells. It won’t look as perfect as if it was rolled but, really, there’s no need to complicate things unnecessarily and only for the sake of presentation…
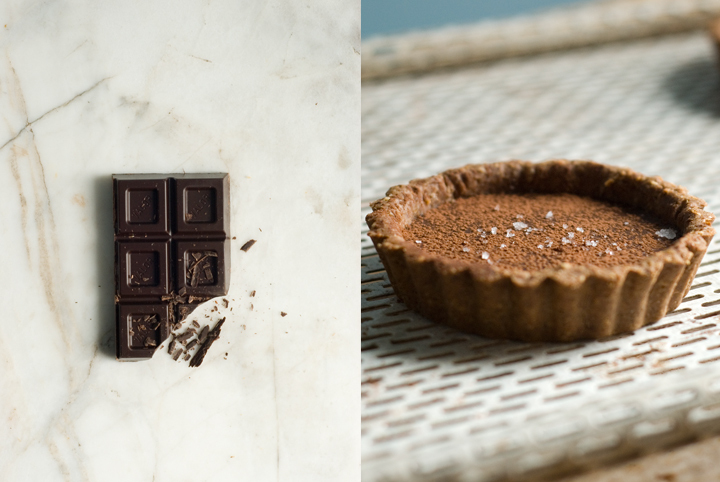
You might also realise this recipe doesn’t call for any sugar and for me it’s fine as is. However, your taste buds are certainly different than mine and if you find the filling too bitter, one or two tablespoons of coconut sugar or other sweetener of your choice won’t hurt. Lastly, do add the flaky salt or fleur de sel on top of the tarts – it really makes a difference, as salt is known to work as chocolate’s flavour enhancer.
Chocolate Cardamom Tarts
(makes 4 tarts, using small tart shells of 7,5 cm in diameter)
for the crust:
70 g / ½ cup chestnut flour
50 g / ½ cup hazelnut meal
¼ teaspoon salt
1 tablespoon flax seed meal
60 ml / ¼ cup melted coconut oil
2 tablespoons cold water
for the filling:
6 cardamom pods, green shells removed and crushed in a mortar
and pestle into a fine powder
100 g / roughly ¾ cup 70% dark chocolate, cut into small pieces
125 ml / ½ cup coconut milk
extra coconut oil for greasing the tins
cocoa powder
flaky sea salt or fleur de sel
Pre-heat the oven to 175º/350ª degrees.
Sift the chestnut flour, hazelnut and flaxseed meals and salt into a bowl. Add the melted coconut oil and the water, and work the mixture with your hands until you get a firm dough. Divide the dough into 4 equal portions.
Using a pastry brush, grease your tart tins with extra melted coconut oil. Press one piece of dough into one of the tart shells and, working with your hands, make it evenly cover its bottom and sides. Using a fork, pinch the dough a few times. Repeat this procedure with the remaining dough and shells.
Cover the pastry shells with greaseproof paper, fill it with baking beans or pie weights and bake blind for 15 minutes. After that time, remove the beans and paper and bake the tarts for additional 10 minutes, or until they’re golden brown.
In a small pan, heat the coconut milk with the ground cardamom until it almost starts to boil (don’t let it boil, though). Remove from the heat and add the chocolate. Stir around with a wooden spoon until the chocolate has fully melted. Let the mixture cool a bit, but not to the point of starting to set.
Divide the mixture evenly between the four tart shells. Let it set for 1 to 2 hours at room temperature. After that time, you can refrigerate the tarts for 1 additional hour if you prefer them cold (I actually ended up eating a forth of one at room temperature and enjoyed it). Unmold before serving and sprinkle with cocoa powder and flaky sea salt or fleur de sel.
Roasted Shallots and Cherry Tomatoes Pie

This pie recipe I’m about to share with today was made upon my mother’s request for a savory pie. My mom is an undeniable sweet tooth and most of the things she asks me to cook are cookies and desserts, but this time around she was up - to my relief - to something different. I’ve been facing days in which my motivation/inspiration to cook has been reduced to a minimum (I think we all have experienced the feeling that, for some unknown reason, we cannot simply come up with new interesting ideas - not only in the culinary realm, but also in any other area) so I really took and followed her guidelines: she wanted a pie with roasted onions or shallots on it, and that was what I made. Actually, I’ve realized this is a good method to pike up your creativity: ask somebody what he/she wants you to cook for them, and you’ll probably come up not only with what they wanted, but also with your own interpretation of what they asked you make - and that’s what makes the new born recipe special and therefore unique in its own way. Another way to re-start feeling inspired to cook - at least for me - is to watch other people cooking: I went to a barbecue party this weekend, and by watching one of my friends making a delicious and dead easy flatbread recipe from scratch, I immediately knew I had to try it at home with my own tweaks and variations (I’ll post up the recipe here soon).
This particular recipe relies on the well-known technique used in non-dairy and eggless pies, which is to make a “tofu custard” (and season it with a few dried herbs and condiments), that will then set when cooked in the oven, similarly to any other savory custard made of eggs and cream.
These days, I’ve been also addicted to experiment with different types of flour, and this time around, while searching the cupboards for buckwheat and oat flours (which I was planning to use in here), I found chestnut flour and that was what I used to make the crust. Chestnut flour has a sweet and somehow dense flavor, and because it’s gluten-free, I think it’s easier to work with when it’s combined with wheat (either whole wheat or just regular) flours - if you don’t have chestnut flour at hand, feel free to make this pie crust using only the white whole-wheat type instead.
I owe my mother the inspiration for this pie recipe so, as a sort of tribute, the leading picture of this post shows myself - as a little child – and her back in the early 90’s. : )
Roasted Shallots and Cherry Tomatoes Pie
(makes one, 20-22 cm tart)
For the pie crust:
140 grams (1 cup) chestnut flour
130 grams (1 cup) white whole-wheat flour
80 ml (1/3 cup) olive oil
60 ml (1/4 cup) plus 2 to 3 tablespoons cold water
½ teaspoon salt
For the roasted vegetables:
250 grams (1 ½ cups) cherry tomatoes, cut in half crosswise
1 teaspoon muscovado sugar
250 grams (2 cups) small shallots, peeled and cut in half crosswise
4 large garlic cloves, left whole and unpeeled
1 tablespoon balsamic vinegar
a pinch of salt
olive oil
For the tofu custard:
500 grams (1/2 pound) firm tofu, patted dry and crumbled
2 tablespoons lemon juice
2 tablespoons tamari
1 tablespoon balsamic vinegar
2 tablespoons fresh lemon-thyme, minced
1. Pre-heat the oven to 200ºC. Lightly oil 2 baking dishes with olive oil. Mix the onions with 1 tablespoon balsamic vinegar and a pinch of salt. In one of the dishes, place the onions, cut side up, and the garlic cloves, and drizzle a little olive oil over them. Separately, mix the tomatoes with 1 teaspoon muscavado sugar and a little olive oil. Distribute them evenly on the other baking dish. Place the 2 baking dishes in the oven – preferably in the middle rack – and roast for 25 minutes, or until the vegetables are golden brown. When they’re done, take them out from the oven and let them cool a bit at room temperature.
2. In the meantime, prepare the crust: Mix the chesnut and wheat flours in a bowl. Add the salt. Now, slowly pour the olive oil and mix everything with a rubber spatula. Finally, add the water. Using your hands, mix the ingredients together in order to form a ball, being careful not to overmix the dough. If the dough seems too dry and doesn’t hold together, add 1 to 2 tablespoons more water.
3. Place the dough in the lightly oiled tart pan and press it with your fingers, so that the bottom and the sides of the pan are uniformly covered with dough. Now, trim any excess dough. Cover the pan with plastic wrap and refrigerate it while you proceed with the recipe.
4. For the tofu custard, place all the ingredients for the custard in a food processor, as well as half of the roasted cherry tomatoes (juices included) and the roasted garlic cloves (which you have to unpeel first), and process until totally smooth. Have a taste and adjust the seasonings – adding a bit more tamari and/or a bit more lemon juice – if needed.
5. Take tart pan out of the refrigerator, cover it with foil and place a few pie weights over it – I used dried beans. Blind bake the crust for 10 to 12 minutes, or until golden brown.
6. Place the onions in the bottom of the pre-baked tart shell. Fill the latter with the tofu custard and distribute the remaining roasted cherry tomatoes evenly on top. Bake for 25 to 30 minutes, at 180ºC, or until the custard is set and golden brown. Serve with a leafy salad.
Adzuki Bean and Celery Stew

Before we get into today’s recipe, happy new year to everyone! 2010 was a though year for me (both in the professional and personal realms), full of challenges and times when important decisions had to be made. It was also the year I cooked more, having learned from my both succeeded and not-so-well succeeded experiments in the kitchen, and the year I have also started this blog. I’m not a person of making life-changing resolutions or, more precisely, I don’t usually make them this time of the year (although I reflect, as I suppose we all do, about what the previous year has brought to me and what – and how - were its best and worst moments). Anyway, as I’m typing this I’m reflecting about a couple of things I’d like to do more – in culinary terms – in 2011. They’re not resolutions, only desires and things I hope I can accomplish. Those are: I’d like to cook more from cookbooks, studying even more non-vegan recipes and trying to come up with vegan alternatives; to master the art of gluten-free baking; to share more meals with friends and family and to cook more meals alongside friends and family; to have a more mindful way of eating, incorporating as much healthy choices as I can into my diet.
On another front, this year I’d like to run more regularly, to fight the tentation to cut my hair short again, to travel abroad (London and Berlin are on my upcoming travel plans), and to be even more surrounded by people whom I love and admire.
As far as today’s recipe goes, it’s basically an adaptation of this one. It’s a delicious and easy stew, perfect for the cold weather and that goes very well not only with toasted wholegrain bread, but also with some simply cooked quinoa. The recipe is easily doubled, which makes it also a very croud-pleasing dish. Hope you’re all having a great time, and I wish you a 2011 full of fruitful projects and ideas.
Adzuki bean and celery stew
(serves 4 to 6)
500 grams cooked adzuki beans*
10 canned whole plum tomatoes, drained, rinsed and roughly chopped
2 cups light stock
2 large heads of celery (stalks only, trimmed and sliced into 2cm thick chunks)
1 teaspoon celery salt*
4 large garlic cloves, peeled and thinly sliced
1 large white onion, peeled and finely sliced
4 tablespoons olive oil
1. In a large pan over medium-high heat, add the olive oil, onion and celery chunks and cook for 10 minutes, stirring often, or until the vegetables are soften. Add the garlic and 1 teaspoon of the celery salt and cook for additional 4 minutes.
2. Add the tomatoes, stock and the beans to the pan. Bring to a simmer and, once simmering, decrease the heat to low and cook, covered, for 20 minutes. Taste and season with a bit more celery salt if needed. Let the stew sit for a couple of minutes before serving.
*to make the celery salt: Pick a couple leaves (no less than 10) from the celery heads. Heat a dry skillet over high heat and add the leaves. Let them toast for 5 to 10 minutes, or until totally dried out. Then, crumble equal parts of the dried leaves with flaky sea salt. For better results, grind the mixture in a coffee grinder.
*to cook the beans: Soak the beans in a large amount of water for 6 to 8 hours or overnight. Drain and rinse them and put them in a large pot. Add water to come at least 2 centimeters over the beans. Bring the water to a boil and, once boiling, decrease the heat to low-medium and cook, covered, for 1 to 2 hours. Once ready, salt the beans and drain them – reserving a couple cups of the liquid in which they were cooked, that you can later use in preparations such as stews and soups. You can now use the beans, refrigerate them (they’ll keep, store in the refrigerator in an airtight container, for up to a week), or bag and freeze them.
recipe adapted from 101 cookbooks

4 comments