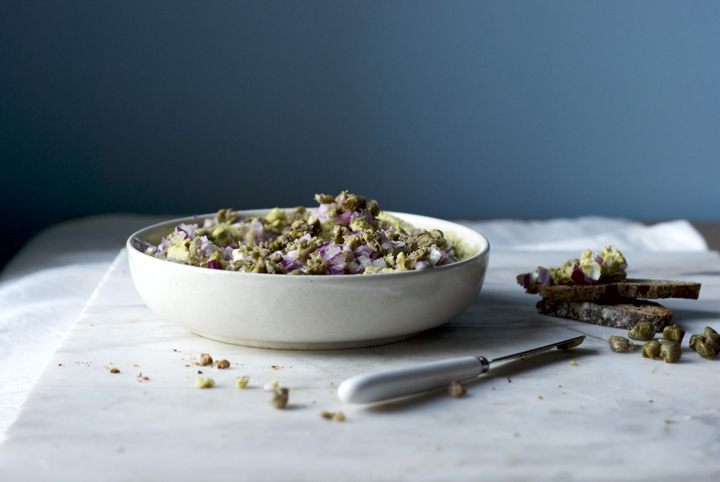
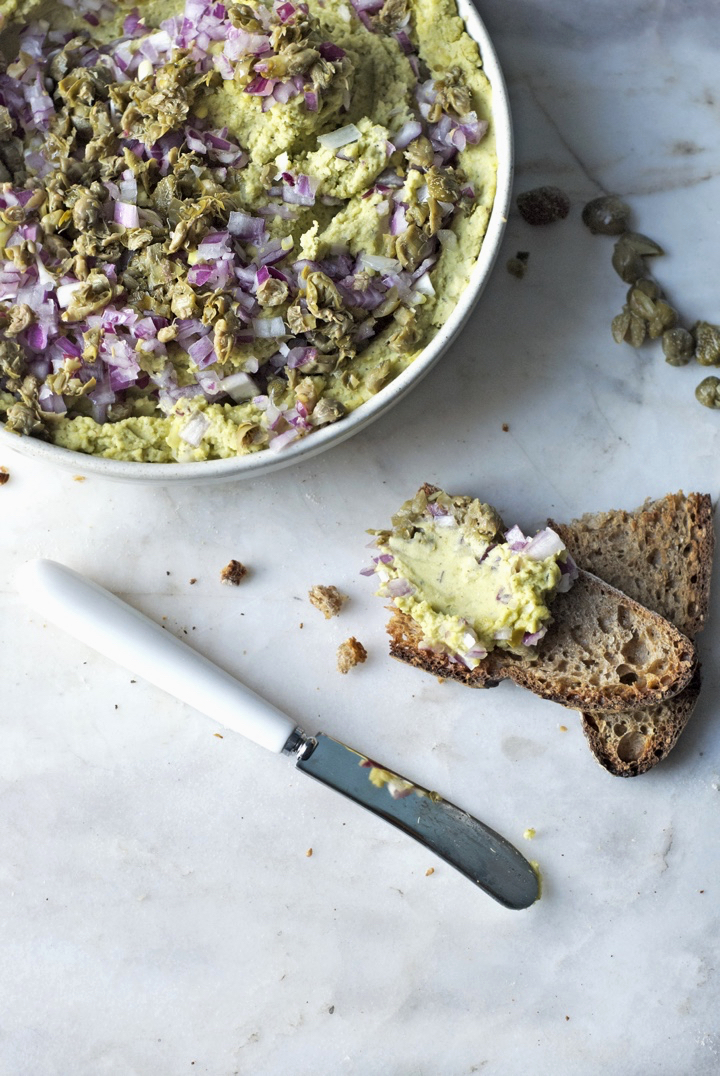
Split Pea Hummus with Capers & Red Onion
Every time I have guests for dinner, I typically serve some sort of homemade hummus or vegetable spread as an entrée. Most of the time I end up making the good old chickpea hummus because it’s one of favourite spreads and everyone loves it. But if I’m pressed for time (because yes, I’m in that tiny group of crazy people who actually thinks that removing the chickpeas’ skins is the secret to making the perfect hummus), I use split peas instead.
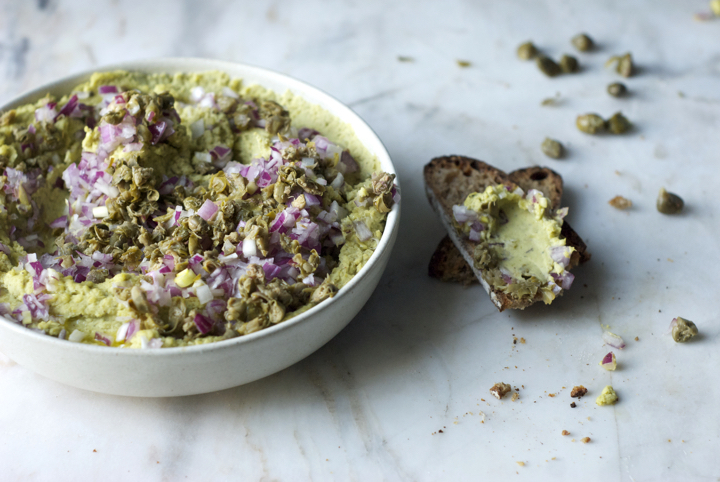
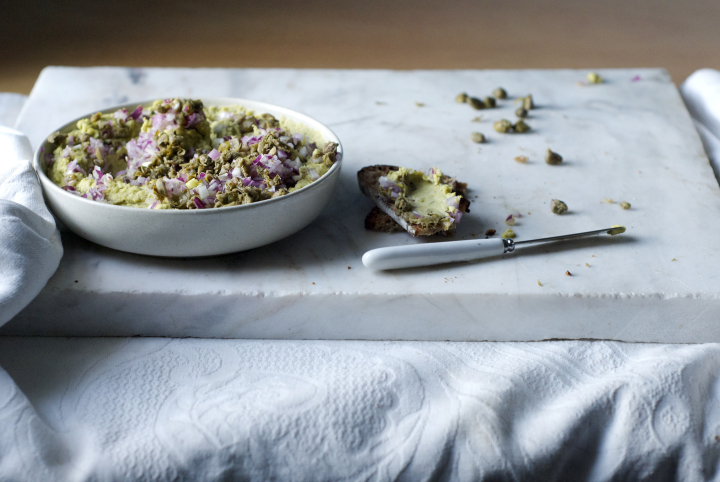
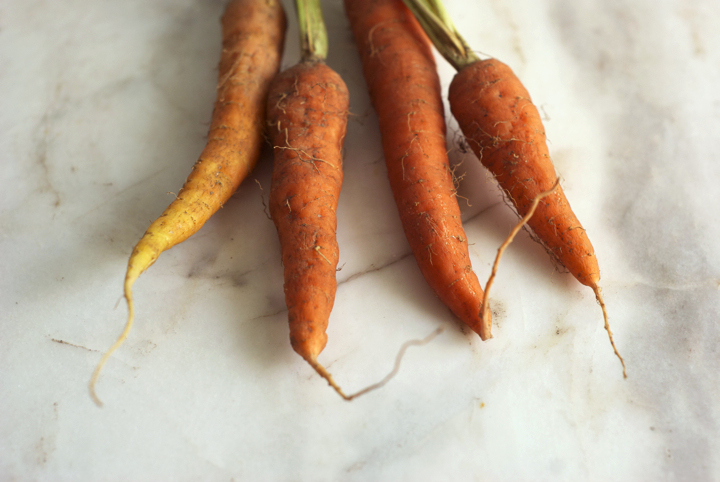
This is an incredibly easy, yet really tasty bean spread that’s perfect served on top of toasted bread or used as a dip for raw vegetables. I love to dip carrots and turnips into this hummus, but peppers (cut into strips), raw broccoli florets and/or parsnips are also excellent options.
I always have this thing going on with the blog where I try to balance more complex recipes with everyday, casual ones. That balance is hard to strive because people who aren’t familiar with vegan cooking tend to prefer simple and straightforward recipes, whereas long time vegans and/or foodies appreciate bold and unusual combination of ingredients and techniques.
At the end of the day, I always try to stay true to myself and my cooking “style”. However, I hope that recipes like this one – that do not involve a long list of ingredients but deliver on flavour – inspire people to venture into cooking more vegan food and, most importantly, help break the misconception that eating vegan is all about pricy superfoods and green smoothies (nothing against both, it just totally annoys me when I hear people saying that – and I do, all the time).
Split Pea Hummus with Capers & Red Onion
serves a crowd
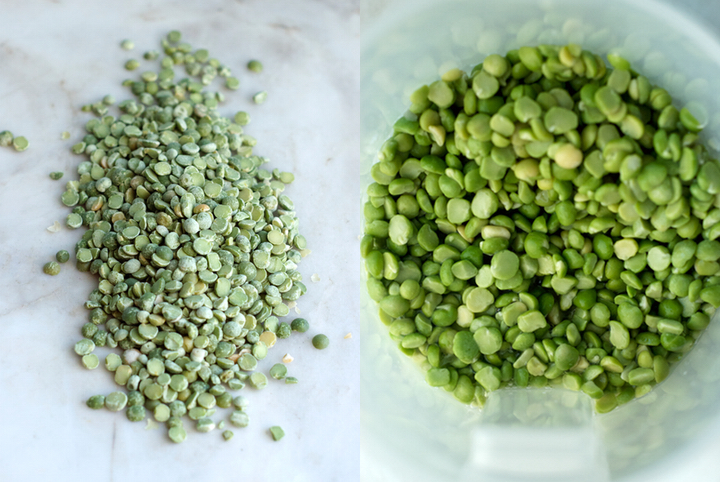
195 g / 1 cup green split peas, soaked overnight, drained and rinsed
¾ teaspoon sea salt
¼ teaspoon freshly ground black pepper
1 teaspoon za’atar
1 garlic clove, minced
2 Tablespoons extra-virgin olive oil, plus a little more for serving
3 Tablespoons lemon juice
2 Tablespoon warm water
65 g / half a medium sized red onion, finely chopped
27 g / 2 Tablespoons brined capers, rinsed, dried and chopped
Add the split peas to a large pot over medium-high heat. Add enough water to cover the peas by 2 cm (0.8 inches). Bring to a boil and, once boiling, reduce the heat to low-medium and cook for 20 minutes or until soft. Some foam might naturally form on top of the cooking liquid – in that case, just take it out with a slotted spoon.
Drain the peas once they are cooked and cooled. Add them to the bowl of a food processor along with the sea salt, black pepper, za’atar, garlic clove, olive oil, lemon juice and water. Run the machine until you get a very smooth hummus. If the mixture seems too dry, add 1 or 2 additional tablespoons of water.
Put the split pea hummus in a medium sized deep plate. Add the red onion and capers on top and finish with a generous drizzle of olive oil.
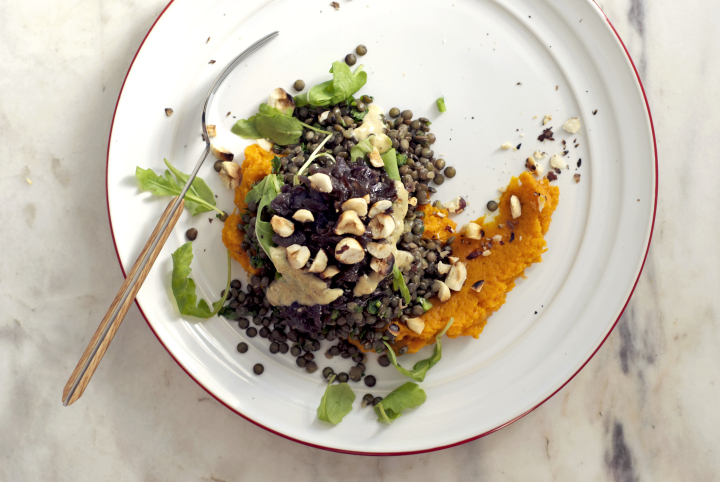
Lentils with Carrot Purée, Caramelized Onions and Hazelnut Mustard Dressing
I know a lot of people who find lentils boring and bland in flavour, and most of the time is because they’ve eaten them overcooked and without exciting accompaniments. I can eat a lot of lentils – typically 2 or 3 times a week – and the reason I’m a huge fan of them (both flavour and nutrition-wise) is because there are so many possibilities when it comes to incorporate them in a dish.
The other day I made a big batch of carrot purée because I needed some to bake a cake. I ended up eating the leftovers – properly seasoned with garlic and olive oil – for dinner along with (also leftovers) lentils and some quickly sautéed onions. I thought the three components got along pretty well, and decided to further explore the idea in order to come up with a recipe worth sharing here on the blog.
This dish might seem like it has a lot of elements but they actually come together pretty quickly and require ingredients you most likely already have in your pantry. What I like about it is that not only it tastes really good but also makes a nutritionally balance main course, which sometimes, for people new to vegan or vegetarian ventures, is hard to achieve with plant-based ingredients.
Hope you like the lentils, enjoy the last days of summer and warmth and fully embrace the next season. Fall is my favourite of all four seasons, and I love the flavours and produce that comes with it. No wonder it’s the time I’m the most inspired to cook and bake, and hopefully I’ll come up with some new creations that will delight your eyes and palate. See you all soon! (: J
Lentils with Carrot Purée, Caramelized Onions and Hazelnut Mustard Dressing
(serves4)
1 ½ cups french lentils, such as Puy
½ teaspoon salt
1 big handful parsley (22 g), finely chopped
for the carrot purée:
510 g (8 to 10) medium sized carrots, cubed
¼ teaspoon salt
1/8 teaspoon ground cinnamon
½ teaspoon freshly ground black pepper
squeeze of lemon juice
for the caramelized onions:
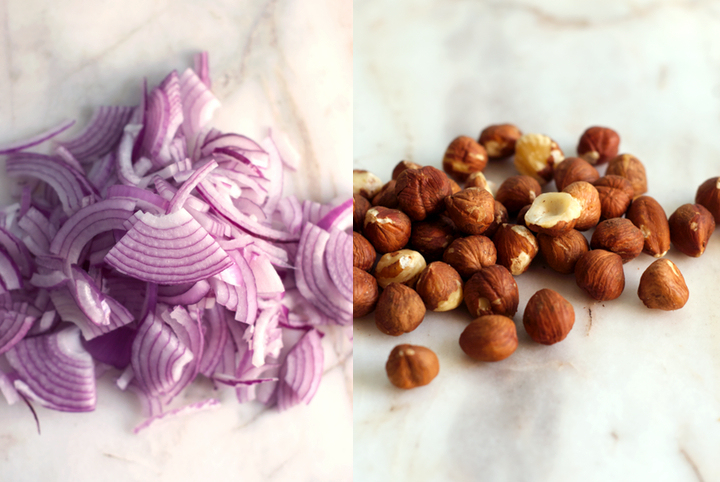
600 g (4 large) onions, finely sliced into rings
½ teaspoon salt
2 tablespoons olive oil
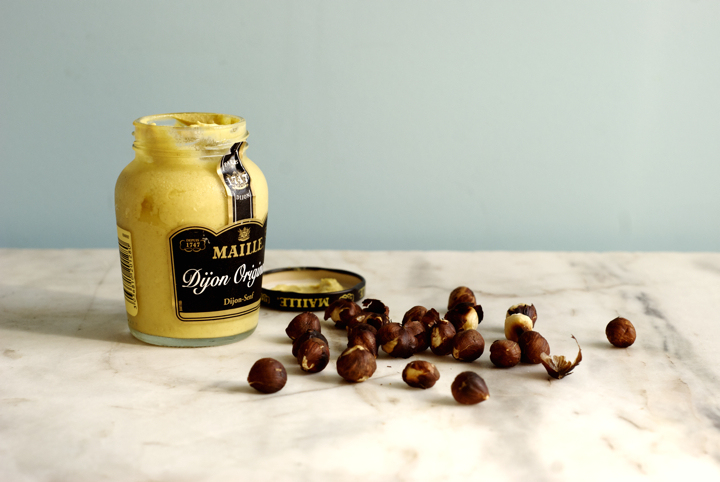
for the hazelnut-dijon dressing:
47 g / 1/3 cup hazelnuts
1 tablespoon Dijon mustard
2 teaspoons brown rice syrup
¼ teaspoon salt
4 tablespoons olive oil
4 tablespoons red wine vinegar
2 tablespoons water
arugula leaves, micro herbs etc., to serve
Carrot purée: Using a steamer, steam the carrots for 8-10 minutes or until they’re cooked through. When they’re cool enough to handle, add them to a food processor with the remaining ingredients for the purée and blend until it reaches a smooth consistency. Adjust the seasoning, adding more salt if necessary. If the mixture seems too thick and you’re having trouble mixing it all together, add up to 6 tablespoons of the water you used for steaming the carrots.
In the meantime, bring a medium sized pan filled with 4 cups of water to a boil. Add the lentils, reduce the heat to medium and cook for approximately 12-14 minutes, or until they’re cooked through but still have some bite. Add the salt, drain the lentils and rinse under cold water. Transfer the lentils to a bowl and mix in the chopped parsley.
Caramelized onions: Heat a large non stick skillet over medium heat and add the olive oil, onions and salt. Cook, stirring often, for about 15 to 20 minutes, or until the onions are really soft. In the last minutes of cooking, turn the heat up to high and cook for additional 3 to 4 minutes, or until they crisp up a little.
Hazelnut mustard dressing: In a skillet over medium-high heat, toast the hazelnuts until they’re golden brown (4 to 5 minutes). When they’re still hot, transfer to a clean kitchen towel and rub them against it to remove as much of its skin as possible. Transfer the hazelnuts to a food processor and process until smooth with the remaining dressing ingredients.
To serve, put a few tablespoons of carrot purée on 4 different plates, topping with the lentils, followed by the caramelized onions and a gentle drizzle of the hazelnut dressing. Add a few arugula leaves, if desired, and serve.
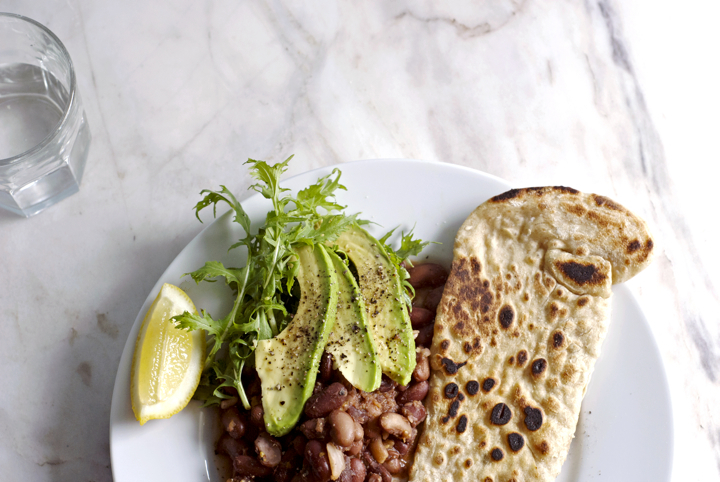
Curried Beans with Naan Bread
As much as I like to cook, I don’t think I could manage the demands of running a restaurant or a café. I love to cook to small groups of people, but more than ten and I start to stress out. I’m also kind of slow in the kitchen, and adding up to that, I hate to delegate tasks. Even though the idea of having a place of mine – with my food, my kind of atmosphere, and so on – sounds appealing, I’m sure it will never see the daylight because of the reasons mentioned above. However, though, that doesn’t stop me from thinking about the dishes I’d like to serve in my little imaginary café, and this one would certainly be a regular on the menu.
It’s simply beans flavored with a spicy curry paste and served with warm charred naan, to whip up the sauces – the kind of food I could eat everyday. The naan is made with both wheat and spelt flours, and you can flavor it in way you like – by adding cumin seeds, garlic, chili powder, and so on. I wanted to make a 100% spelt naan but couldn’t find white spelt flour, so had to compromise and make a wheat and whole spelt version instead. However, though, next time I find it I’ll make the bread again and update this post with how it turned out. A few words on the measurements: I always like to have all the ingredients for each recipe weighted into grams (it’s way more accurate than cups), but my scale has been having some sort of identity crisis and only gives me the weights in pounds. I was a bit lazy and didn’t want to go into the trouble of weighting things down and then make the conversions, but if the scale doesn’t change its mind soon, I’ll buy another one and reintroduce the proper metric measurements.

Curried Beans with Naan Bread
(serves 4)
for the naan bread:
1 cup wheat flour
1/2 cup whole spelt flour
1/2 cup warm water
3/4 teaspoon active dry yeast
1/4 teaspoon salt
2 teaspoons brown rice syrup
1 teaspoon olive oil
optional: cumin seeds, thyme, chili flakes, coriander…
for the curried beans:
4 cups red beans (canned is fine)
3 large garlic cloves, finely chopped
2 tablespoons melted coconut oil
3 tablespoons chopped canned tomatoes
1 large fresh green chili, finely chopped
1/2 teaspoon salt
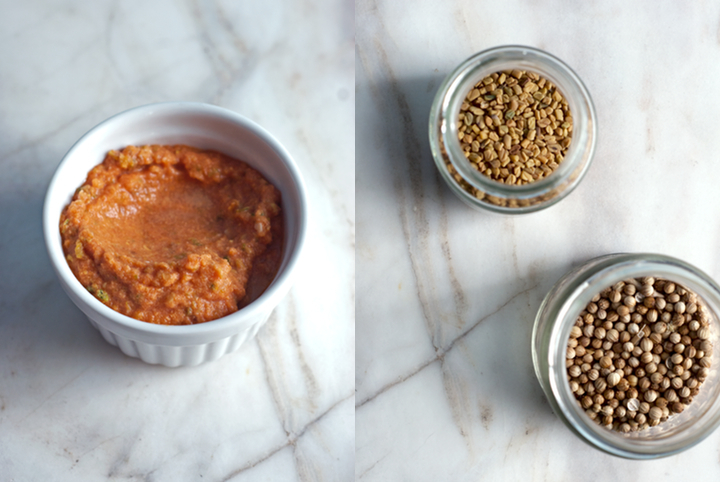
2 teaspoons coriander seeds
1 teaspoon fenugreek seeds
1 large lemon (cut into 4 wedges) and chopped avocado for serving
To make the naan bread: Add, to a medium bowl, the water, yeast, salt, brown rice syrup and olive oil, and whisk everything together. In another bowl, combine the flours. Add the yeast mixture to the bowl with the flour and knead until you have a firm, yet soft to the touch, dough. If the dough is too wet, add more flour until you reach the right consistency. Cover the bowl with a clean kitchen towel and leave it in a warm place to rise for 2 hours.
Heat a large grilling pan over medium-high heat. Dust a working surface with flour and add the proofed dough. Knead for a couple of minutes and divide it into 4 equal parts. Roll each ball of dough into a not too thin elongated shape and add the topping you want (if using) pressing it down gently into the dough. Brush the naan with water and add it to the grilling pan, water side down, and cover with a lid. Cook for 30-50 seconds, or until you start seeing some bubbles on it. Cook the other side for approximately the same time, or until lightly charred. Repeat this process with the remaining balls of dough.
To make the curried beans: Add all the ingredients for the curry, except the beans, to a food processor and pulse until it turns into a paste. Add the curry to a pot over medium heat and cook, stirring often to avoid sticking to the bottom of the pot, for 2-3 minutes. Add the beans, 3/4 cup of water (if you cooked your own beans use the cooking water), and cook for additional 5 minutes. Serve immediately.
Add a good squeeze of lemon juice to each serving, along with some chopped avocado and a drizzle of olive oil. Serve with the naans.
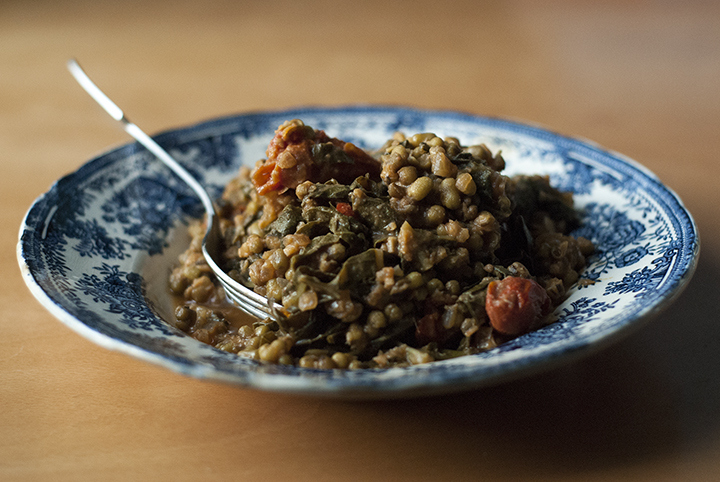
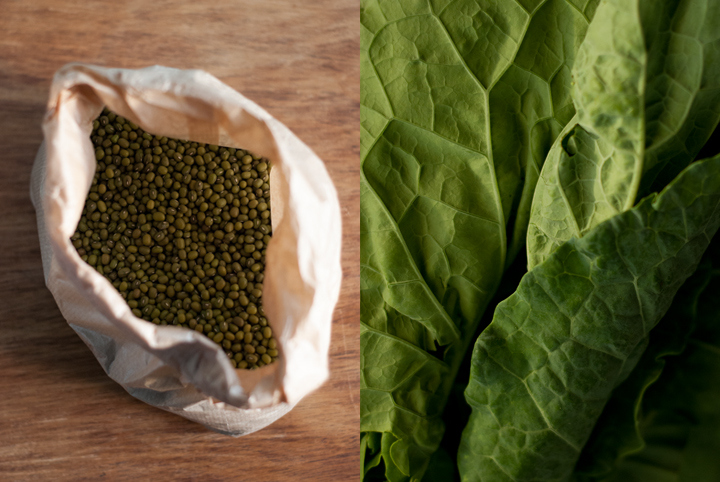
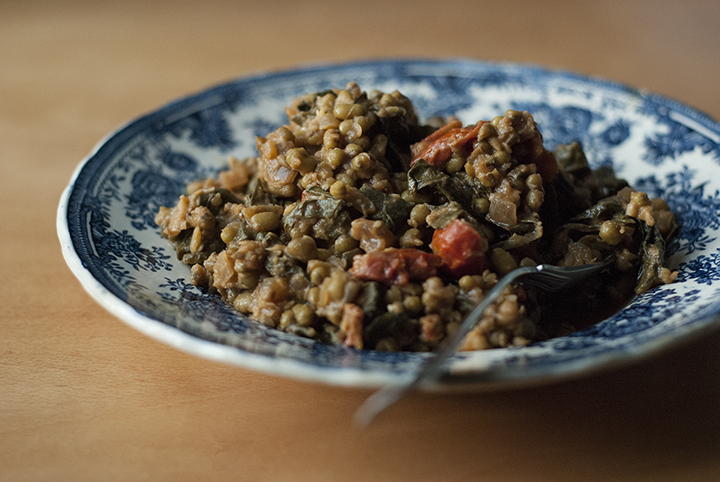
Mung Bean and Kale Stew with Miso
Miso is the kind of ingredient you either love or hate. There’s no middle ground. I strongly believe that those who don’t like it should give it a second chance, as it can be used in a lot of savory dishes and sauces (don’t restrict its use only to soups, please). It sure has a great deal of health properties too – as with all fermented foods, it’s loaded with enzymes and beneficial bacteria – and I’d like to think that a stew like this is one is a wonderful way of eating (and enjoying) this beautiful live ingredient.
I had high hopes of trying to make my own, following the recipes provided by this book, but after getting acquainted with the whole process, I easily gave up. It’s a slow process – miso should ferment from six months to a year –, which has made gain a whole new respect for the art of fermenting foods. There are a lot of types of miso. I’m not going to go deep into that – I also don’t have the knowledge to – but, basically, what you want for this dish is a mild variety, savory but with tiny hints of sweetness. The longer the miso is fermented the stronger and saltier it will taste, so you want to choose a type that’s light brown in color. I used mugi miso in here, a variety made of barley and soya beans – it’s the one I find the most versatile and not overpowering in flavor.
This stew came to live a few weeks ago as an attempt to clean the fridge – I get constantly surprised by how dishes like that seem to be the ones I’m more satisfied with – and it’s easy to put together as there isn’t a lot of prep work to do. I really loved how it came out and have made it twice since then. The recipe makes a lot, and I dare say the stew tastes even better the next day, when the ingredients have meld together and the sauce has thickened for an even yummier flavour.

Mung Bean and Kale Stew with Miso
(serves 4-6 as a main)
1 tablespoon olive oil
1 medium sized onion, finely chopped
4 garlic cloves, finely chopped
1 big piece of ginger / 50 g, peeled and finely grated
260 g kale, coarsely chopped
270 g cherry tomatoes, cut the larger ones in half but leave the smaller whole
1 cup / 200 g mung beans
3 bay leaves
4 cups / 1 litre stock or water
4 tablespoons mugi miso
In a large sauce pan, heat the olive oil, onion and garlic over medium heat. Sautée for 5 minutes or until the onion has softened.
Add the cherry tomatoes to the pan and crush them lightly with the help of a wooden spoon, so that they release their juices. Add the bay leaves, kale and mung beans, followed by the stock. Raise the heat to high and bring the mixture to a boil. Once boiling, decrease the heat to low, cover the pan, and let the stew cook for 30 to 35 minutes, or until the beans are thoroughly cooked and the kale is tender.
After that time, take out the lid and let the stew cool down for 5 minutes – you’re going to add the miso to the pan and you don’t want to ruin its health properties by heating it up excessively.
In a medium sized bowl, add the 4 tablespoons of miso. Then, gently pour ½ cup of the stew’s liquid over the miso and whisk everything together until you get a sauce-like mixture with a smooth consistency. Add the miso mixture back to the pan and mix well to incorporate. Serve with cooked quinoa, crunchy bread, or simply topped up with plenty of roasted almonds.
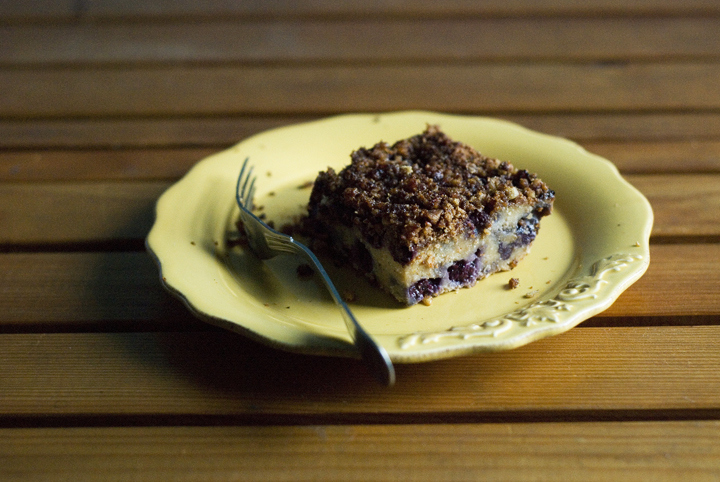
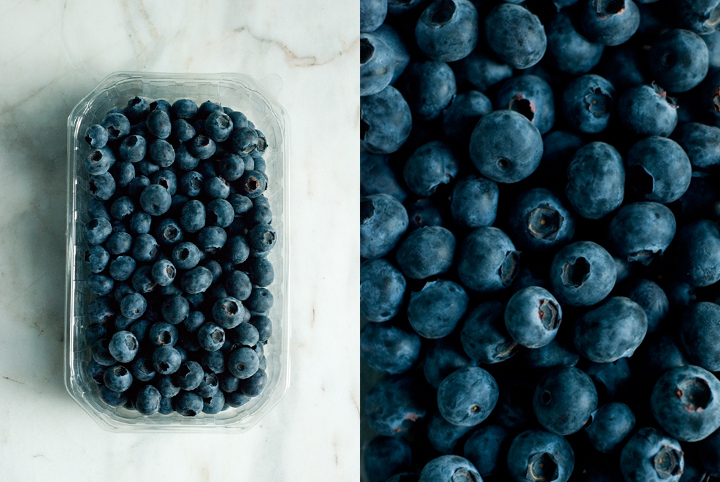
Blueberry Coconut Cake
When God gives you blueberries…. you either a) eat them in one sitting on a particularly lazy Sunday night (as if they were popcorn), or b) drag yourself into the kitchen and, despite the hot temperature (the thermometer has been reaching – and even passing – 30º degrees these days) decide to bake a blueberry cake. After giving the issue some thought and, frankly, not without a few doubts, I went with the last option.
I haven’t baked anything with any sort of berries before, mostly because I can’t help myself from eating them in their natural state, as they taste so incredibly good when in season (as now). However, I most say, if you’re going to make this cake you’re into something. Because, that night, I didn’t bother to check up online recipes and ratios for this particular baked good, I approached it in the same way I work with savoury foods – tasting as I go, paying attention to the amount of liquid added in order to reach the right batter’s consistency…. that sort of intuitive thinking.
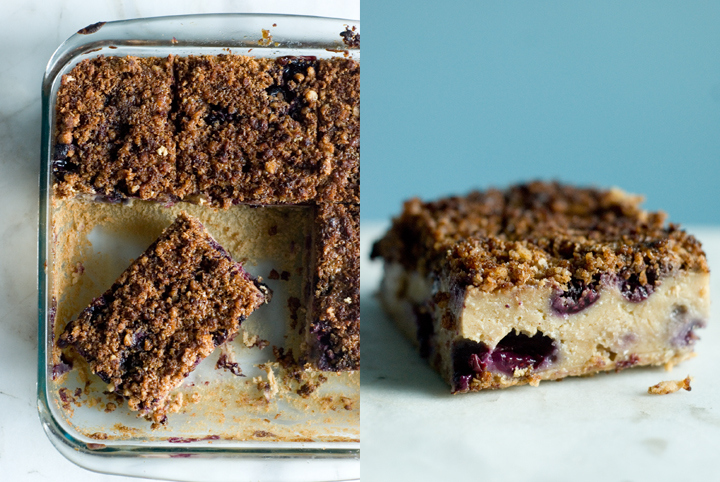
I know (as we all do) that berries love coconut, so that really was my starting point. The cake is full with blueberries (that you could easily substitute with raspberries or blackberries), not too sweet, and with that nutty-crunchy finish that gives it character and an extra boost of flavour. Now, you guys can definitely call me inconsistent – I deserve the title – because I’ve been saying way too many times that baking is not my cup of tea but, honestly, and what I’m about to say is quite a statement, this is probably the best and most accomplished sweet treat I have ever made and shared on this blog.
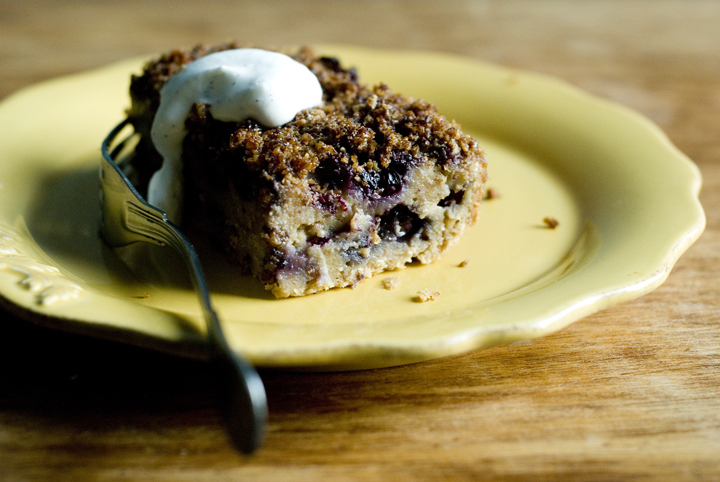
Just a little last note: you can definitely serve the cake with some coconut whipped cream on the side. I don’t have a particular recipe for it but this is how I generally do it: freeze, upside-down, a can of coconut milk for a few hours; open the can, pour the creamy part into a bowl (discard the liquid), add a sweetener (I usually go with agave) and maybe the seeds of half a vanilla bean, mix everything together, et voilà!
Enjoy the summer, do not forget the sun protection cream, and eat your berries (they’re full of antioxidants and other good things that google will be more than happy to tell you). ;)
Blueberry Coconut Cake
(makes 1 cake in a square 20 cm pan)
for the dry mixture:
1 ½ cups / 180g brown rice flour
½ cup / 40 g desiccated coconut
¾ cup / 80 g quinoa flour
1 tablespoon baking powder
¾ teaspoon salt
zest of one lemon
for the wet mixture:
¼ cup / 60 ml melted coconut oil
1/3 cup /55 g coconut sugar
¼ cup / 60 ml agave nectar
2 tablespoons flaxseed meal mixed, in a bowl, with ¼ cup / 60 ml water
1 ½ cups / 375 ml light coconut milk
for the topping:
½ cup / 52 g coarsely ground walnuts
½ cup / 40 g desiccated coconut
2 tablespoons coconut oil
4 tablespoons coconut sugar, divided
½ teaspoon cinnamon
¼ teaspoon salt
–––
2 cups / 290 g blueberries
extra coconut oil, for greasing the cake pan
Pre-heat the oven to 180ºc /350 F. Grease a square 20×20 cm pan with melted coconut oil. Set aside.
In a medium sized bowl, mix the topping’s ingredients, adding only two tablespoons of coconut sugar instead of the four written above (you’ll use the remaining two tablespoons later).
Sift the dry ingredients into a large bowl. In a separate bowl, whisk together the wet ingredients. Pour the wet mixture over the dry one and mix slowly until everything’s well incorporated and you end up with a slightly thick batter.
Pour half of the cake batter into the bottom of the pan. Add one cup of blueberries on top, making sure to distribute them evenly. Add the remaining half of cake batter, followed by the last layer of blueberries. To finish things off, cover the cake with the coconut-walnut topping.
Bake the cake, in the pre-heated oven, for 45 minutes. After that time, take the cake out of the oven and scatter the remaining two tablespoons of coconut sugar on top of it – make sure you cover all the cake’s surface with the sugar, so that you end up with a crisp and caramelised layer. Return the cake to the oven for an additional 5 minutes. Once done, let it cool to room temperature, cut into squares and serve. Even though I like to eat it plain, it goes particularly well with coconut whipped cream.
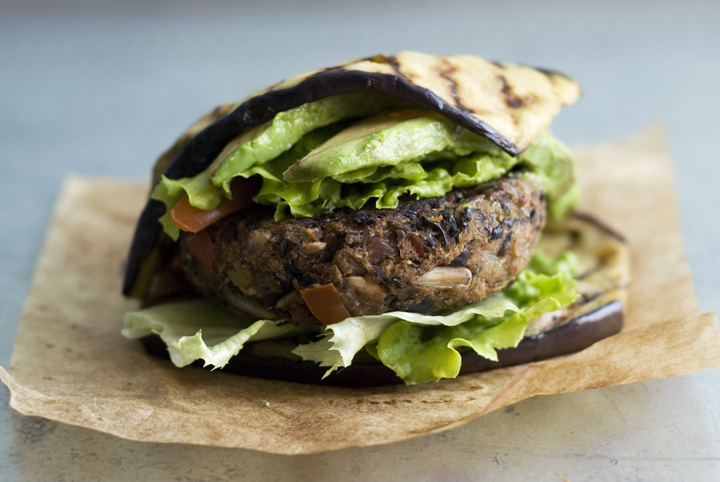
Black Bean and Red Pepper Burgers
If you check this blog regularly, chances are you’ve probably noticed that I have a soft spot for veggie burgers. Out of the 62 recipes posted to date in here, 6 of them consist of some sort of patties – and being honest, I think there will be a lot more to come. What I mostly like about veggie burgers is that you can play around with ingredient and flavour combinations – mixing spices, nuts, whole grains, legumes and vegetables – and end up with a protein-packed component of a dish. When paired with a salad of sorts, they make quite a satisfying meal.
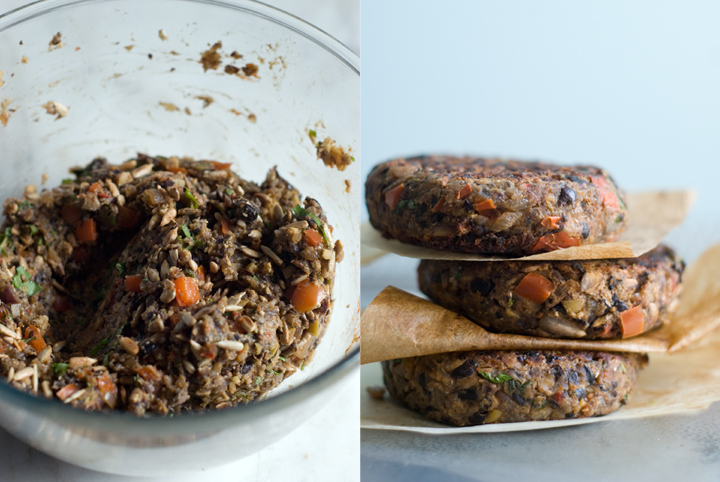
This burger in particular came out of the need to clean up the fridge: there was this neglected pepper in the bottom shelf that would go bad in a matter of days, halves of onions wrapped up in parchment paper for a supposed later use, a nearly empty large jar of olives… I could go on. I strongly encourage you to give these a try as they have a contrast of flavour and texture – soft and salty olives / crunchy and nutty seeds – that really seals the deal for me.
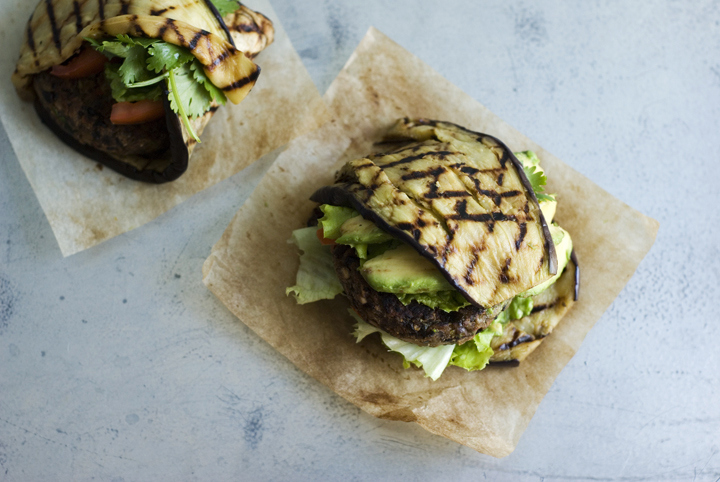
When it comes to serve them, this time around I thought of something different from “the classic” – in between two pieces of bread – and came up with the idea of wrapping the patties in thin slices of grilled eggplant. The eggplant adds extra moisture and a distinct smoky flavour that I’m particularly fond of. In case you want to up the patties’ (already high) protein content, an open-faced “sandwich” made with grilled Portobello mushrooms – just like this one – would be an excellent choice.
Black Bean and Red Pepper Burgers
(makes 6 patties)
2 large onions / 300g / 2 cups, finely chopped
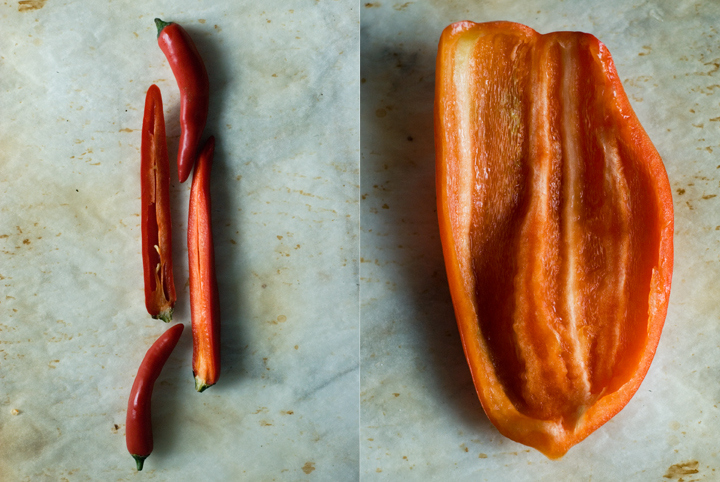
1 medium sized red bell pepper / 220g / 1 cup, finely chopped
1/2 teaspoon salt
2 large garlic cloves, finely chopped
1 teaspoon coriander seeds, lightly crushed in a mortar and pestle
1 ½ teaspoons cumin seeds, lightly crushed in a mortar and pestle
2 tablespoons olive oil
¼ teaspoon smoked paprika (1/2 teaspoon if using regular paprika)
240 g / 1 ½ cups cooked black beans, rinsed and drained
60 g / ½ cup buckwheat flakes (you can substitute with rolled oats)
55 g / 1/3 cup green olives, coarsely chopped
40 g / 1/3 cup sunflower seeds
1 big handful chopped coriander
Heat a large skillet over medium-high heat. Add the sunflower seeds and toast them for 3 to 4 minutes, or until they’re golden brown and smell fragrant.
In the same skillet you used for toasting the seeds, add the finely chopped garlic cloves, coriander and cumin seeds, smoked paprika and olive oil. Cook the spices and garlic over a medium-high flame for 1 minute.
Add the onions, pepper and salt to the skillet, give it a good stir, and turn the heat down to medium-low. Cover the skillet with a lid and let the mixture cook for about 15 minutes, or until the onion and pepper bits are soft and slightly caramelised. You should check the skillet every 5 minutes to avoid burning the mixture – if the latter seems dry, add up to 2 tablespoons of water each time you check it out.
Once the onion mixture has been cooked and cooled down, add half of it to the bowl of a food processor. Add the beans as well. Pulse a few times, or until you get a sticky but consistent paste.
Transfer the bean and onion mixture to a bowl. Add the buckwheat flakes and incorporate well using a wooden spoon. Add the chopped green olives, toasted sunflower seeds and coriander as well. Mix again. You’ll end up with a slightly moister mixture, but it should still be possible to make patties out of it. To make the job easier, wet your hands with cold water and shape the mixture into 6 burgers (or more, depending on the size you choose).
Heat 1 tablespoon of oil, over a medium flame, in a large skillet. Add the patties and cook them for 3-4 minutes on each side. Serve with your favourite condiments and fixings or as suggested above.
Simple and (almost) Fat Free Apple Cake

I always love to watch people cooking, specially to see how their process is – not only in terms of what ingredients they choose to cook with, but also in terms of how they organize things and manage the time they spend preparing a meal. I’m not sure if I’ve told you this before, but I’m not (really) an organized cook. Firstly, I spend way too much time preparing things, and secondly, I tend to be messy. I know some people who are always cleaning up and arranging the ingredients they’re working with on the kitchen counter, and even though I try to be like them, it seems I can’t achieve such level of method. Pans, plates and bowls are left on the kitchen sink, waiting for the meal to be done to get washed; ingredients remain on the counter even though I might have already used them; t-shirts and sweaters get stained with tomato sauce, cake batter, and so on, because most of the time I forget to put the apron on. I don’t mean to scare you – in fact, if you’d come over for dinner, I’d do my best to hide the evidences of my messiness.
Things tend to get worse when I bake – flour all over the place, packages of sugar and margarine clearly out of their natural environment, dirty bowls and cups pilled up on the sink. You get the scenario. As I was thinking about this the other day, I thought it’d be great if I could come up with a cake recipe that would require minimal effort and the use of only a few kitchen utensils.

The recipe for the Apple Cake I’m sharing with you today, even though requiring the use of a food processor, can be pretty much considered a clean-up-friendly type of cake. It’s also gluten-free and (almost) fat free, meaning that a second or third slice won’t hurt. The fact that it’s a fat free cake doesn’t compromise its flavor, which is delicate, yet full of warmth, for which the addition of a generous amount of ground cinnamon definitely contributes.
And finally last, but definitely not the least: I’m really (really!) excited to be a contributor for Honest Cooking, a brand new online food magazine that has launched just yesterday. My very first article can be found here, but please do check out the website, it’s really well worth it!
Simple and (almost) Fat Free Apple Cake
(for one 20 cm - 8 inches - round pan)
1/2 cup (73 grams) buckwheat flour
½ cup (80 grams) brown rice flour
1/3 cup (35 grams) oat flour
1 teaspoon baking powder
½ teaspoon baking soda
a pinch of salt
1 teaspoon ground cinnamon
wet mixture:
6 tablespoons agave nectar
½ cup (65 grams) light muscavado sugar
½ cup (125 ml) apple juice
½ cup (125 ml) soy milk
100 grams (one medium sized) banana, peeled
topping:
250 grams (2 medium sized units) sweet apples (such as Starking or Red Delicious)
1 tablespoon light muscavado sugar
1 tablespoon cold vegan margarine, cut into very small pieces
a good pinch of ground cinnamon
1. Pre-heat the oven to 180º.
2. Grease a 20 cm (8 inches) round baking pan with melted vegan margarine and dust it lightly with flour.
3. In a large bowl, combine all the ingredients for the dry mixture. Set aside.
4. In a bowl of a food processor, combine the agave nectar with the muscavado sugar. Process, at medium speed, until creamy. Add the apple juice, soy milk and the banana and process for additional 2 minutes, or until totatlly smooth.
5. Slowly pour the wet mixture into the bowl with the dry ingredients, mixing everything with a spatula. Even though you shouldn’t overmix the batter, make sure it doesn’t have any lumps.
6. Transfer the cake batter to the prepared pan.
7. In the meantime, peel and core the apples and cut them into thin slices. Then, arrange the apple slices evenly on top of the cake. Sprinkle it with the remaining tablespoon of muscavado sugar and a pinch of ground cinnamon. To finish things off, evenly distribute the margarine pieces on top of the cake.
8. Bake the cake in the preheat oven for 30 to 35 minutes, or until the top is golden brown. Let it cool for 10 to 15 minutes in the pan, after which you should transfer it to a wire rack or large plate to cool down completely. To do this, carefully flip the cake onto a large plate (it will be upside down), and then use another plate to flip it again. Serve warm or at room temperature.
Ottolenghi’s Saffron Cauliflower
I’m not sure why, having already tried some recipes from Plenty, I haven’t wrote about the book in here before. Plenty is strictly vegetarian (no meat, no fish) but, on the other hand, isn’t particularly vegan-friendly (a large number of the recipes call for dairy and eggs). Anyway, that isn’t really a disavantadge, as I usually find a lot of inspiration in dishes that aren’t vegan already, as part of the fun is to actually try to veganize them – that both mental and practical exercise on how to substitute non-vegan ingredients for plant-based ones, is one of the things I enjoy the most about the process of recreating recipes.
Back to the book: it is filled with amazing dishes from cover to cover (the photography is also great, and there’s an image for every single recipe on the book too) – next on the list, is the Soba noodles with aubergine and mango, already mentioned here – but this one in particular - saffron cauliflower - not only is really tasty, but also couldn’t be simpler (and require fewer ingredients) to make.

I’ve already shared with you my love for cauliflower – one of the vegetables I like the most to work with – and with this recipe on hand, I assure you, there’s no reason why not to eat it more often. I also haven’t modified the recipe that much, so my version only includes some minor tweaks: I ommited the bay leaves the original recipe called for (actually because I forgot them on the counter and only realized that a few minutes before the cauliflower was done roasting), subbed saffron strands for the powdered version (as it was what I had on hand), and added ¾ teaspoon of sea salt. Although the book features a very slightly different version of this dish, you can find its first version online, published on The Guardian’s column the new vegetarian.For a tasty, unusual, side dish, this is it.
recipe’s here
Seasonal Minestrone

Surprisingly enough, yesterday - with an outside temperature of 35 degrees -, I found myself sneezing and coughing all the time. I knew I was about to get sick, and started craving a comforting soup and toasted bread, no matter how hot was outside and how sweaty I’d get right after eating those foods. I had some seasonal veggies sitting on the fridge that would make for a good pot of soup, and it didn’t take me long to get my hands at preparing them (peeling, slicing and all), although I must confess I was about to give up a few times during the process and go for a nap. I’m usually very determined when it comes to satisfy my cravings, and the idea that, in the end, I’d get a huge pot of soup that would make my lunches and dinners for the rest of the week, worked out as the main motivation factor.


I ended up following (although not stricktly) Jamie Oliver’s recipe for a Spring and Summer Minestrone, that I’ve bookmarked from his book Jamie Does. I adapted the recipe to fit what I had on hand, and I guess that’s the spirit of minestrone anyway – use whatever vegetables are in season and that would go well together for a hearty, filling soup. The original recipe for the pesto calls for Parmesan, but as I don’t do cheese, I’ve just ommited this ingredient and had not problems at all. Just bare in mind Parmeasan is quite salty, so use a good pinch of salt in the pesto to work as a substitute and to balance things out.

Seasonal Minestrone
(serves 6)
200 grams carrots
300 grams zucchini
3 garlic cloves
1 large leek
1 large tomato
a bunch of parsley
2 handfuls watercress
1 cup frozen peas
150 grams short pasta
1 small cabbage
2 liters good tasting stock
salt and pepper
olive oil
for the pesto:
a bunch of basil
60 grams pinenuts
3 tablespoons olive oil
2 small garlic cloves, peeled and thinly sliced
a pinch of salt
1. Start by preparing the carrots and zucchini: slice each vegetable into quarters, and then slice each quarter into cubes of aproximadetely 0,8 to 1 centimeter thick.
2. Then, thinly slice the leek and garlic cloves.
3. Heat your largest pan on medium heat, add a few glugs of olive oil, the leek, garlic, carrots and zucchini. Stir and cook for about 5 minutes.
4. Roughly chop the tomato, parsley, and watercress. Slice the cabbage into halves, remove the hard core, and finely shred each half. Add the veggies to the pan.
4. Now, add the peas, pour in the stock, and bring to a boil. Once boiling, add the pasta and salt and pepper to taste. Lower the heat to low-medium, and let the soup simmer for about 10 minutes, or until the pasta is cooked. Taste and adjust the seasonings if needed.
5. To make the pesto, add the basil, pinenuts, garlic cloves, a pinch of salt and the olive oil to a food processor, and pulse everything for 1 minute, or until the mixture starts coming together into a paste, but isn’t totally smooth. Have a taste and adjust the flavors (adding a bit more of one or another) if needed, bearing in mind you want to find a balance between all the ingredients.
6. Divide the soup among deep plates and top each serving with a good tablespoon of pesto. Drizzle over a little olive oil and add some fresh basil leaves.
recipe inspired by Jamie Does, published by Penguin Books

1 comment