Carrot and Tahini Muffins
Some of my culinary experiments don’t turn out as well as I thought they would, either by lacking flavour and/or photographic charisma. Lately, there were at least three dishes I conceptualized, took notes of and photographed, but ended up not posting up here because, well, they weren’t good enough. A weird tasting celeriac and roasted garlic soup, a watery korma, some herb crusted tempeh that turned out too dry after being baked… I’m well familiar with failure and I’m not defeated by it, as I try to evaluate what went wrong, what could have I done better, and so on – the worst part is, I guess, to actually eat those not so well succeeded attempts.
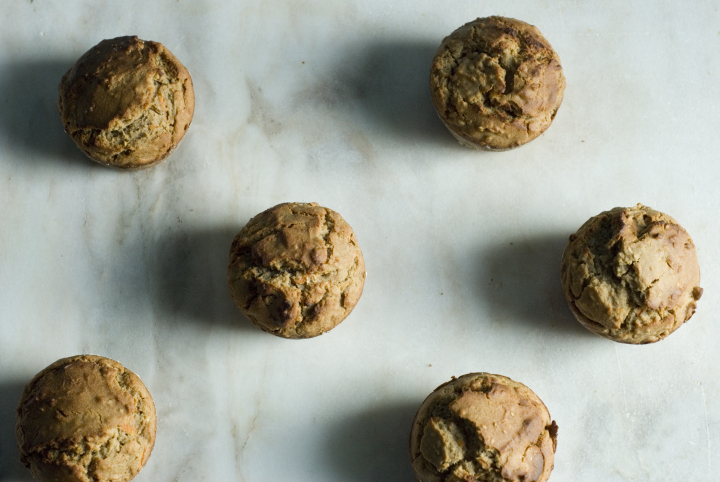
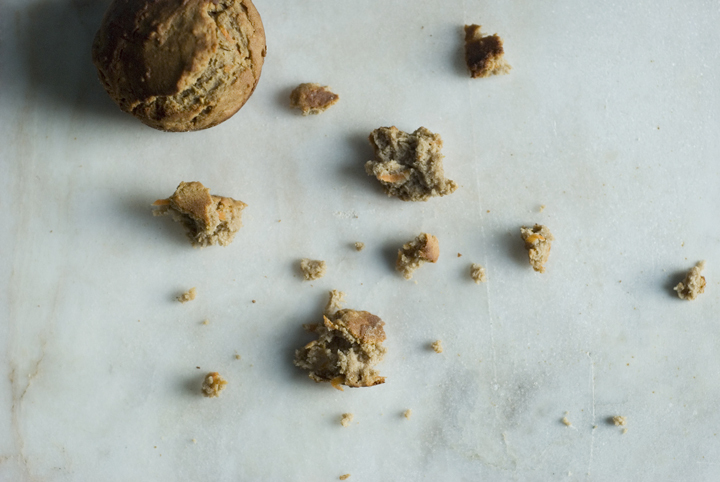
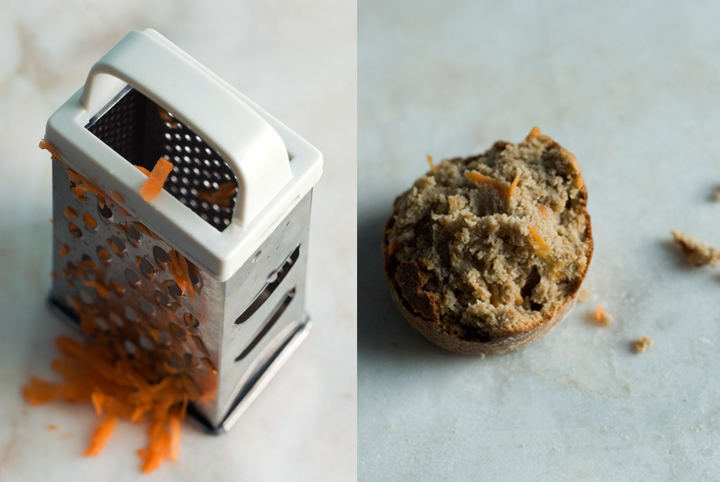
So, when things go wrong, I turn to what I know it’s good – and I’m here talking about these carrot and tahini muffins. I have a (healthy) obsession with tahini. I just love it. I always keep a jar of it in the fridge and another one in the pantry. I have the nasty habit of opening up the tahini jar, take a teaspoon of it, top it up with a few drops of agave nectar, and in it goes. These muffins are dense and nutty in flavour, punctuated by shreds of carrot and toasted sesame seeds. They’re the perfect accompaniment for a cup of tea in the mid-afternoon when, sometimes, that sugar cravings just start to pike up.
Carrot and Tahini Muffins
(for 8 muffins)
Dry mix:
1 cup / 140 g buckwheat flour
1 cup / 120 g brown rice flour
½ teaspoon baking powder
¼ teaspoon baking soda
¼ teaspoon salt
½ teaspoon cinnamon
4 tablespoons toasted sesame seeds
wet mix:
1 tablespoon flax seed meal mixed with 5 tablespoons water
1 cup / 250 ml unsweetened nut milk (I used almond milk)
½ cup / 135 g dark tahini
¾ cup / 185 ml agave nectar
1 cup / 108 g shredded carrots (about 1 large carrot)
melted coconut oil or sunflower oil to grease the muffin tins
1. Pre-heat the oven to 175º/350ºF. Grease with sunflower oil or melted coconut oil 8 muffin tins.
2. In a large bowl, sift the flours, baking powder, baking soda, salt and cinnamon. Add the sesame seeds and stir well to combine.
3. In another bowl, whisk together the flax seed mixture, nut milk, tahini and agave nectar, until well incorporated.
4. Add the wet mixture to the dry ingredients stirring well to combine. Finally, add the grated carrots.
5. Pour the mixture into the greased muffin tins. Bake in the oven for 20 to 25 minutes (mine took exactly 23 minutes). Let the muffins cool a bit in the tins before unmolding and transferring them to a cooling rack. Eat!
Pear and Port Wine Filo Pastries

The idea for this dessert has been in my mind for almost a week. I’ve had some filo pastry on the freezer that would expire next month, so I desperatly needed to use it in some kind of sweet and/or savory treat. I’ve bookmarked a recipe from Jamie Oliver’s book Jamie Does, that basically consisted of feta cheese wrapped up in filo pastry. It looked absolutely stunning. “Are you going to replace the feta cheese for tofu?”, my mum asked. “Humn, no. I think I’m going to take this to a whole different level”, I replied back. In fact, substituting the feta cheese for tofu was my very first idea, and even though it sounded great, I didn’t want to make a dairy free version of Jamie’s recipe by using ingredients, such as tofu, that have a similar look to feta but - let’s be honest - don’t have that strong character the latter has. I’m glad I’ve worked on the recipe and made something different from the original source: pears, raisins, and a good amount of Port wine come into play, and thus a new recipe is born.
This recipe is, in fact, very easy to make, and even though filo is a very delicate pastry, with a bit of practice you manage to work with it very easily. As I was writing the recipe today, I suddendly blocked when it came to explain on how to work and fold the filo sheets. I’ve done my best to clear it out for you, but I honestly think that’s something that would be better explained with the add of a simple drawing. Anyway, I have made no drawing, nor I took pictures of that part of the process, so if any of you have doubts regarding that component of the recipe, I’ll draw a quick diagram and post it up here to help you to visualize things. Anyway, don’t worry too much on trying to get perfectly shaped rectangle parcels: as long as the filling is sealed, you’re good to go.

Pear and Port Wine Filo Pastries
(makes 4 pies)
4 medium sized pears (350 grams), peeled, cored and thinly sliced
1 tablespoon vegan margarine
2 tablespoons muscavado sugar
60 grams (1/3 cup) raisins
60 ml (1/4 cup) port wine
1 teaspoon ground cinnamon
8 sheets filo pastry
olive oil for brushing
a handful of roughly chopped and toasted almonds
agave nectar, for drizzling
1. Pre-heat the oven to 200ºC. Line a baking dish with parchment paper and coat it lightly with olive oil.
2. In a pan over medium-heat, melt the vegan margarine. Once melted, add the sugar, cinnamon, raisins and pears and cook, stirring often, for 5 minutes, or until the pears are cooked through. Increase the heat to medium-high and add the port wine. Bring the mixture to a boil and, once boil, reduce the heat to a simmer and cook for additional 10 minutes, or until the wine has reduced and the pears look almost caramelized. Set aside to cool.
3. Lay one sheet of filo pastry in you kitchen counter/table. (Keep the remaining sheets wraped up in a damp clean towel, to prevent them from drying out.) Brush it lightly with olive oil and add another sheet on top , so that you “glue” the two sheets together. Now, carefully cut the sheets in half across the width, so that you have 2 long pieces of filo pastry in front of you. Repeat this process with the remaning sheets of filo.
4. In the center of one of these sheets, place 2 to 3 tablespoons of the pear and port wine mixture. Now, flip one of the sides over the filling, so that its end almost reaches the end of the other side. After you’ve done it, flip the other side as well. Now, you should have 2 open sides parallel to your body. Carefully flip them so that they meet in the center of the parcel. Repeat this process with the remaining sheets of filo.
5. When you’re done, place the 4 parcels in a baking dish and bake for 5 to 8 minutes in the preheated oven, or until they’re golden brown.
6. To serve, drizzle a little agave nectar over each pastry and scatter some toasted almonds on top.
recipe inspired by Jamie Does, published by Penguin Group, 2010
Upside-down Pear Cake

When I first started this blog I promised myself I’d be posting a recipe at least once a week. Back then, I was so excited about this whole blogging thing that I found myselft posting two, three, recipes a week. But school work has been leaving me with very little time to cook these days, and that’s the main reason why I can’t keep with my former promise all the time. Anyway, today, after an almost 12 hour sleep (yes, that’s possible), I cured my tiredness from the very busy week I had, and sit in front of the computer after lunch - this time, not to work on the projects I have on hand, but to write you the recipe for a delicious upside-down pear cake.

As I’ve told you in the previous post, I’ve been working with gluten-free flours recently and the results couldn’t be better. So, this cake not only is gluten-free but delicious on its own. Chickpea flour is here used in place of eggs and the pairing of buckwheat with fall fruits such as pears, seems to work extremely well. As we’re approaching Christmas, and I’m experimenting with a couple ingredients typicall for this time of the year, it’s more likely that the following recipes will be desserts, cakes, and hearty savory dishes - we’ll then have plenty of time in January to get back on track. ; )
Upside down Pear Cake
(one 23 cm cake, 6 to 8 slices)
for the fruit layer:
3 medium-sized pears, ripe but firm, cored and sliced
3 tablespoons muscavado sugar
3 tablespoons vegan margarine
a pinch of cinnamoon
for the cake layer:
140 grams (1 cup) buckwheat flour
130 grams (1 cup) white rice flour
1 teaspoon powdered ginger
1 teaspoon ground cinnamon
¼ teaspoon salt
2 teaspoons baking powder
5 tablespoons melted vegan margarine
100 grams unsweetened soy youghurt
45 grams gram flour
60 ml (¼ cup) plus 3 tablespoons water
160 ml (2/3 cups) soy milk
120 grams muscavado sugar
80 ml (1/3 cup) agave nectar
1. Pre-heat the oven to 180ºC. Oil a 23 cm round baking pan.
2. Heat a large skilllet over medium heat. Add 3 tablespoons of vegan margarine, pears, sugar, and cinnamon, and cook, covered, for 5 to 10 minutes, or until the pears are tender and slightly caramelized. Let the cooked pears cool to room temperature. Transfer the pears and their syrup to the prepared pan, spreading evenly.
3. In a large bowl, combine the buckwheat and white rice flours, powdered ginger, ground cinnamon, salt and baking powder.
4. In another large bowl, whisk the melted vegan margarine and sugar. Add the yoghurt, soy milk, and agave nectar to the mixture, stirring to combine.
5. In a medium-sized bowl, add the gram flour and water, whisking everything until you get a smooth consistency. Slowly pour this mixture over the wet mixture and combine well.
6. Using a rubber spatula, fold the wet mixture into the dry mixture, being careful not to overmix.
7. Pour the batter into the prepared pan – over the pears - and bake for 40 to 45 minutes, or until a toothpick inserted in the center of the cake comes out clean.
8. Cool the cake in the pan for 20 minutes before inverting onto a large plate.
Hazelnut and Banana Bread

I’ve baked a lot this week: there was a birthday cake for my boyfriend, a spice cake to bring to a picnic, and this hazelnut and banana bread, that I made yesterday. I’ve told you before that I’m not that much of a baker. Actually, baking cakes always scared me a bit, since so far I had way too many unsuccessful experiences to count. But, anyway, it seems I’m mastering the art of vegan baking, as those three cakes that I baked this week turned out quite yummy. The hazelnut and banana bread is the one I decided to share with you, since it’s almost 100% created by myselft.
To be fair, I first started to follow a recipe from an old cookbook that my mom bought a long time ago, but things weren’t working out (the recipe didn’t call for enough wet ingredients, and the batter ended up not coming together at all), so I started things over with a whole new approach. I might have been on a lucky day, as the bread turned out quite good: it’s definitely moist, and as far as the flavor goes, it’s delicate and slightly sweet, which makes it perfect for breakfast. First things first: use very, very, ripe bananas, as it makes all the difference. Baking them will enhance even more their sweet flavor, so make sure not to skip that step. A final note: I used hazelnuts in here, but feel free to substitute them for walnuts or pecans, as they work out very well too.

Hazelnut and Banana Bread
(makes one loaf)
4 very ripe bananas, unpeeled
½ cup (125 ml) olive oil
½ cup (55 grams) muscavado sugar
1 and ½ tablespons ground flax seed, mixed with 8 tablespoons water
1 non dairy, unsweetened, yogurt (100 grams)
½ cup (125 ml) soy milk
1/3 cup (80 ml) agave nectar
1 teaspoon baking soda
1 teaspoon baking powder
2 teaspoons cinnamon
1/8 teaspoon salt
¾ cup rolling oats
1 cup (135 grams) unbleached all purpose flour
1 cup (135 grams) bleached all purpose flour
¾ cup (120 grams) hazelnuts, toasted and coarsly chopped
1. Preheat the oven to 180ºc. Line a (25 by 12 by 7 cm) metal loaf pan with non stick parchment paper. Set aside.
2. Put the bananas, unpeeled, in a large baking dish and bake them for 15 minutes or until their skins are totally black. Remove from the oven and let cool. When they’re cool enough to be handled, take the flesh out of the bananas and put it into a bowl. Set aside.
3. In a large bowl, sift together the flours, baking soda, baking powder, salt and cinnamon. Mix in the rolling oats.
4. Beat together the olive oil, agave nectar and muscavado sugar in the bowl of an electric mixer at medium-high speed, until well incorporated. Reduce the speed to low and add the yogurt, soy milk and flax seed mixture. Finally, mix in the bananas.
5. Remove the bowl from the mixer and fold in the flour mixture and hazelnuts.
6. Pour the batter into the loaf pan, spreading evenly, and bake in the middle of the oven for 50 to 60 minutes, until golden brown and a toothpick inserted in the center comes out clean. Mine was done after 50 minutes, but after 35 minutes of the baking time, I covered the top of the pan loosely with aluminium foil, to prevent the top crust of the bread from browning too much.
7. Cool the loaf in the pan for 10 minutes, then turn it out onto a rack to cool completely. I think this bread is at its best the day after it’s baked.
Vegan Panna Cotta with Stewed Blackberries

The other day, my mom went to the park to pick up some blackberries. She came home with a bag full of them, and asked me to use them as part of a dessert. I couldn’t help myselft but thinking of a delicious, simple, spoon dessert, made of coconut milk, agar agar, and stewed fruit. You may have heard about agar agar before: it’s a gelatinous substance derived from an algae, mostly used in asian cuisine. It’s all natural, 100% vegan, and doesn’t have the artificial ingredients gelatin generally does have (I’m not even mentioning the part that gelatin is derived from animals’ bones…).

I’ve been working with agar agar powder as a substitute for gelatin for quite some time now, but it took me a while to get the best out of it. The main problem I’ve found while using it in various spoon desserts, is that it tended to harden way more than I wanted it to. The consistency I’d get, although reminding that of gelatin, wasn’t as soft as the latter. But after some experiments, I think I came up with the right ratio: for each 300 mililiters of liquid, add 1 and ½ teaspoons of agar agar flakes. Less than that, you’ll get a runny consistency; and adding just a bit more for the said amount of liquid, will make your dessert a bit on the hard side.
Now, this recipe for Vegan Panna Cotta is a favorite around here; it’s dead easy to make and really tasty. Not only adding the right amount of agar agar powder but also using coconut milk, are really important things in here, so do not try to substitute any of those ingredients. The coconut milk with its rich and subtle flavor really complements well the sweetness of the stewed berries. As far the fruit goes, you don’t really need to use blackberries in here; others, such as blueberries or even strawberries, will work out. I even tried once to make this dessert using stewed figs – delicious. Just bare in mind you want a fruit that is delicate and soft, but still firm enough to hold part of its structure after being cooked.

Vegan Panna Cotta with Stewed Blackberries
(serves 3)
¼ cup regular sugar
¼ cup water
300 grams blackberries
1 vanilla bean, split lengthwise
400 ml coconut milk
5 tablespoons agave nectar
1 and ¾ teaspoons agar agar flakes
1. Heat a saucepan over low-medium heat, add the blackberries, vanilla bean, sugar, and water. Cook, covered, for 10 to 15 minutes, or until the liquid has thickened a bit but hasn’t all evaporated. Let it cool and discard the vanilla bean.
2. In another pan over low-medium heat, add the coconut milk, agar agar flakes and agave nectar. Bring the mixture to a simmer (do not let the coconut milk boil) and stir constantly, for 15 minutes. When it’s done, remove the pan from the heat and let cool for 10 minutes.
3. Divide the coconut mixture equally among 3 cups. Refrigerate the cups for at least 2 hours, or until the mixture has harden to the consistency of gelatin.
4. Now, add the blackberries as well as the liquid that has been realeased while stewing them, on top of each cup. Cover the cups with cling film and refrigerate for additional 1 or 2 hours before serving.

4 comments